06
2014There are several “Great Walks” in New Zealand that receive very positive reviews in guidebooks and online. The Abel Tasman Track is one of these walks that generally receives “not to be missed” praise. It is in fact the most popular Great Walk in New Zealand. Located in the Abel Tasman National Park on the South Island’s northwest coast, the walk extends roughly 56 km from the start at Marahau to the end of the track at Wainui. Anne and I did a shortened version of the trip over 4 days in December (6-9) from Marahau to Totaranui covering 41.4 km.
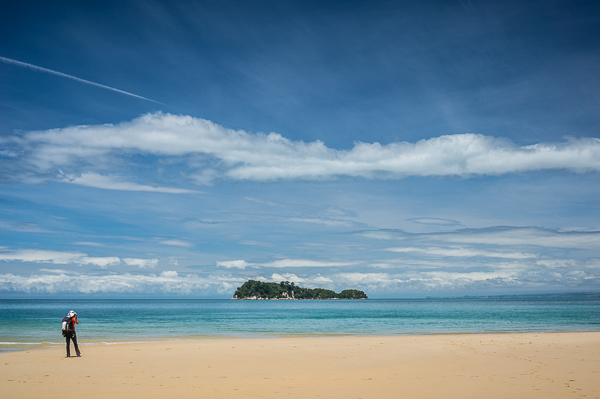
(photo by Anne Archambault)
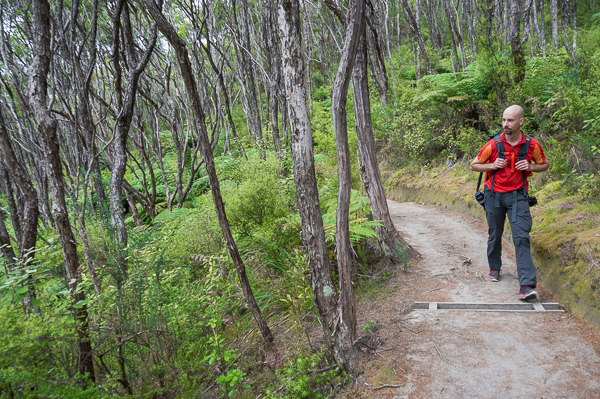
The track mostly follows the coast line, sometimes on beach but mostly on very well maintained trails in the forest overlooking the Tasman Sea. The myriad streams and small canyons along the way are bridged — some with impressive suspension bridges. In two places, there are relatively significant tidal crossings that can only be done within an hour or two of low tide.
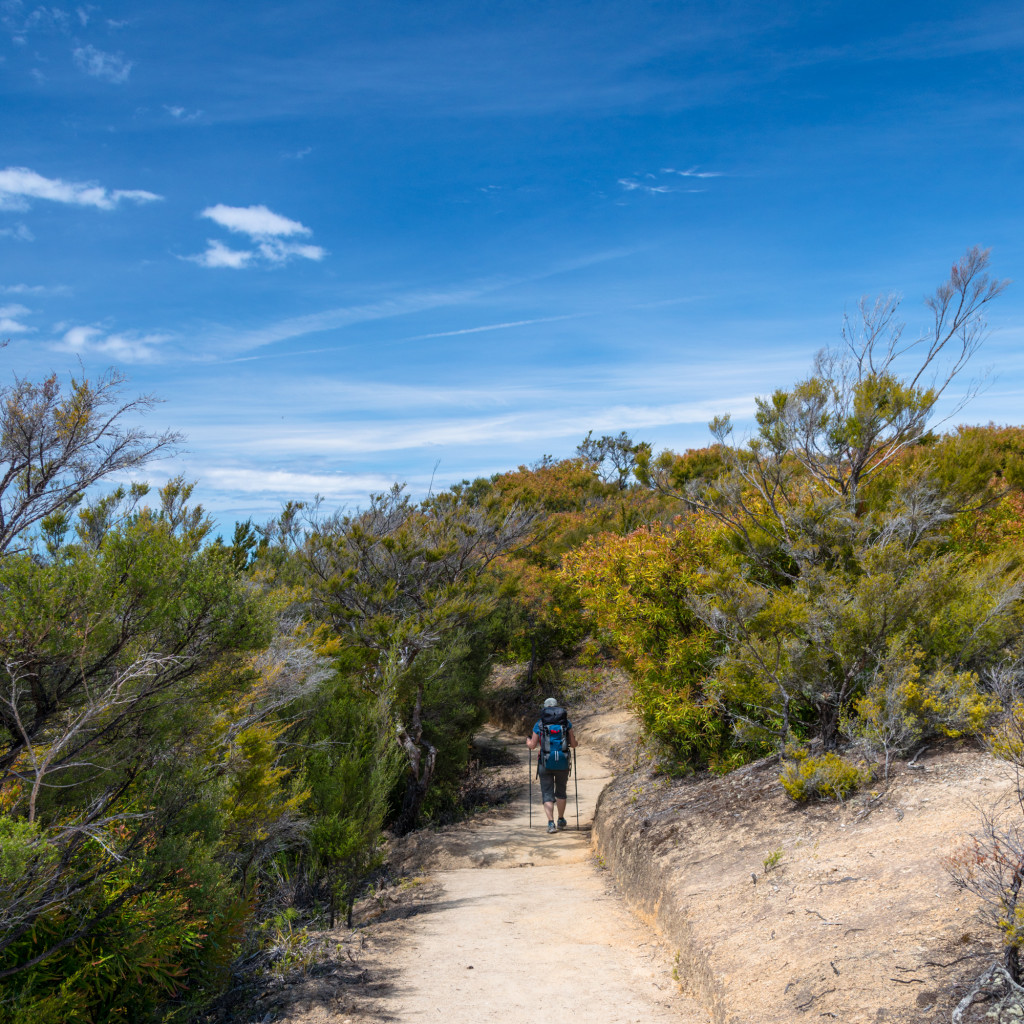
Overnight accommodation is provided in both Department of Conservation (DOC) huts as well as campgrounds. The huts must be booked well in advance and provide drinking water, toilets, and sleeping pads in bunk style dorm rooms. The length of the track (through Totaranui) is serviced by water taxi, which allows hikers to access any point along the trail easily. This is a blessing and a curse, it allows for myriad options to explore the trail, but also allows scores of day trippers to visit huts and campgrounds that would otherwise be 2 days from the trailhead.
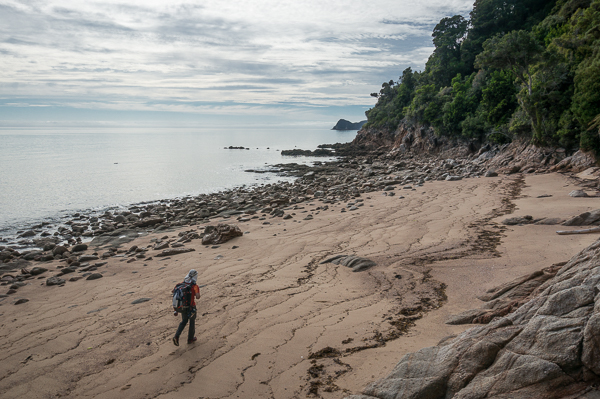
(photo by Anne Archambault)
Beaches and Beautiful Blue Water
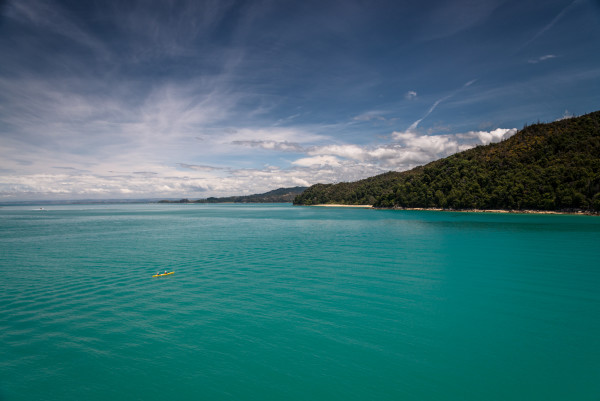
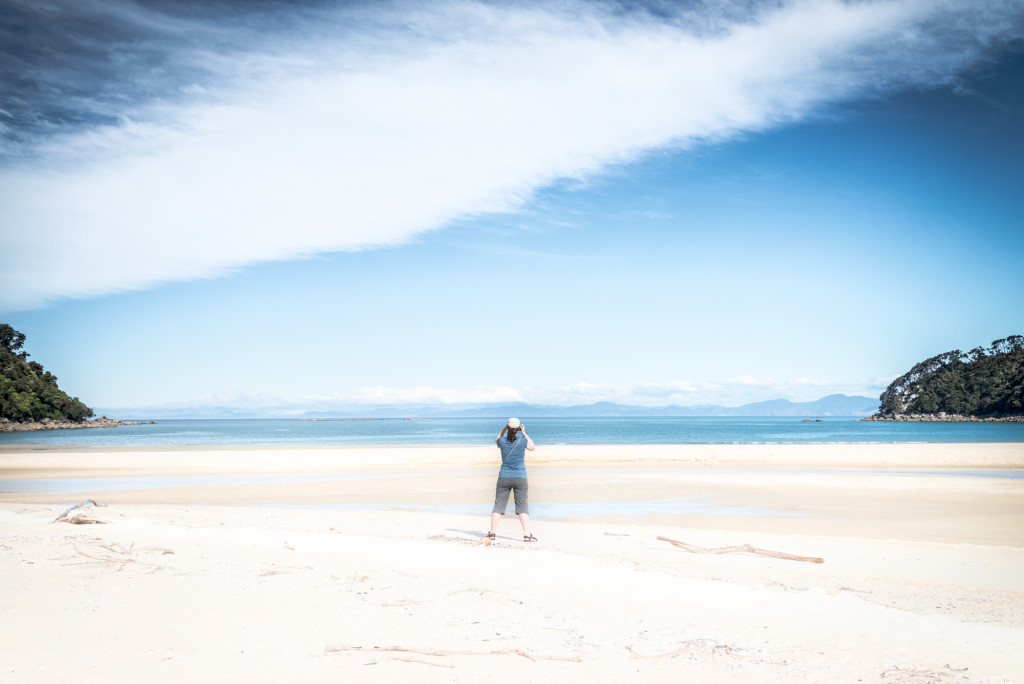
The highlight of the track is the proximity to the beautiful beaches and pristine blue water of the Tasman Sea. Without knowing better, it would be easy to mistake the coastline for beaches in Thailand or Hawaii.
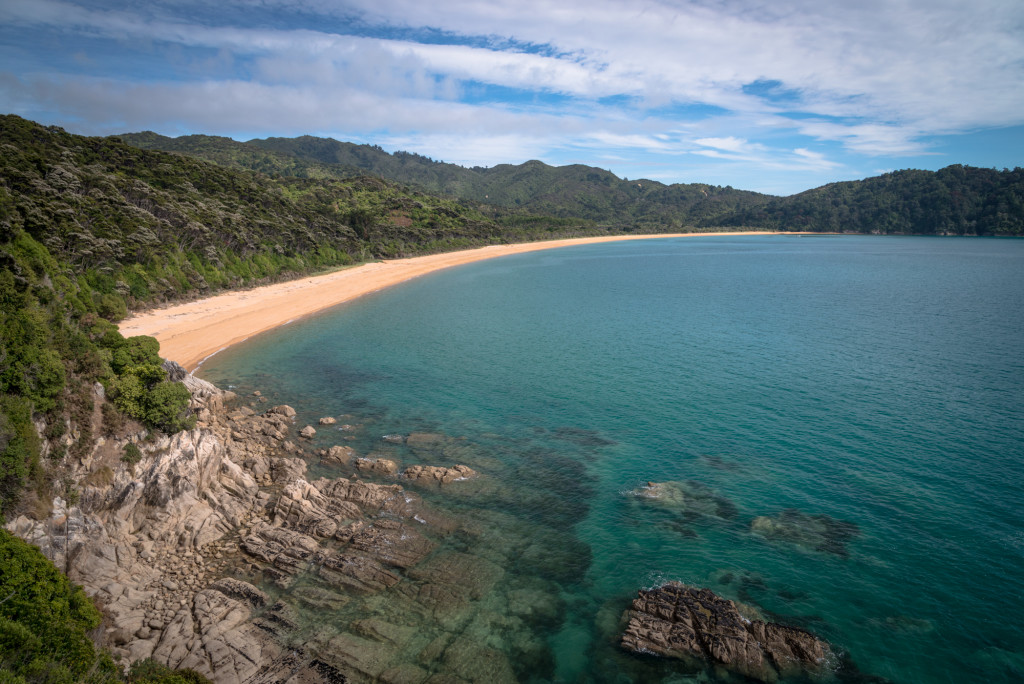
In some places, rocky granite outcroppings form small islands just offshore. These provided a wonderful opportunity for us to take a break from the walk and pull out the camera gear. We didn’t use the tripod often, but in these cases it was very handy for long exposure compositions.
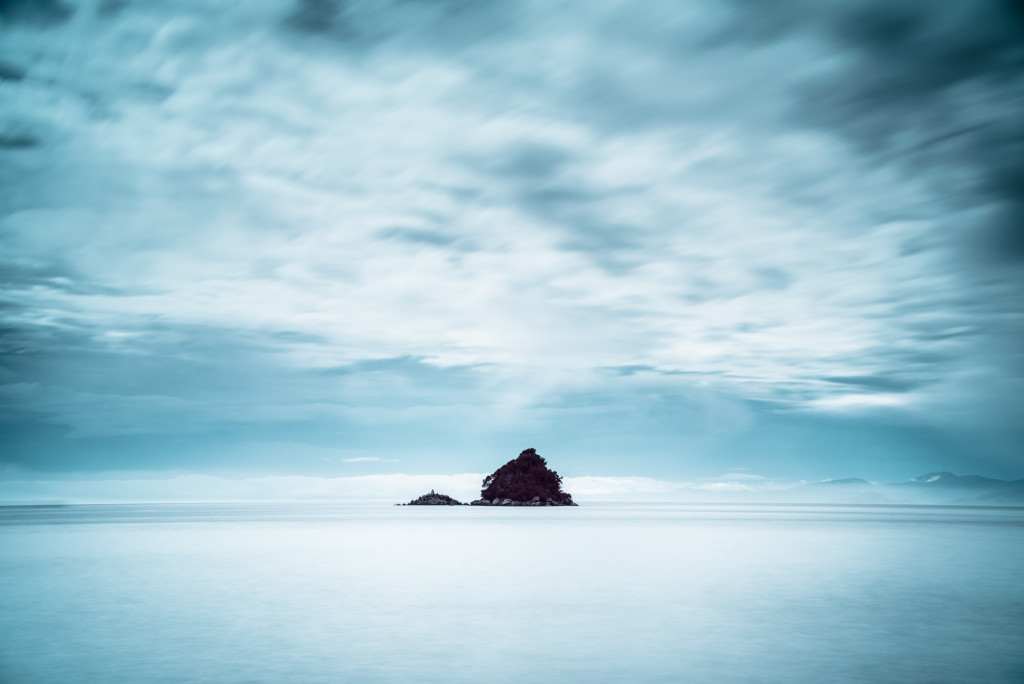
Because of the way the hike is laid out, Anne and I were generally able to complete our hike by early afternoon, giving us plenty of time to rest and relax at the hut. Alternatively, many hikers took the opportunity to stop along the way at secluded or otherwise wonderful beach locations and relax.
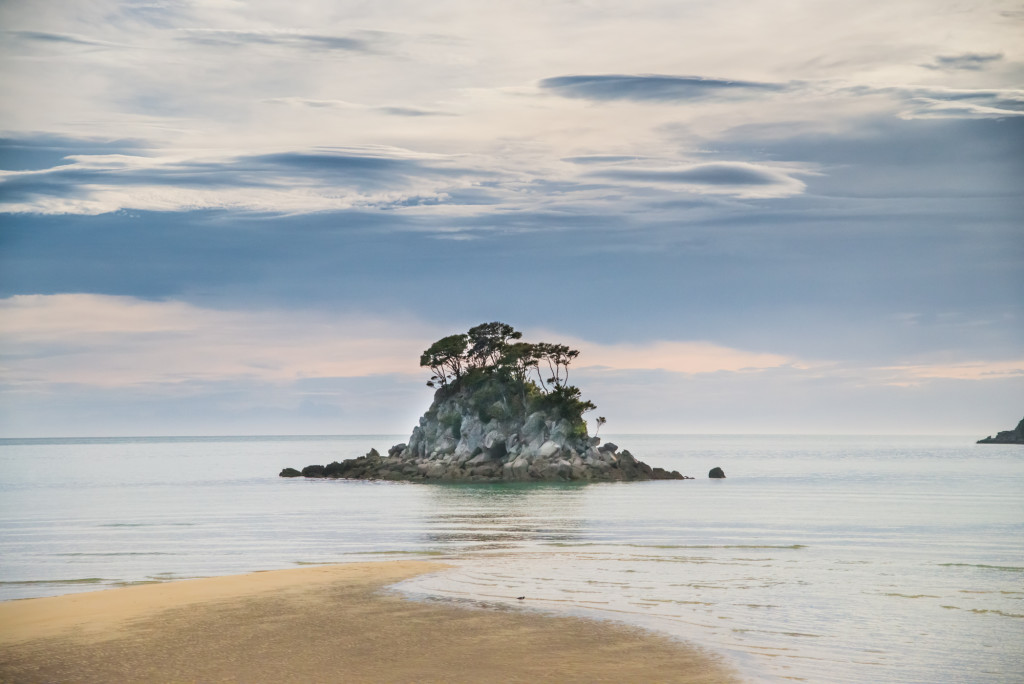
Of course the beaches also provided wonderful sunrise and sunset photography. At Anchorage Bay, we had to be up at 5am to make the tidal crossing and were able to watch an amazing sunrise bloom over the hills.
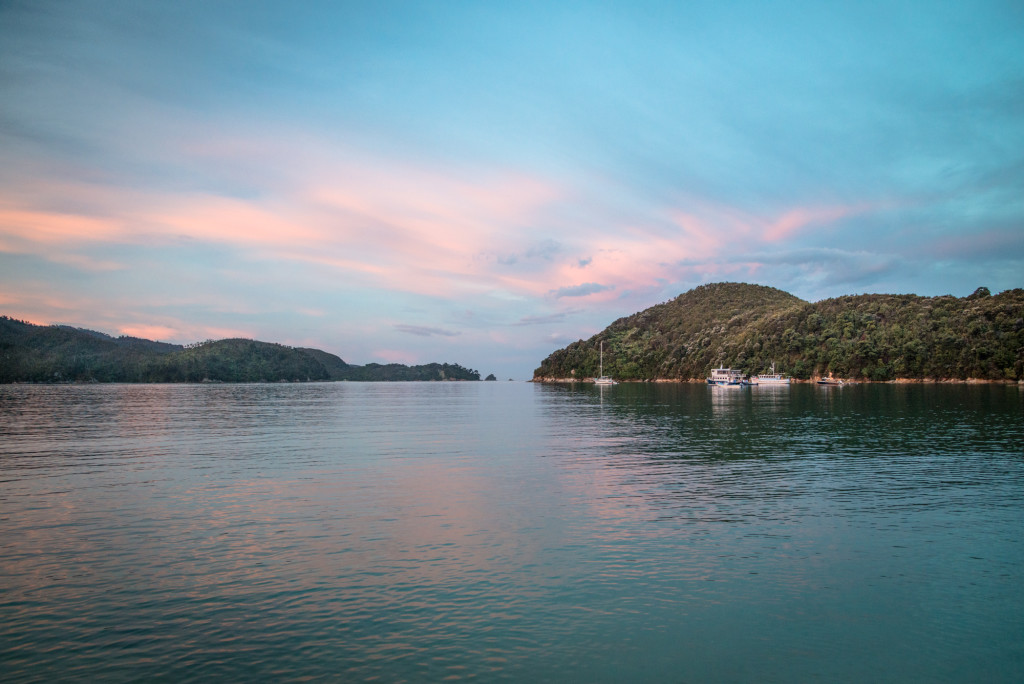
Wildlife
The national parks we visited on the South Island all had robust conservation efforts in place to help protect indigenous species. Invasive species such as possums, rats, and stoats have decimated the native bird populations. Along the track are literally hundreds of traps designed to kill these predators.
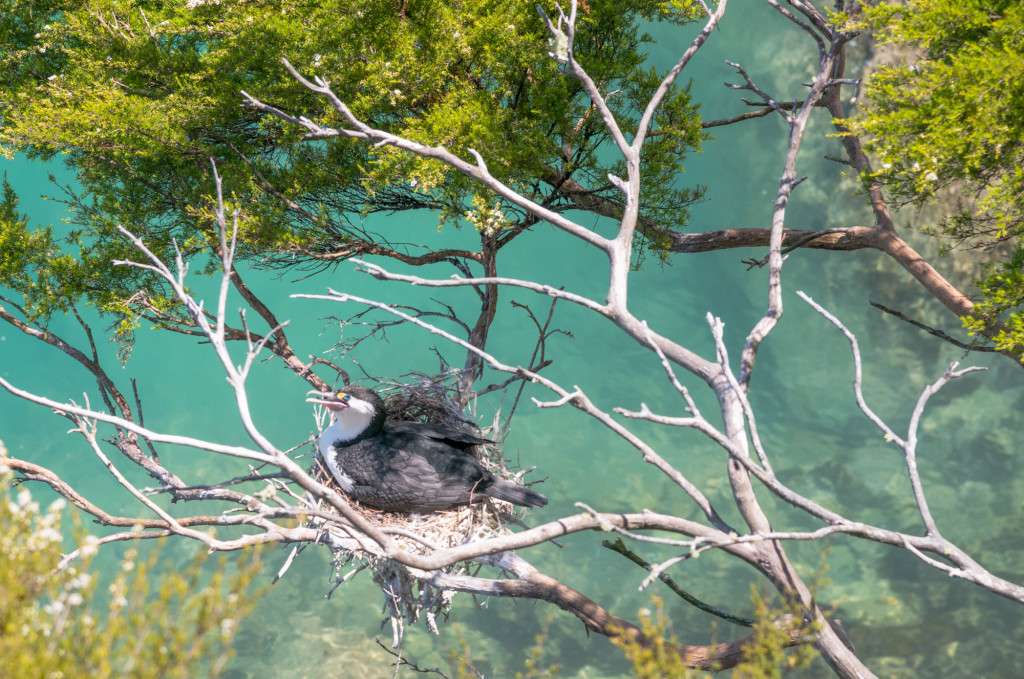
Many of the islands visible along the track are sanctuaries where native species can nest in relative safety. There is also the Tonga Island Marine Reserve to help protect dolphins, seals, and the many native species that inhabit the diverse system of waterways, estuaries, and bays. Fur seals come here to lay their pups and penguins sleep along the rocky headlands.
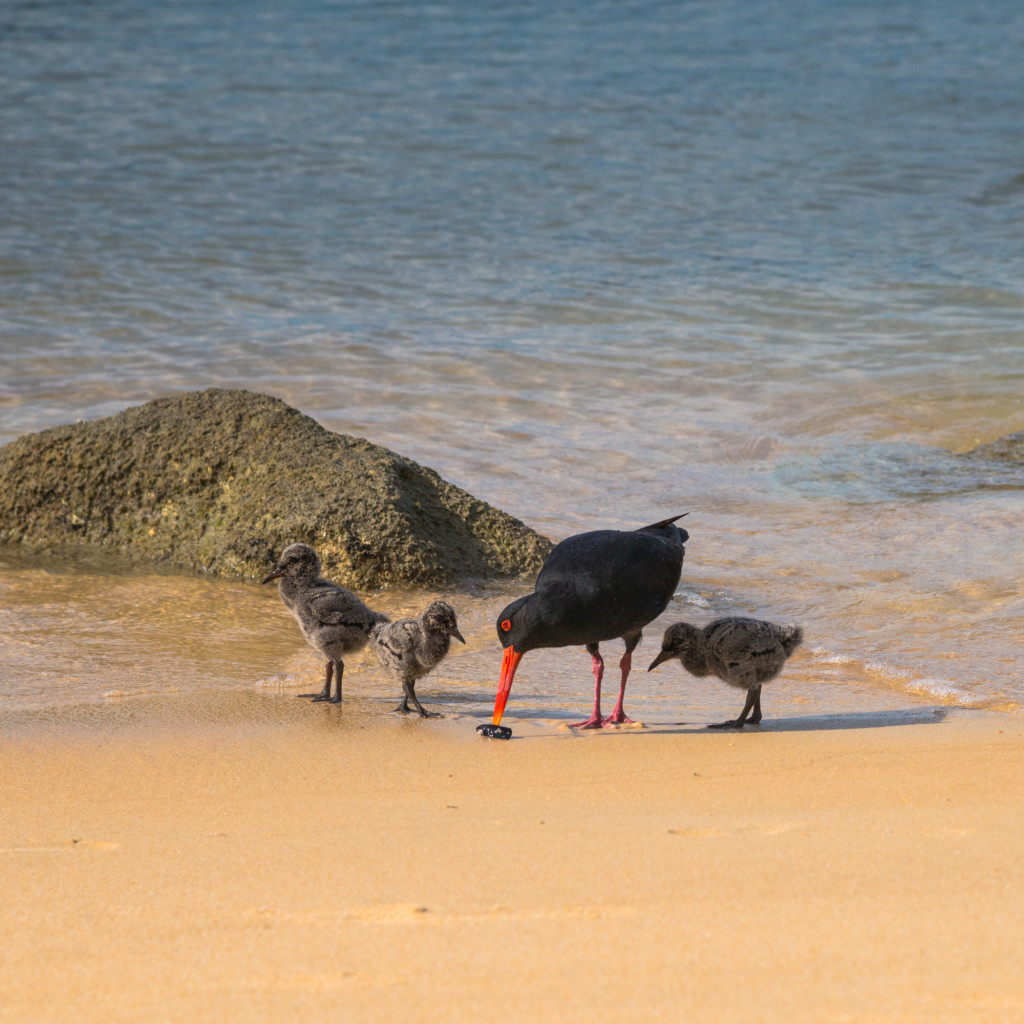
Because we were walking the track in the southern hemisphere’s summer, we were also able to see a lot of young chicks. At Anchorage Bay, a pair of variable oystercatchers had a set of three chicks that allowed us to approach during low tide.
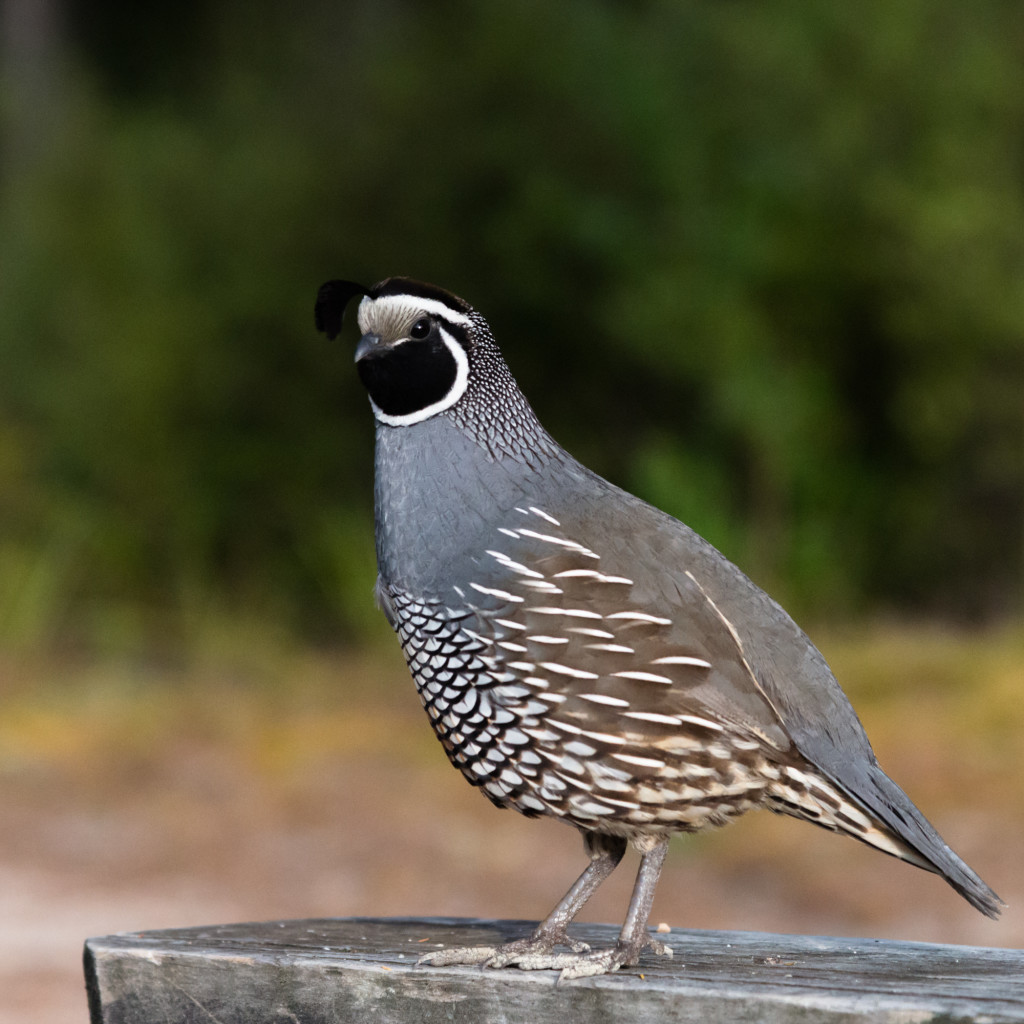
We also saw many of the native quail, some with broods as large as 6 or 8. Some of these quail were quite tame and even posed a little.
Incredible Flora
It’s hard to discount the incredible flora of New Zealand. In Abel Tasman National Park, the forest is dominated in the undergrowth by ferns both small and large. Tree ferns and beech form the bulk of the forest canopy, punctuated by fragrant flowering manuka trees (famous for their honey).
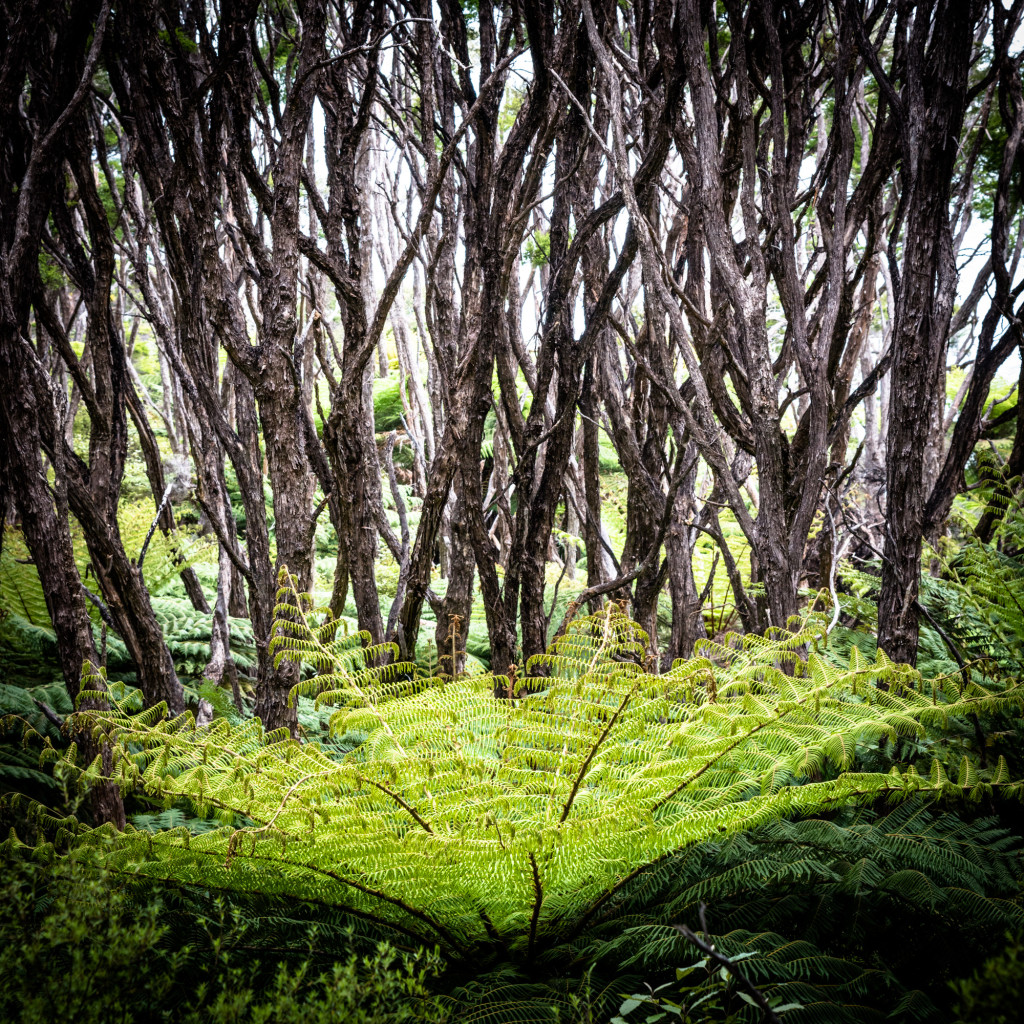
The ferns lend a prehistoric feel to the forest and you could be forgiven for thinking you might be walking on the set of Jurassic Park. In fact, we talked to one person who was sure they filmed some scenes from the movie in the park.
(photo by Anne Archambault)
Should you go?
In short, yes. The trail is fantastic, the days are short, and the scenery is well worth it.
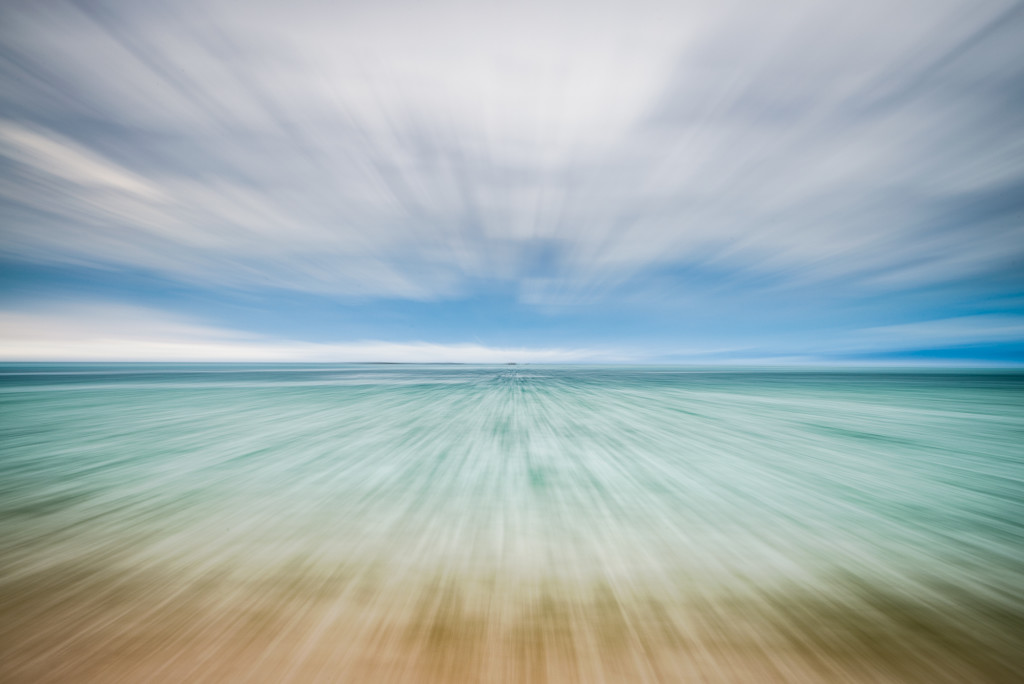
The trail is a little more crowded than other tracks, both because of the relative ease and the easy access. It’s a great warm up for longer or harder walks and it’s also great for families (of which we saw many).
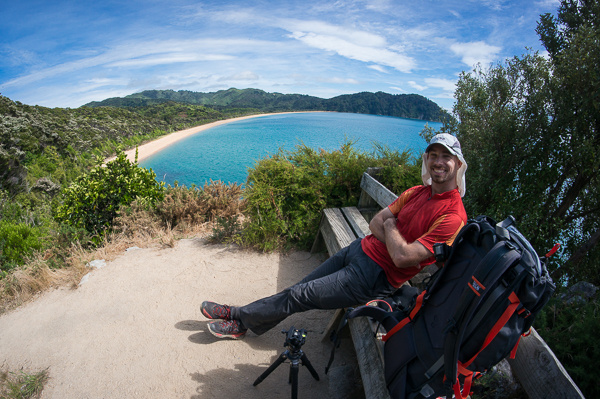
(photo by Anne Archambault)
And who could argue with lots of time on the beach? Anne and I both felt like 4 days was plenty; it provided enough time to get into the backpacking groove without feeling like we were spending more time than we should (the south island is big, we didn’t want to miss anything).
Max elevation: 385 ft
Min elevation: -283 ft
11
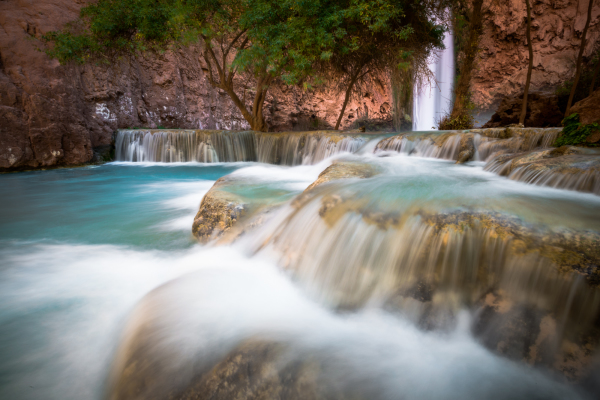
2014Anne was in Phoenix attending the Grace Hopper conference and so we made plans with our friend Valerie (of Haute Route fame) to hike into Havasu Falls and the Havasu creek canyon. Havasu creek is somewhat unique because of the high mineral content in the water, giving it an astounding turquoise color and building up beautiful travertine pools that provide for countless smaller cascades down the length of the canyon. The beauty of the canyon certainly puts it on the “bucket list” of hiking and photographic locations to visit. So Anne and I were both super excited, both because we got to spent time with Valerie as well as because we got to do it in such a wonderful location.
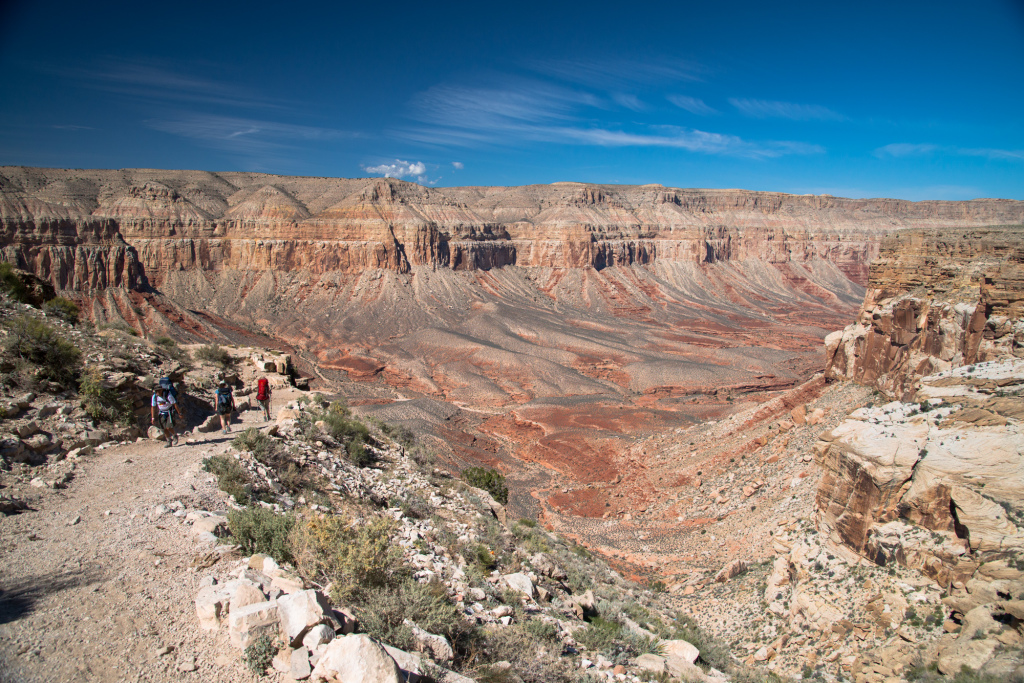
Camping reservations into the canyon are notoriously difficult to get given the popularity of the hike. However, Valerie was doggedly persistent and able to secure camping reservations by calling repeatedly until a camping space finally opened up.
On paper, the hike is not a difficult one. From the trailhead to the campground my GPS clocked 10.75 miles with 2577 feet of elevation loss. However, the statistics don’t take into account the fact that most of the trail follows a river wash with a packed gravel surface. This provides a good path, but saps energy and makes the hike feel longer than it might on a firmer packed surface.
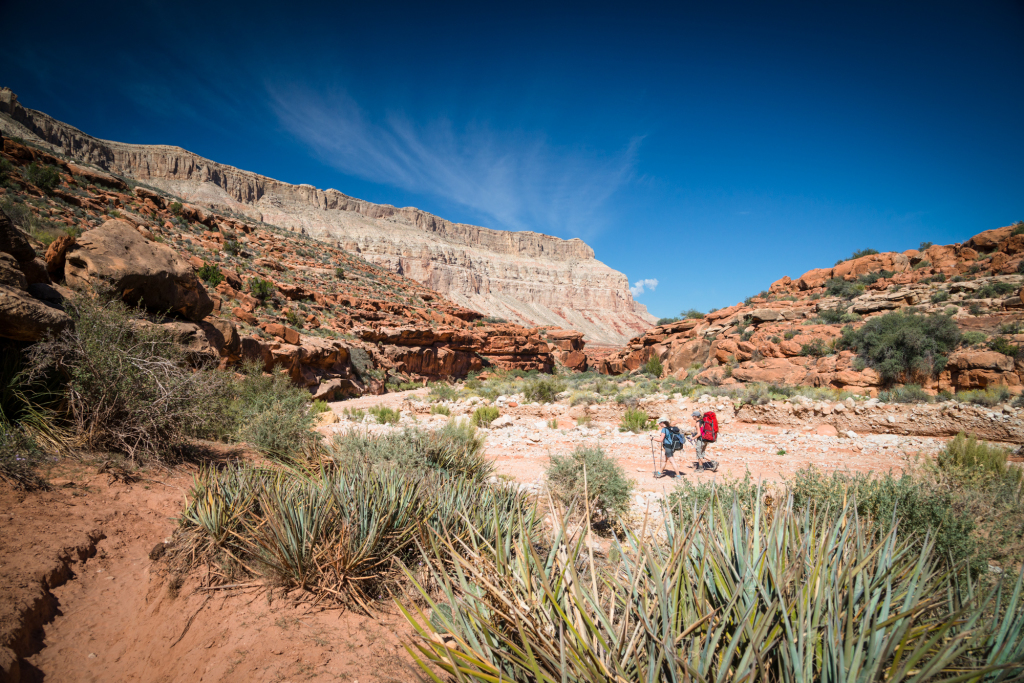
We started our hike on Saturday morning and arrived at the trailhead around 11:00 am after a relatively leisurely breakfast in Peach Springs. By that time the parking lot was already packed to overflowing, with cars parked well down the road. We rounded ourselves up for the hike quickly and set out on the hike right around 11:30 am . Luckily, the temperatures were still mild and made for a pleasant start.
The hike drops elevation quickly as it makes its way down a series of switchbacks that joins a gentle ridge taking you down into the bottom of the canyon to the creek bed. This trail then winds its way very gently downhill, following a river bed to the town of Supai.
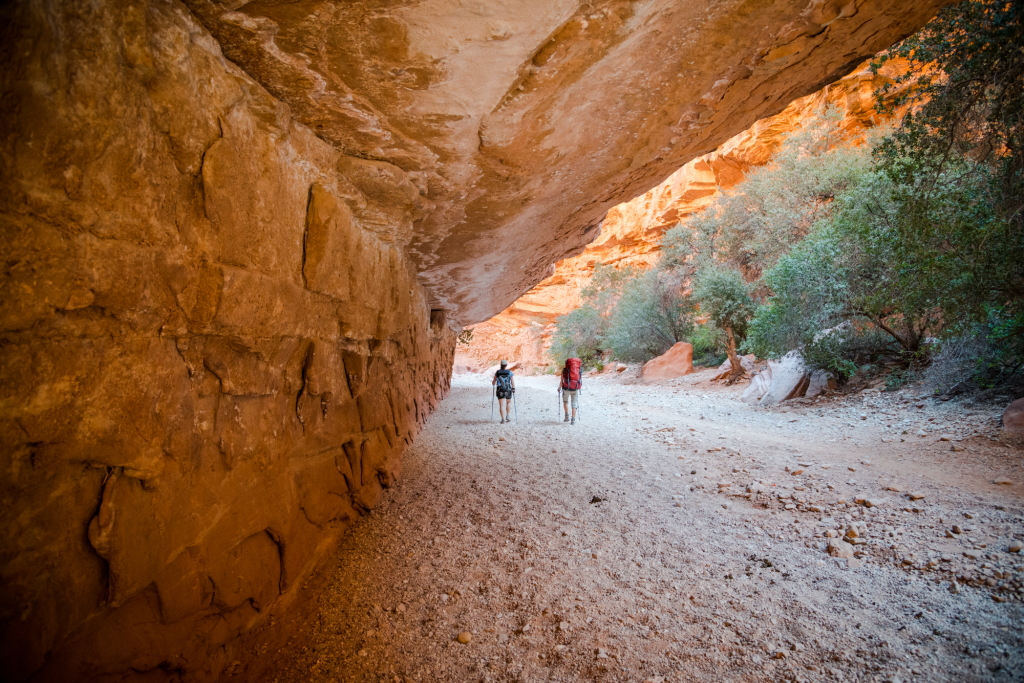
Along the dry creek bed, there are often braided trails that shortcut horseshoes in the creek and help facilitate both horse and human traffic. Plenty of horse droppings help confirm continually that you’re on the right track. Surprisingly, given our late start, the hike was a pleasant one with long sections of the trail being in partial shade. After about 3 hours, we reached a junction with a sign confirming that we were “almost” at Supai. The trail forked left and continued through a dense patch of trees where we first crossed Supai creek. Shortly thereafter we descended a small hill and arrived at the village of Supai. We wound our way around town and stopped at the Camp Reservations building (about 7.4 miles from the trailhead) where we picked up our camping permits consisting of printed wrist bands for each member of the party as well as a tent tag for each tent in the group.
Note to hikers: There is a water spigot at this building where you can fill your water bottles.
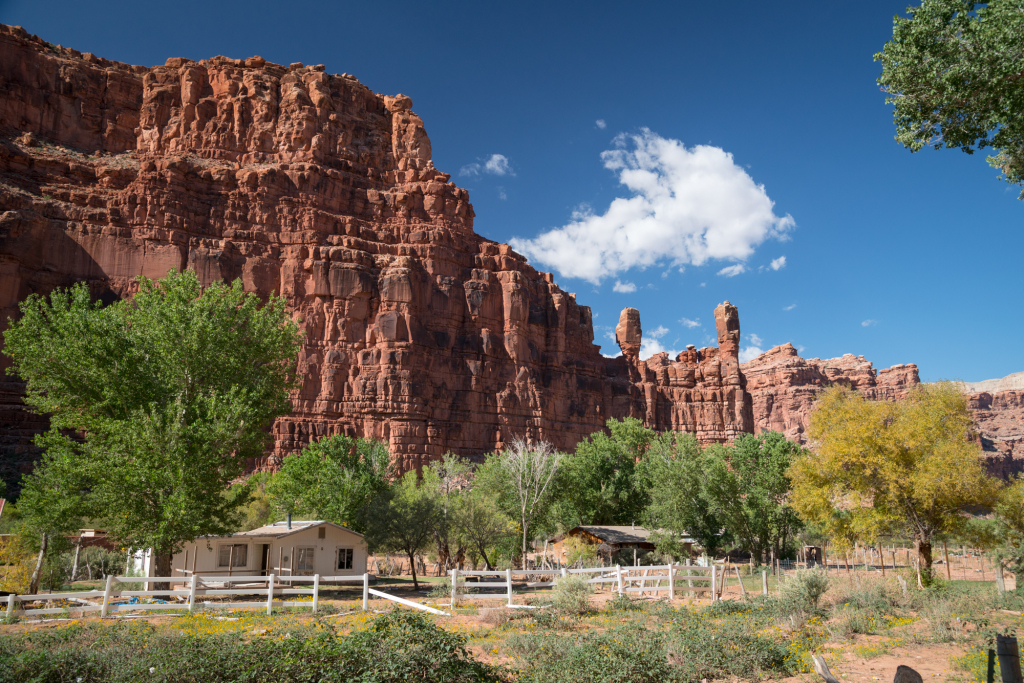
The trail leads quickly out of town to parallel Havasu Creek, which then again quickly brings you to your first set of small but beautiful travertine cascades.
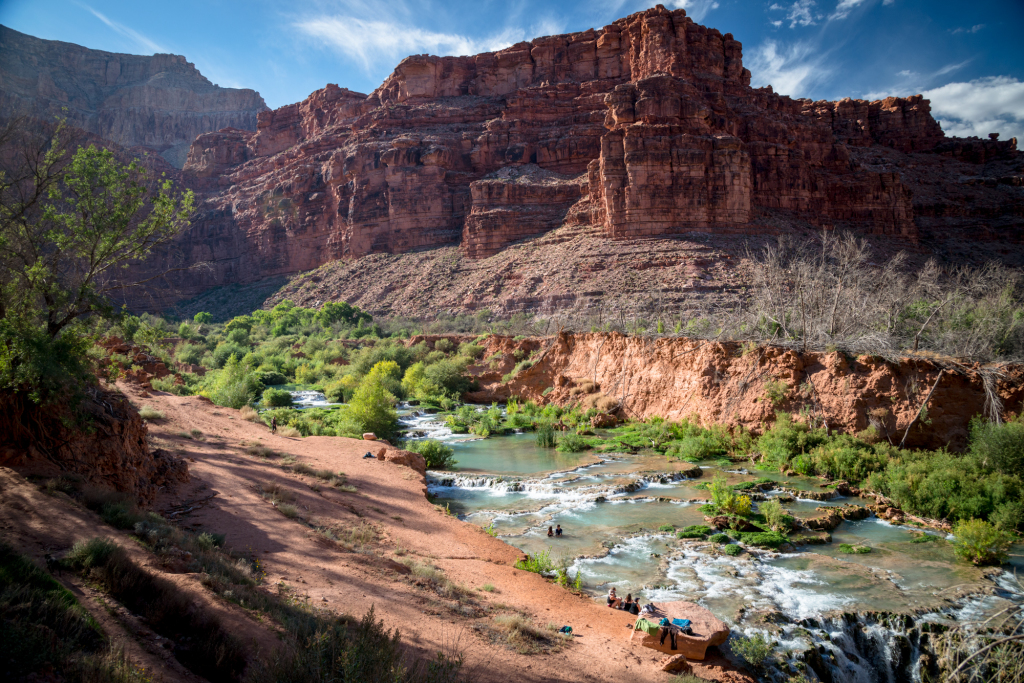
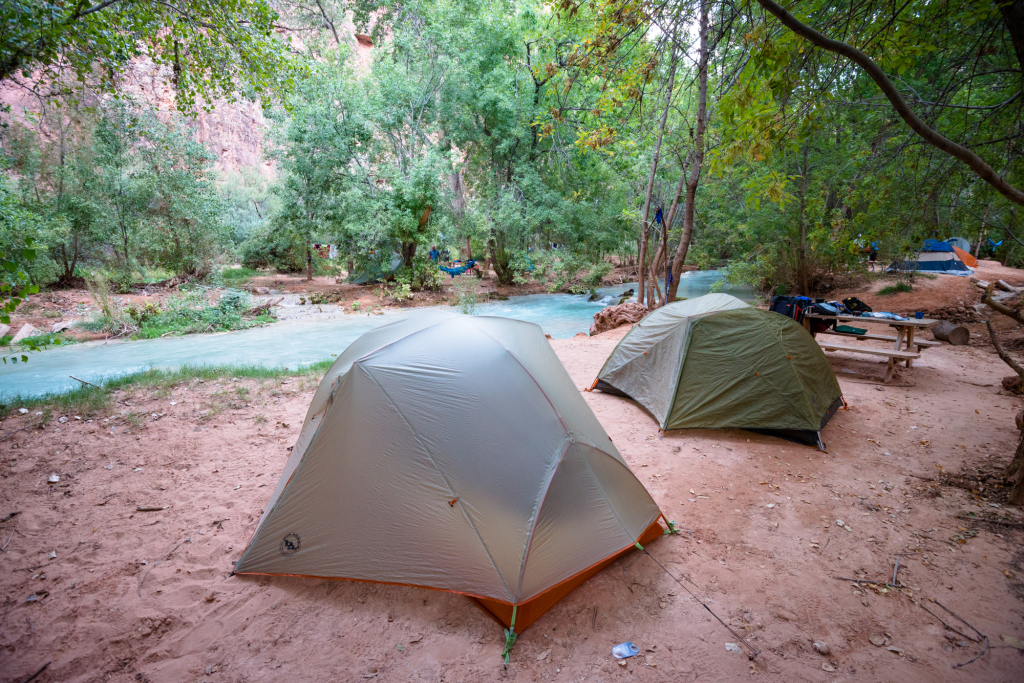
Not far beyond is Havasu Falls and the campground. We’d read about the campsite before we left and steered past the start of the campground, instead looking for sites after about the second bathroom. However, the campground was almost completely full with people which made campsite selection difficult. In the end, we wound up with an excellent, secluded spot next to the creek at the very far end of the camp group (close to Mooney Falls). Total time, about 5 hours.
On Sunday we hiked further down the canyon with the desire to photograph Beaver Falls. Just beyond our campsite was Mooney Falls, maybe a 5 minute walk from the end of the camp group. Here the trail winds down a series of increasingly steep ledges until it finally disappears into a hole in the rock that passes through a tunnel and to a series of chains and ladders that descend to the base of Mooney Falls.
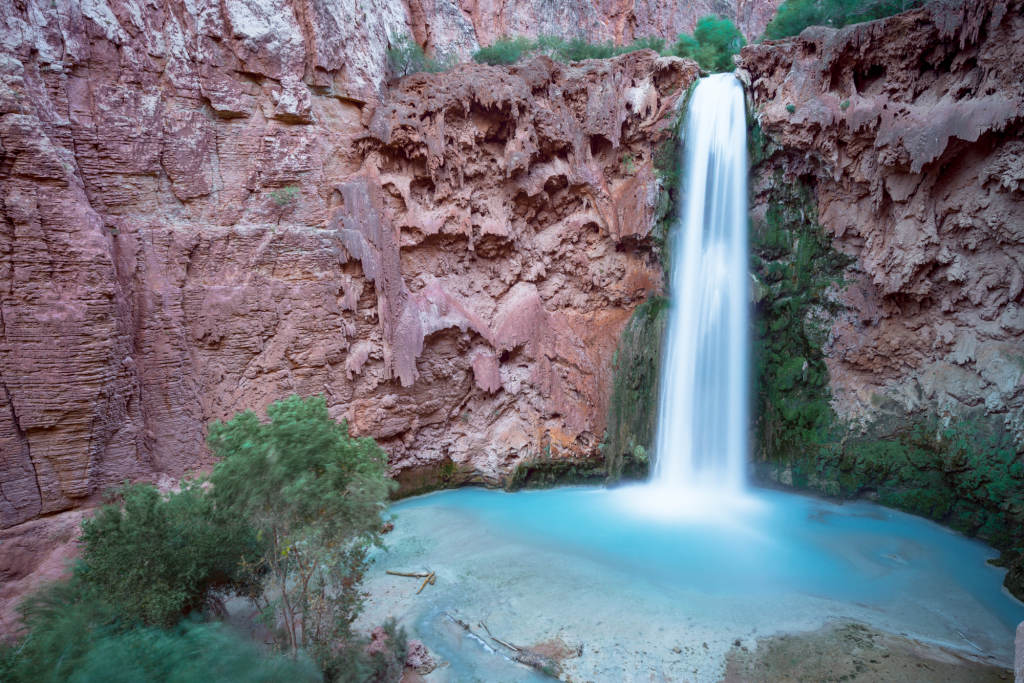
The lower section of the descent is perpetually wet from the spray off the cascade making for both muddy and slippery conditions. It’s not a particularly difficult descent, but does require care and is best done without others either coming down on top of you or climbing up immediately under you.
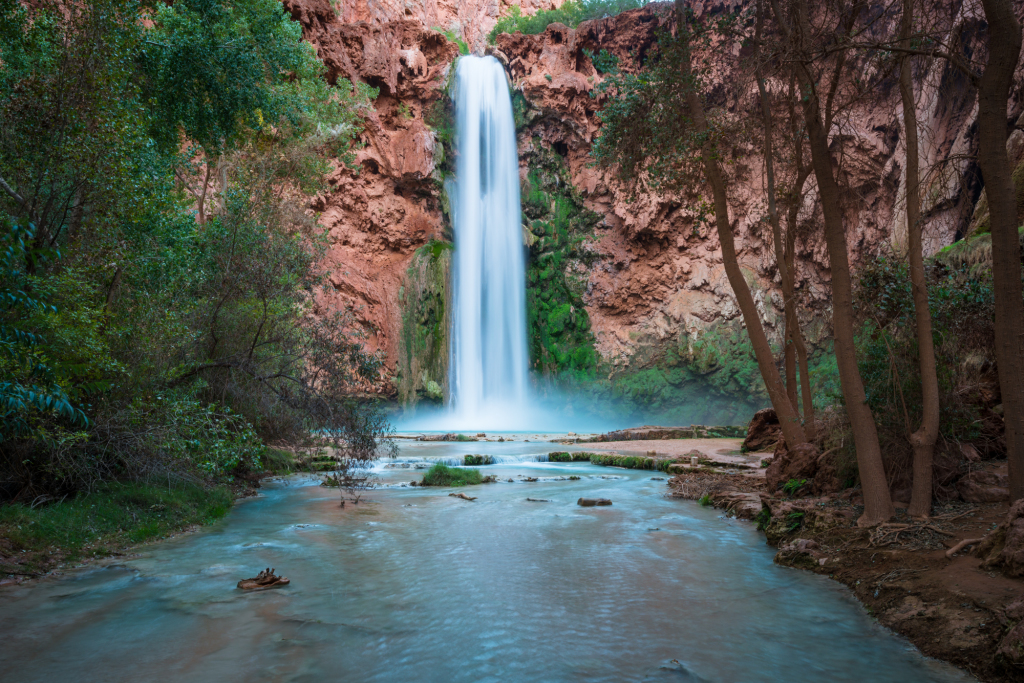
Mooney Falls and pools offer some really nice photographic opportunities. On the far side of the canyon from the ladders there are a nice set of travertine cascades that contrast beautifully against the red canyon walls. Get here early or late to avoid harsh sunlight.
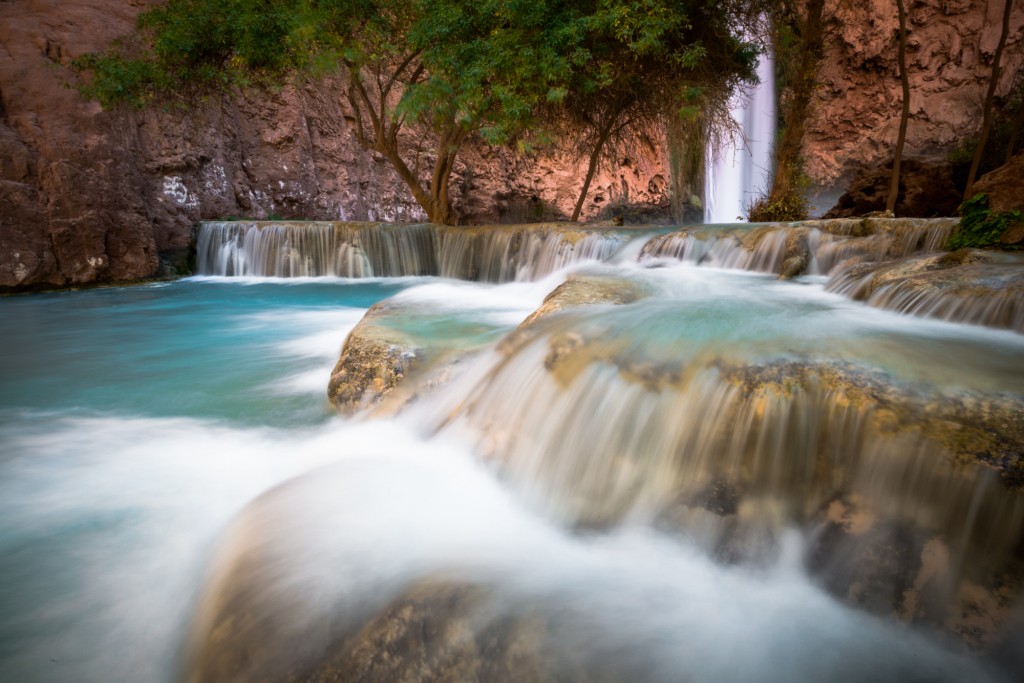
Continuing further down the canyon brings you to two creek crossings. Here you’ll need to remove shoes (or be willing to get them wet) before you can continue dry the rest of the way to Beaver Falls. Havasu Creek continues down the valley with ever present pools and falls, all robed in the beautiful blue-green hues that makes it stand out so vividly against the red rocks.
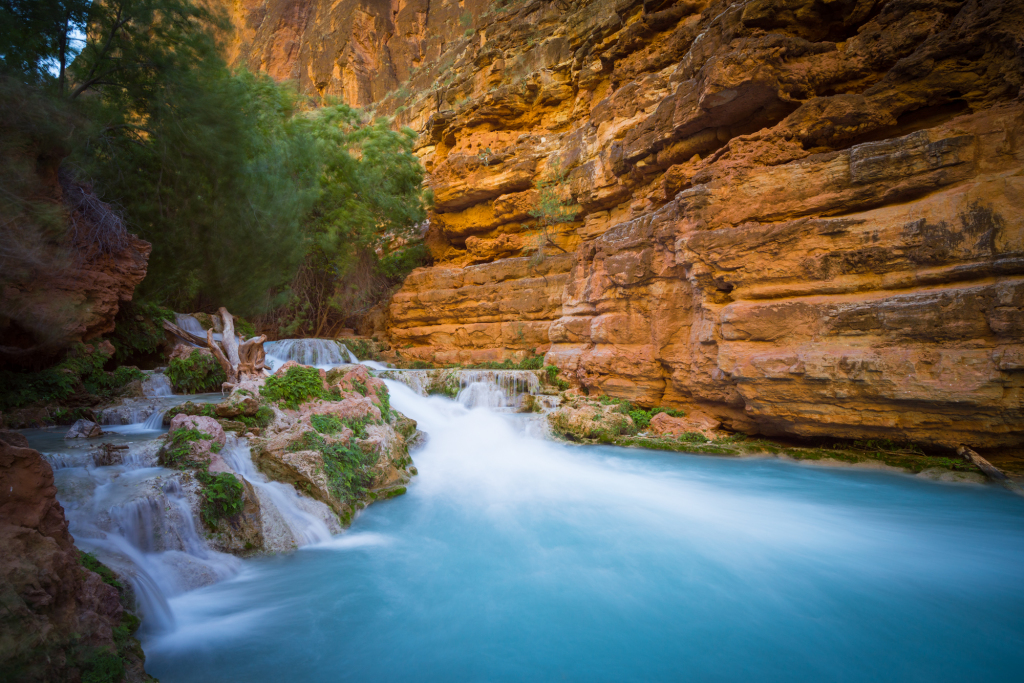
In a couple places, you ascent ladders or hewn logs to gain high trails that look down on the winding creek before finally ending at a tribal patrol station where your wrist band is checked. Before descending to the creek, you can make a short (~100 yard) detour to step inside Grand Canyon National Park and look back at Beaver Falls from a nice vantage point. It’s possible to continue another approximately 4 miles to the Colorado River.
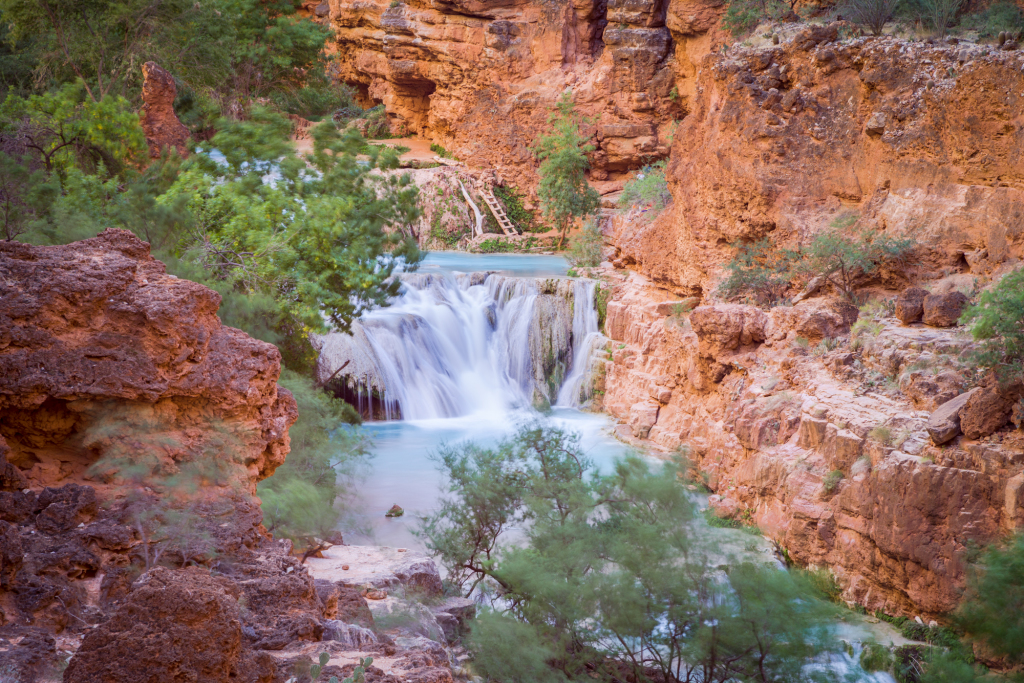
The hike to Beaver Falls concludes with a descent down a series of three ladders where you cross Havasu Creek just under the falls. The river crossing below Beaver Falls is quite shallow and allows for easy placement of a tripod to get nice long exposure images of the falls and pool.
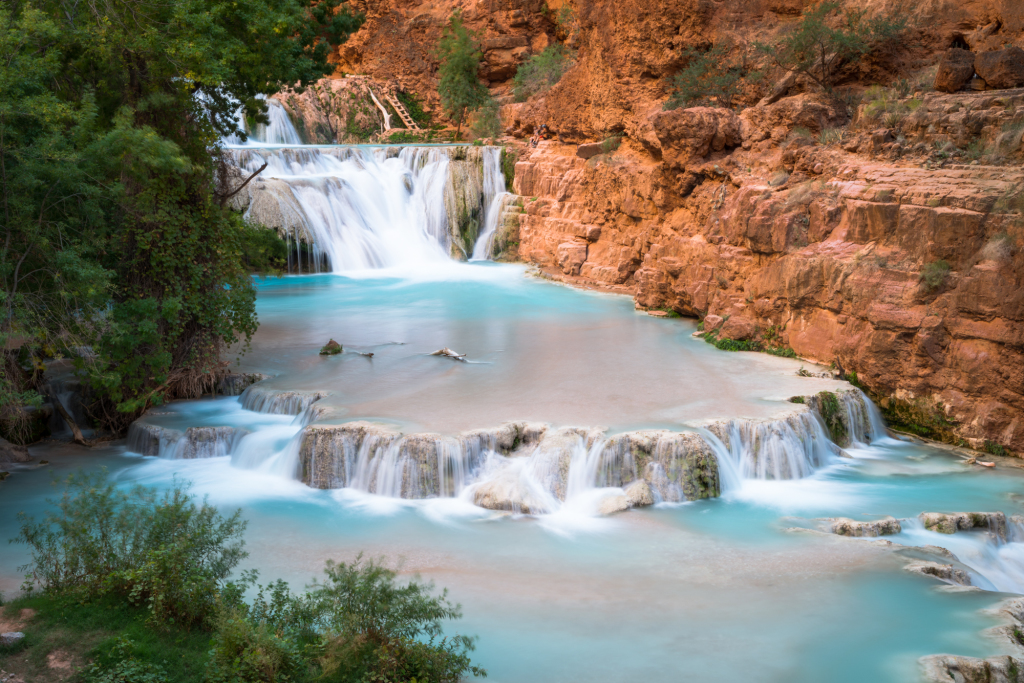
Notice to hikers, as we were ascending out of the falls I was hit in the head by a small rock falling from above. Thankfully, it left me with only a little pain but the consequences of such a hit could have been fatal. From that point on, I made a point of standing well clear of the canyon walls when I was able to.
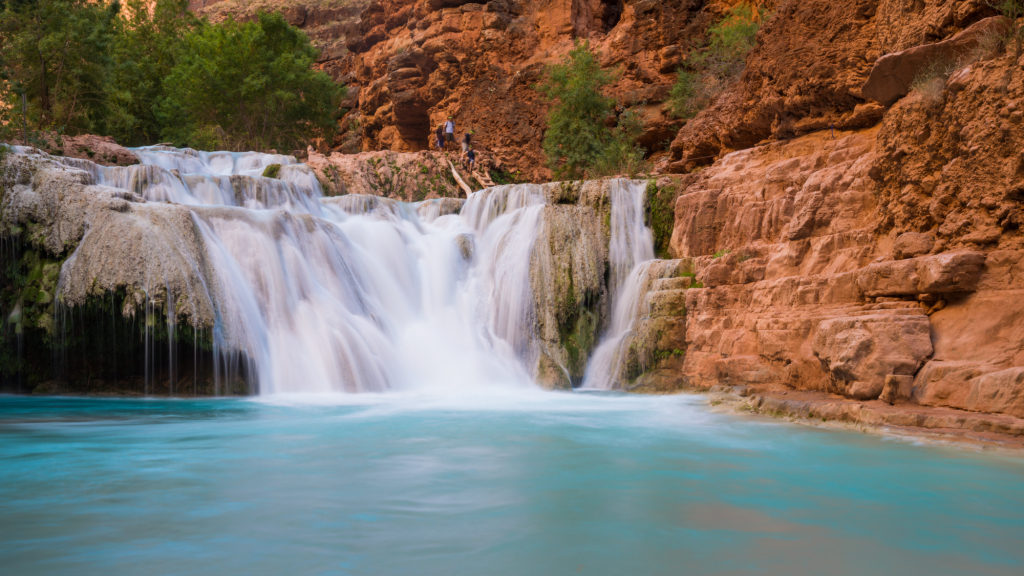
We finished the day by hiking back to camp and up to Havasu Falls to catch sundown. Havasu Falls are best photographed in the early morning or late evening to avoid harsh sunlight and high contrast. As an added advantage, by the time we got there most of the day hikers and swimmers had left.
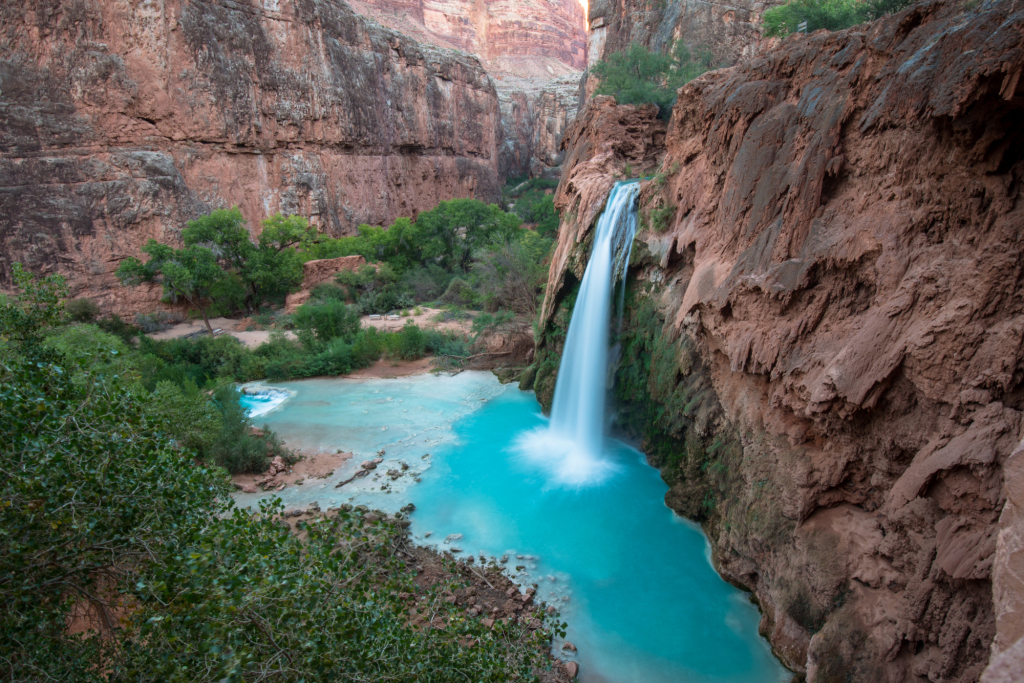
Because we had a 6pm flight out of Phoenix, we had to get a really early start on Monday morning. We woke at 4am, packed up camp, and were on the trail by 5am under bright moonlight and an incredible blanket of stars. Havasu Falls was well lit by the moon as we walked past, making for a magical scene. By the time the first sunlight was hitting the rim of the canyon we’d already passed Supai and were on our way up the wash. Because of the early start, we enjoyed cool temperatures and shade for all but about the last 30 minutes of the hike, and only about 15 minutes worth of that was in direct sunlight.
We ended the hike with sore feet and big smiles, excited about both the amazing sights in the canyon and the great companionship we shared over the weekend. Definitely a bucket lister!
Max elevation: 5236 ft
Min elevation: 2585 ft
14
2014Anne and I headed out of work as quickly as we could Friday to try and make the best out of one of the best aurora forecasts (see my other post on photographing the Aurora Borealis) in a long time. As we left Redmond, the estimated planetary Kp index was already topping 7, promising strong aurora displays overhead. Our destination, Mt. Baker. We knew that we could hit Artists Point by car, which would give us both high elevation as well as unobstructed views and dark skies.
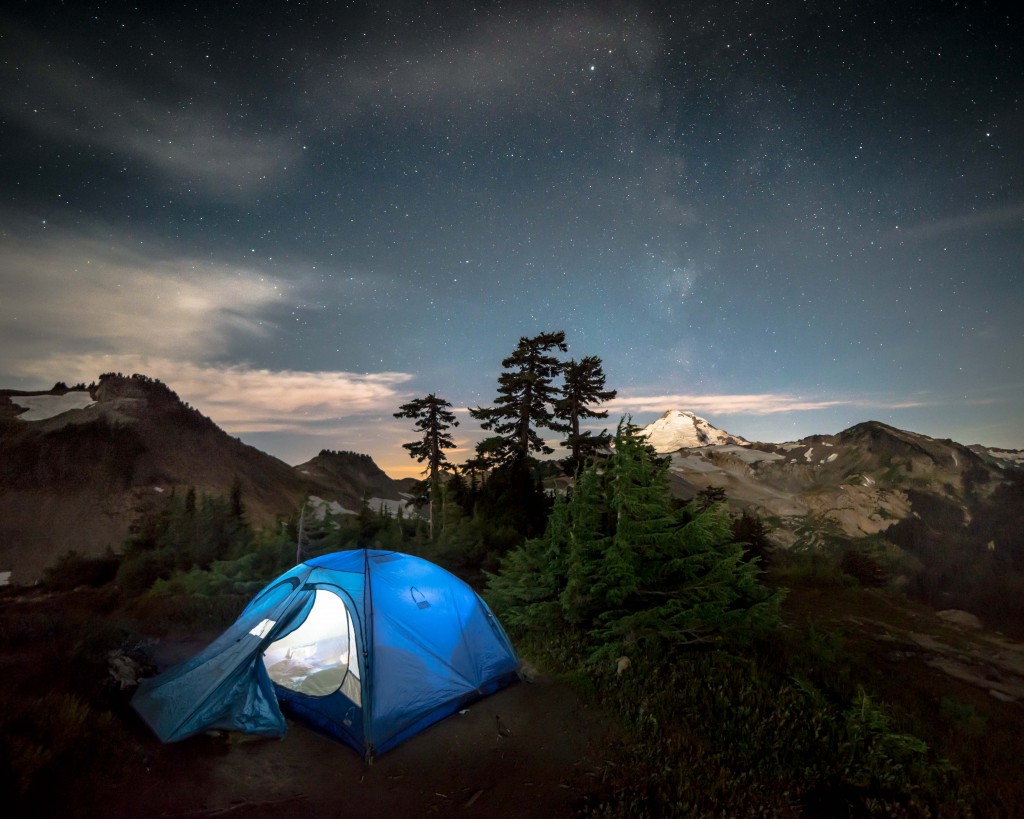
While we’d hoped to grab a campsite in either Douglas Fir or Silver Fir campgrounds, we found quickly that we were out of luck and that all camp sites were full. Undaunted, we continued to the top of the Mt Baker Highway to the Artists Point parking area where we found a party like atmosphere. The parking lot was full, the camper behind us had a fire pit going, and music was playing loudly. In 360 degrees around us, people had taken up residence on virtually every promontory and cars were coming and going by the minute.
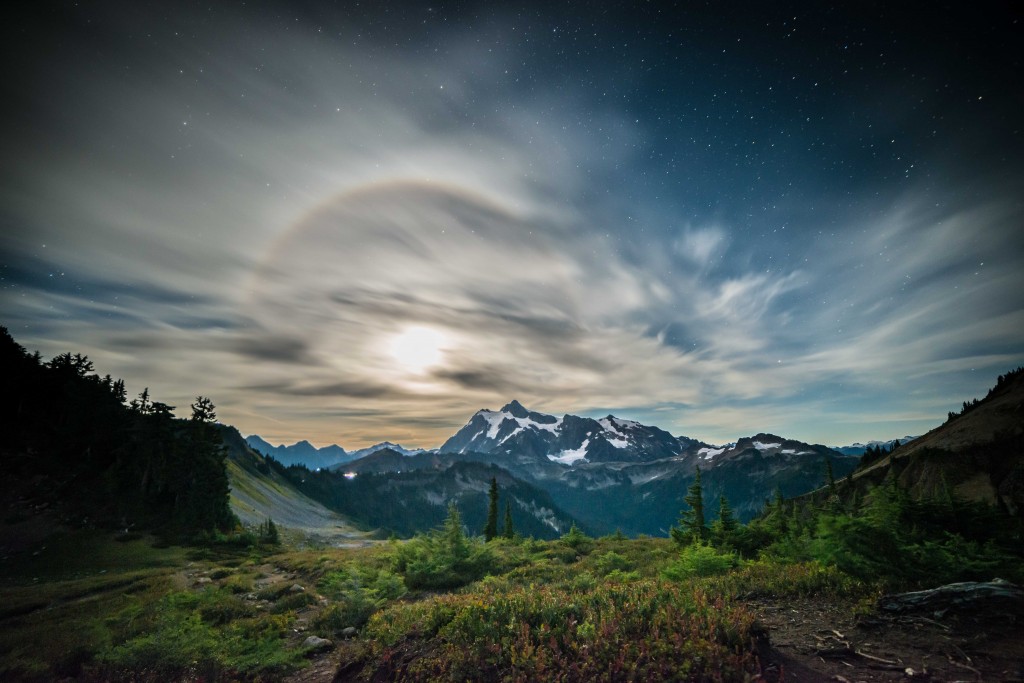
Anne and I quickly decided that in order to both have the best chance of catching the aurora as well as sleeping for the night, we’d be best to backpack out past Table Mountain and grab a campsite where we would be away from the crowds and have a place to sleep. We packed up our car camping tent, cameras, clothes, minimal food, and tripods and left as quickly as we could. The 1.1 miles to the Chain Lakes/Ptarmigan Ridge junction passed quickly and under glorious conditions and we found ourselves a camp site overlooking the chain lakes, Mt. Baker, Mt. Skuksan, and the rest of the splendor of the Mt. Baker wilderness.
We made camp and stayed up till midnight, but no aurora presented itself. Just to make sure, I left my camera out overnight to capture a time lapse, which also proved that the aurora was not to be found. Regardless, we had an absolutely wonderful night out under the stars in some of the most spectacular landscape one could wish for.
17
2014Mt. Curtis Gilbert (8184 ft) in the Goat Rocks Wilderness has been on Anne’s and my climb list for a while. Given that we hadn’t been on an overnight backpacking trip since our Zion Narrows trip and that the forecast looked promising, we decided to give it a go. Peggy Goldman’s Washington Scrambles book listed the hike’s coordinates as relatively moderate with an 8 mile/2000ft approach to Warm Lake and another 4 miles/2000ft to gain the summit. We loaded up our packs Friday night and set out early on Saturday morning for the trailhead.
For a little good karma, we picked up a hitchhiker at the Stevens Canyon Road / Highway 123 junction. This hiker turned out to be a PCT through hiker who was going for a resupply in Packwood. The amazing part – this hiker and his wife had already completed the PCT from Mexico to Canada and were headed back to the Mexico border! So even though it was a little out of our way, we enjoyed the company so much we eagerly drove him to Packwood. Sadly, we never thought to get either his name or email address. [UPDATE: It turns out our PCT through hiker’s name was Darrell “Chimp” Johnson and he unfortunately wasn’t able to complete his yoyo PCT hike because of injury. His wife, Dubliner Olive “Raindance” McGloin, ended up completing her yoyo PCT trek by herself thereby becoming the first women to do so. That’s an average of 27 miles a day for 195 days straight! What an outstanding achievement!]
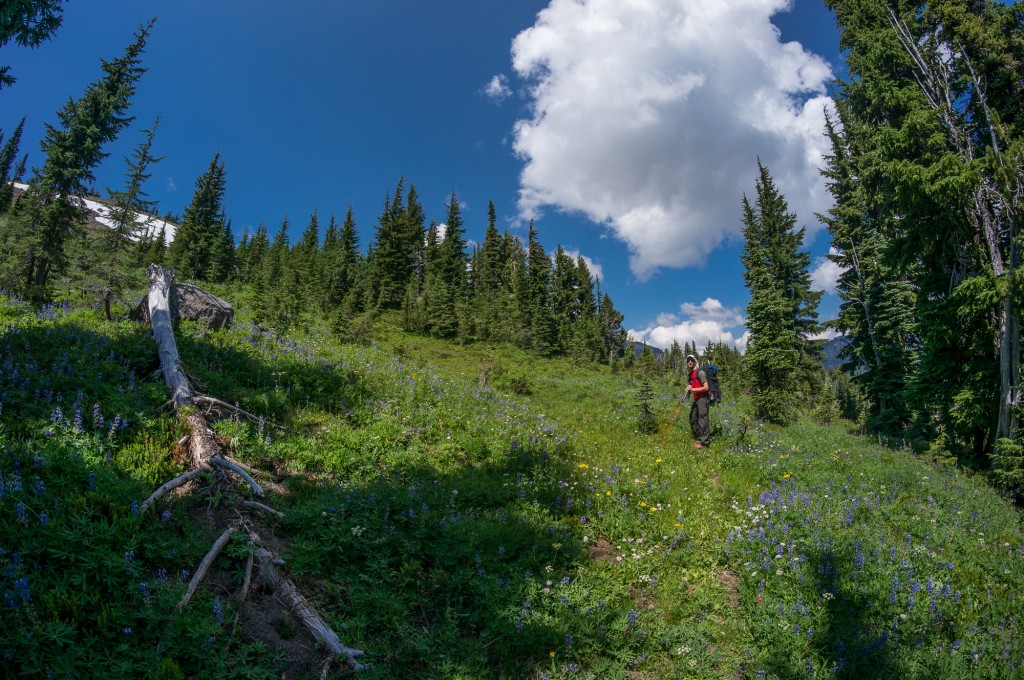
We arrived at the trailhead around 12h30, ate a quick lunch, and set off across Conrad Meadows towards the Surprise Lake Trail. Conrad Meadows is the largest subalpine meadows in the Cascades. Despite trip reports of hikers getting lost by the myriad paths leading across Conrad Meadows, Anne and I (with the help of GPS) were able to chart a straight path to the official start of the trail and the permit box.
The hike was very moderate and the trail was both well-maintained (despite the heavy horse traffic) and very well graded. In fact, it seemed that we barely gained elevation at all. Anne and I took the “Old” trail that was called out in the new version of Peggy Goldman’s Washington scramble book. This in opposition to the “New” trail leading to Surprise Lake in the old version of her book.
(Photo by Anne Archambault)
However, the pleasant grade changed abruptly once we reached the turn off towards Warm Lake. The path towards Warm Lake is marked by a cairn and a small path leading to the north that gains elevation steeply as it climbs away from the main Surprise Loop trail. The trail continues to gain elevation and travels (counter-intuitively) AWAY from Warm Lake until it gains a small plateau under a steep, somewhat cliffy hillside. The path continues away from Warm Lake, over the South Fork Tieton tributary, until it ascends steeply again making for a small col from which you turn left at the cairn and travel back towards Warm Lake following what could best be described as a game trail. You’ll again from the South Fork Tieton where the trail completely disappears and you continue overland up the hillside to reach Warm Lake.
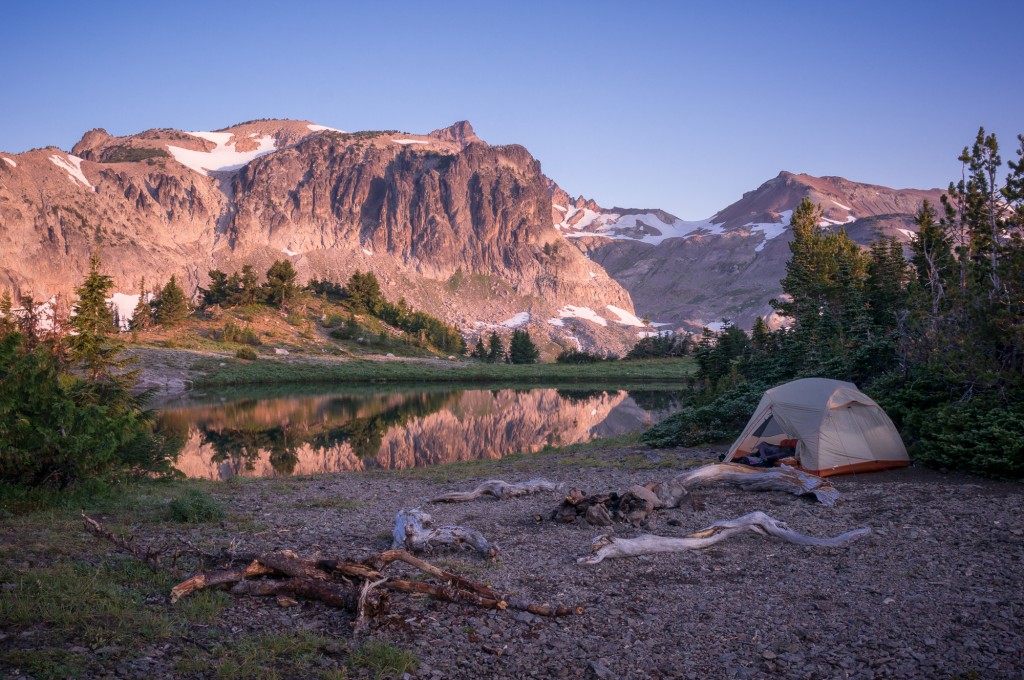
(Photo by Anne Archambault)
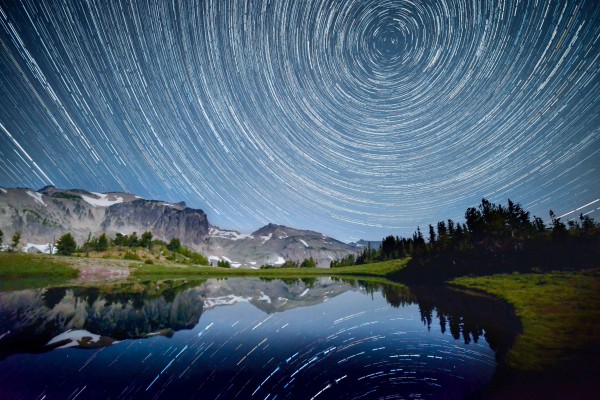
We had a grand campsite at Warm Lake that was well secluded, close to water, and afforded an excellent view of the cirque, the ridge, and our next morning’s summit. We ate well, rested our feet, and found a spot to hang our food for the night. In addition to the normal camp chores, we’d also brought a tripod and digital cameras, intent on doing some night photography and time lapse. The moon was set to rise around 11h30PM so I woke up around 10:30PM to set up my camera and leave it running for the rest of the night.
I was a little worried that my all night experiments might not have produced anything. In the end, I think the results are pretty cool and I was happy to work a little at my video editing skills.
Our climb the next day took around 4 hours return to the summit. The trail was a faint and rarely used goat path that followed the obvious ridge to the shoulder of Gilbert.
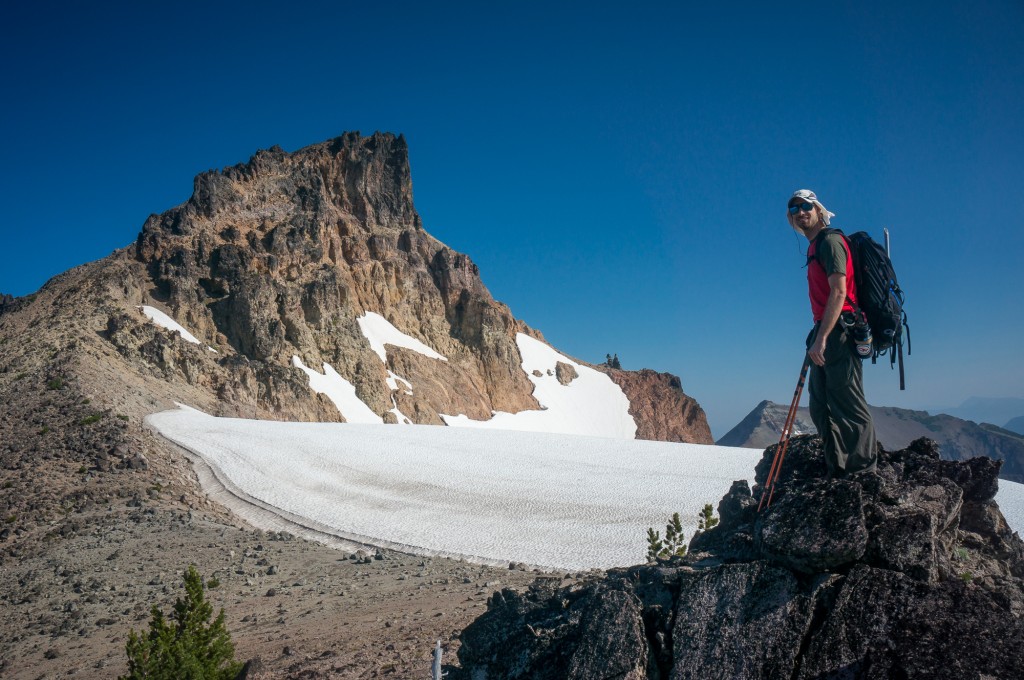
(Photo by Anne Archambault)
This leads to an obvious traverse on the west side of the buttress to a point of weakness in the small but vertical bands of rock. The true summit was attained by heading nearly straight up. On the way up, we met another couple who had been leapfrogging us since we left the trailhead the previous day. They were Mazamas from Portland (Jonathan and Sandy) out for a weekend. We shared the final scramble to the summit, being careful to avoid rock fall as we made our way up the loose slope.
On the summit the views were grand as the Goat Rocks Wilderness was laid out before us along with Mt. Adams, Mt. St. Helens, and Mt. Rainier. We had Jonathan and Sandee take a picture of us rather than our generally mandatory selfie and then made our way back towards camp.
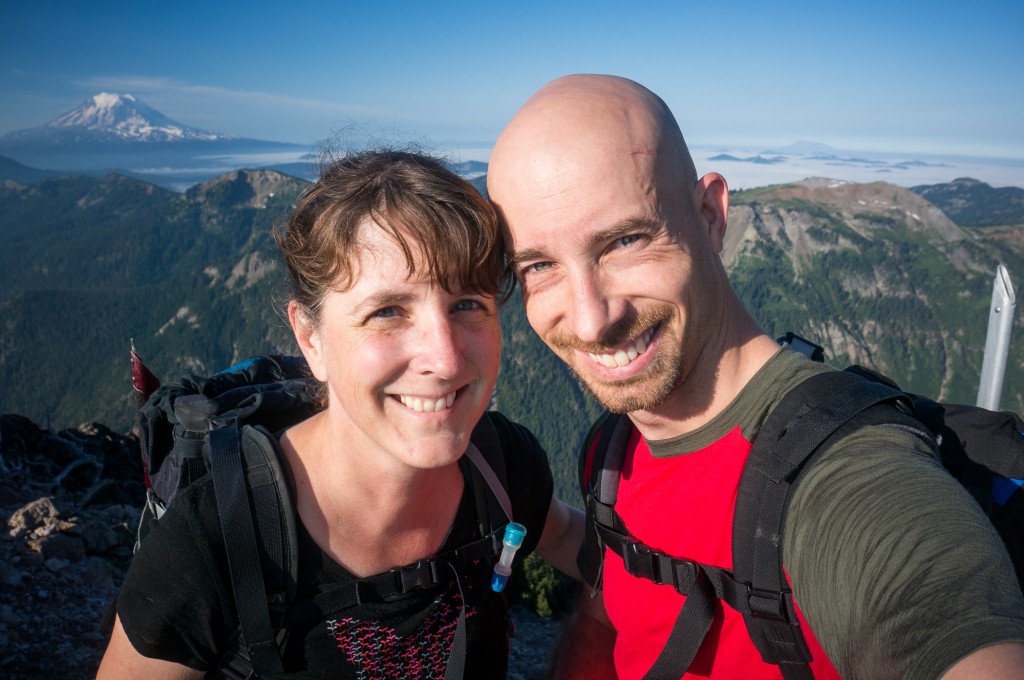
The trip out was uneventful even if it was long, dusty and hot. We stopped to refill our water bottles several times along the way and were glad for the various opportunities to grab fresh (and cold) water. By the time we reached the car around 5pm I was footsore and ready to devour a juicy burger.
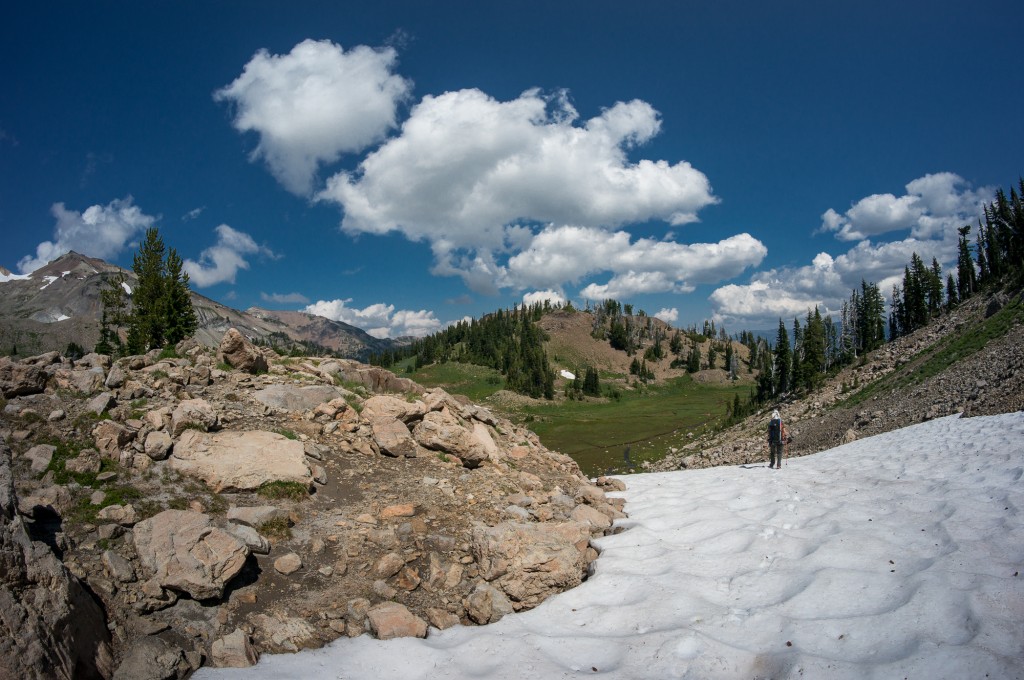
(Photo by Anne Archambault)
Max elevation: 8191 ft
Min elevation: 3880 ft
23
2013(photo by Anne Archambault)
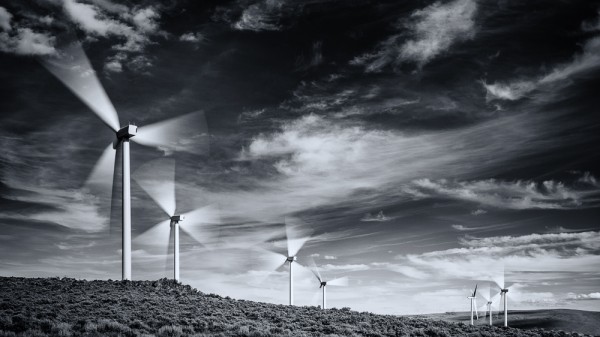
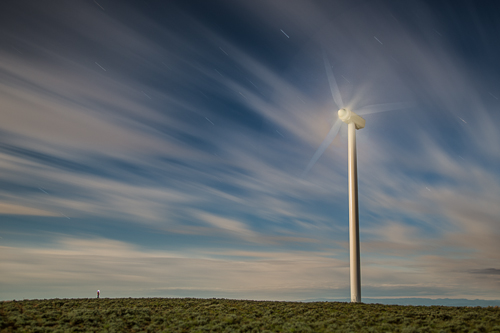
If you’ve driven through Washington on I90, you have probably seen the large wind farm that sits between the Columbia River and Ellensburg. Anne and I have often driven past and wanted to take pictures of the wind turbines but we’ve never stopped until this weekend.
Puget Sound Energy operates the facility, and as luck would have it they encourage people to visit! The Renewable Energy Center sits atop a ridge that has incredible views along with a windy disposition. The center itself has numerous educational displays to inform visitors about how the facility works and shows live data from the power output of the turbines and solar array.
A quick check-in allows you to get temporary use permits to travel around the facility and to walk just about wherever you please. There are of course some rules, the primary one being that you can’t get closer than about 100 yards to the turbines. However, the main access road crosses several lines of turbines, affording fantastic photographic opportunities right from your car.
While most locations favor a particular type of light (morning, evening), the direction of the turbines means that they could be facing in any direction at any time. Hence, locations that might make excellent morning compositions one day could change entirely when the turbines are angled differently. That said, we also found that the wide variety of terrain allowed for considerable freedom and we never felt like there weren’t opportunities.
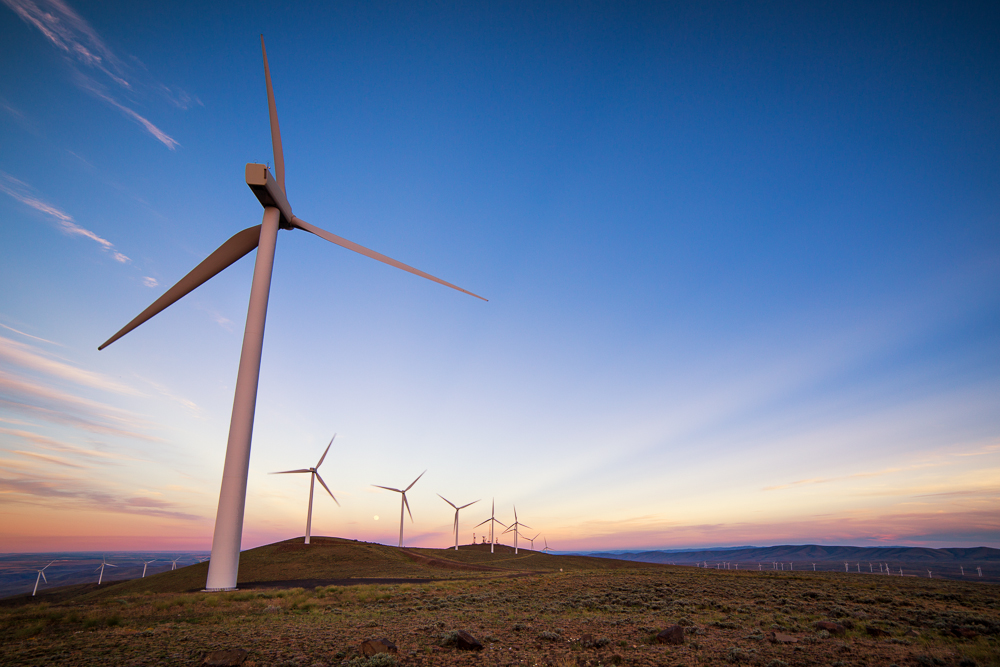
(photo by Anne Archambault)
As a happy coincidence, our trip corresponded with the “Super Moon,” allowing us to watch it rise above the Columbia and the turbines of the wind farm. Combined with the “Super Moon” we were also witness to an absolutely breathtaking sunset.
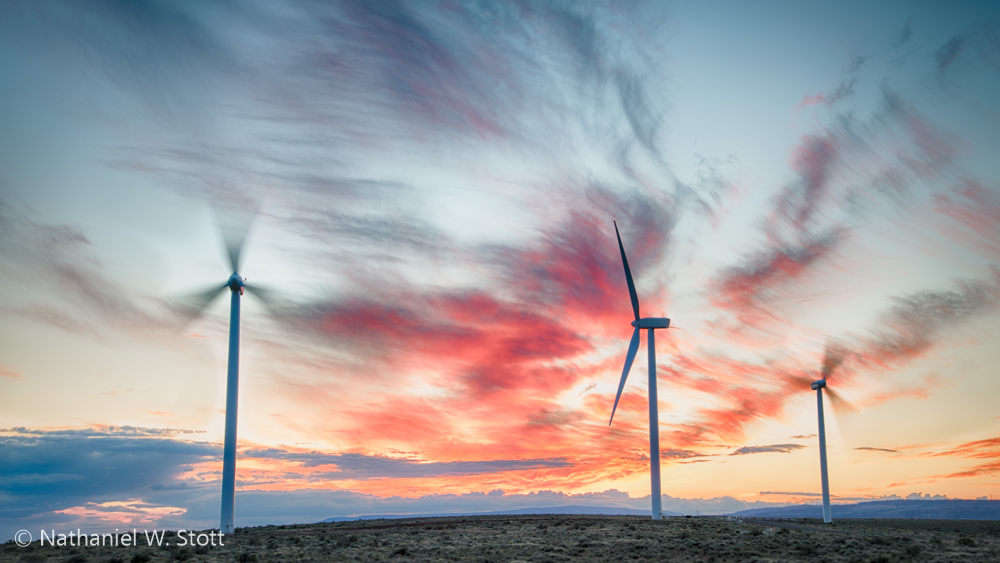
Since the facility allows visitors to stay up to two hours past dusk, we used the time to work on our night photography. The “Super Moon” provided us with enough light to experiment with different ways to photograph the turbines. In addition to headlamps and flashlights, we’d also brought along our camera flashes. We were able to use these to strobe the turbine blades and add detail. Anne was able to use this technique combined with some long exposure to capture a great image that she’s posted in her blog post Windy Night:
22
2013(photo by Anne Archambault)
Anne and I recently had a chance to take a fine art long exposure photography workshop with Vancouver Photo Workshops. We’ve both been interested in long exposure photography for a while, and we’d already gotten some of the equipment (like 10-stop ND filters) to help us slow down the real world and blur our things like wave and waterfalls in broad daylight. As hoped, this workshop added to our bag of tricks.
The instructor was Marc Koegel. He has a great blog and since he’s been shooting long exposure photography for a while, he’s also full of great advice. He’s also been generous in sharing resources for the aspiring long exposure photographer.
Shooting Long Exposure
Marc had a lot of great guidance for us and took a ton of time to answer all sorts of questions. We spend half of both Saturday and Sunday talking about various aspects of long exposure photography. For me, the biggest take away was that long exposure photography is a means to the end of creating artistic images that inspire. Several people in the class mentioned that taking the workshop (including myself) was a way to help them produce more artistic photographs. Indeed, long exposure is a way of capturing a mood in movement that is imperceptible in our visual reality but that reaches us at a deep level. In this sense, it’s quite different than standard photography which aims to realistically and accurately the scene in front of us.
Serendipity
One of the really cool things about long exposure is the serendipity of it. Things happen when you’ve got the shutter open from thirty seconds to 30 minutes that you simply can’t account for. Marc showed us his image of the Brandenburg Gate where a limo pulled up while the shutter was open. The car helps make the image but could have never been staged. Clouds or water may not turn out how you think they will and that’s part of the magic.
GENERAL Tips
Of course there were lots of interesting tips that we took away. Marc has an excellent blog at http://bulbexposures.com that provides detailed tutorials. We referred several times to the Long Exposure Tutorial which provided some excellent advice on gear, selecting the proper amount of ND stopping power, and some guidelines for shooting.
1. Bracketing
In terms of shooting, perhaps the best tip was to really bracket the shot. Marc suggested not only doing a plus/minus HDR style bracket, but also a time based bracket of 1,2,4, and 8 minute exposures to ensure you’ve captured what you need. The HDR style bracket will allow you to fill in detail if you need it in post.
2. Clouds and cloud Coverage
Generally, you’re looking for days where the sky is between 60-80% cloudy. These days will provide you with a good amount of cloud variation to allow for a sense of motion. Too much cloud cover and everything is just bland. Too little and you can’t make an interesting sky.
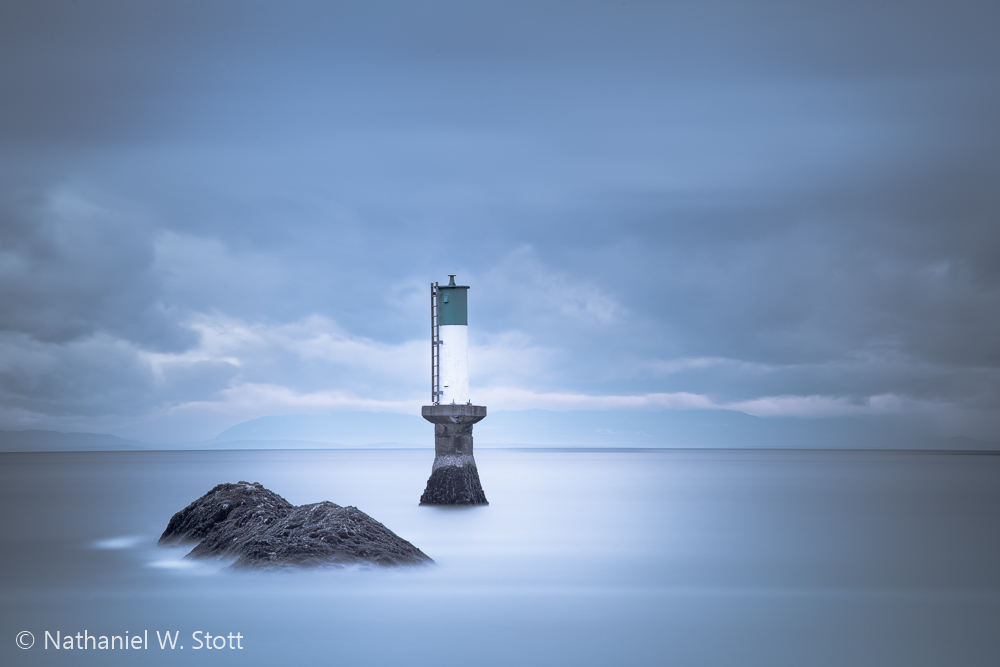
3. F-Stops and Diffraction
Another good reminder was about using your aperture wisely. Too many times you’ll be tempted to use a high f-stop to further slow down the shutter speed. I’ve done this countless times to slow my exposure time. However, it’s important to remember that high f-stops (higher than about f/14 really) will cause diffraction in the lens and will cause image quality and sharpness to suffer. If you can, shoot at between f/7.1 and f/11 to ensure appropriate sharpness.
4. Long Exposure Noise
When shooting long exposure, especially when doing it back to back, remember that heat can build up on your sensor and lead to sensor noise. For example, if you’ve taken six 5-minute shots back to back then you’ve had the shutter open for about 30 minutes non-stop. That’s going to build up heat on the sensor and cause an increase in noise, especially on hot days. So take that into account and try and give your sensor a chance to cool off and reduce noise.
I’ve read a bunch of articles on long exposure noise reduction. Marc recommends touse long exposure noise reduction for any shot longer than 8 minutes that on a crop sensor camera. He also recommends to avoid it all together on full frame cameras to avoid the associated lengthy delays. I’ve read articles pontificating both approaches. At this point, I think I’m in the camp that says most cameras that are under a year old probably have noise levels that make noise reduction more of a hassle than a benefit. You mileage may vary.
5. Test Shots and Exposure Time
When shooting long exposure images, use a test shot to help you determine your exposure time. From the test shot, you can compute the long exposure time for your ND filter with a simple table (see Marc’s bulbexposure.com tutorial) or smartphone application (available for all smartphone platforms). For example, if a “normal” exposure at f/11 is 1/60th of a second, the equivalent exposure with a 16 stop ND filter would be 18 minutes and 12 seconds.
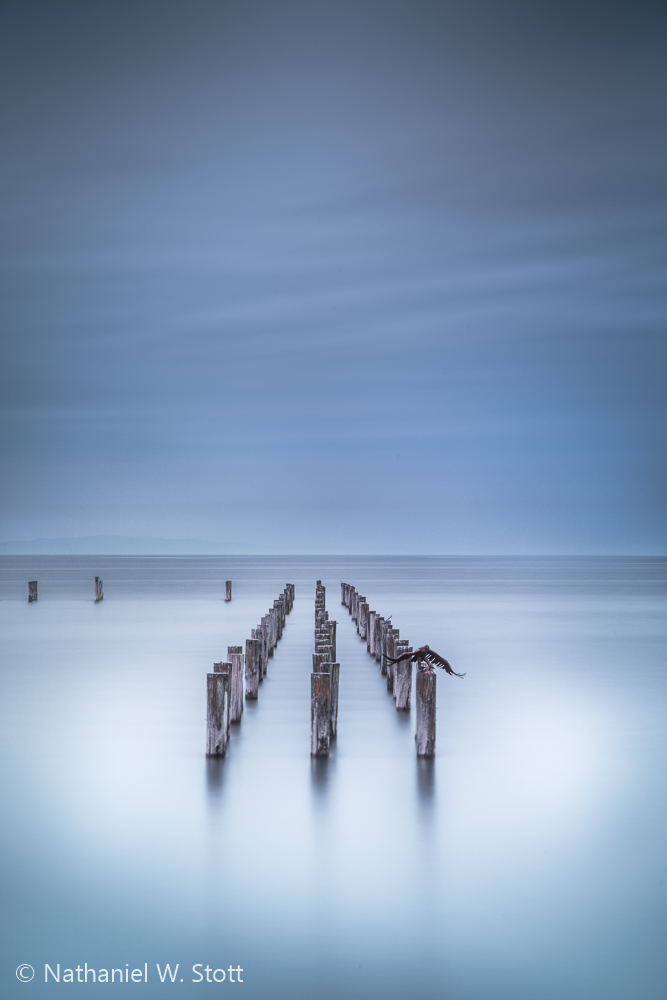
6. Light Leaks
It turns out that as good as cameras are today, most still have small areas where light can leak in and ruin your long exposure images. Marc uses black tape to tape over his viewfinder and other strategic areas of his camera. This is also problematic for users of “plate” style 100mm x 100mm filters like Lee, Cokin, or Hitech since light can bounce between the filters and lens. In general, I think screw on filters probably do a better job of controlling potential light leaks, but are harder to take on and off for focusing and metering.
I’ve taken to simply covering my camera with my hat, both to prevent sun from entering my Cokin filter holder system as well as to cover the entire camera/lens system. This prevents heat buildup and helps prevent any additional light from ruining my shots.
Summary
I had a blast on this workshop. We visited some cool places and learned some great new techniques to really help our photography. While the tips were specific to long exposure photography, I think some are also applicable to everyday shooting. If you have the chance, I’d certainly recommend taking a look at what Marc is doing and his workshops at Vancouver Photo Workshops.
19
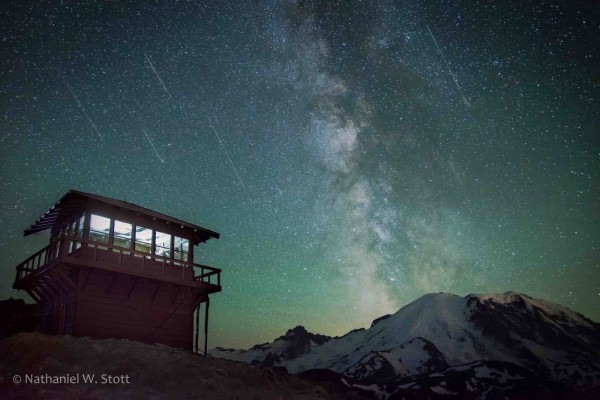
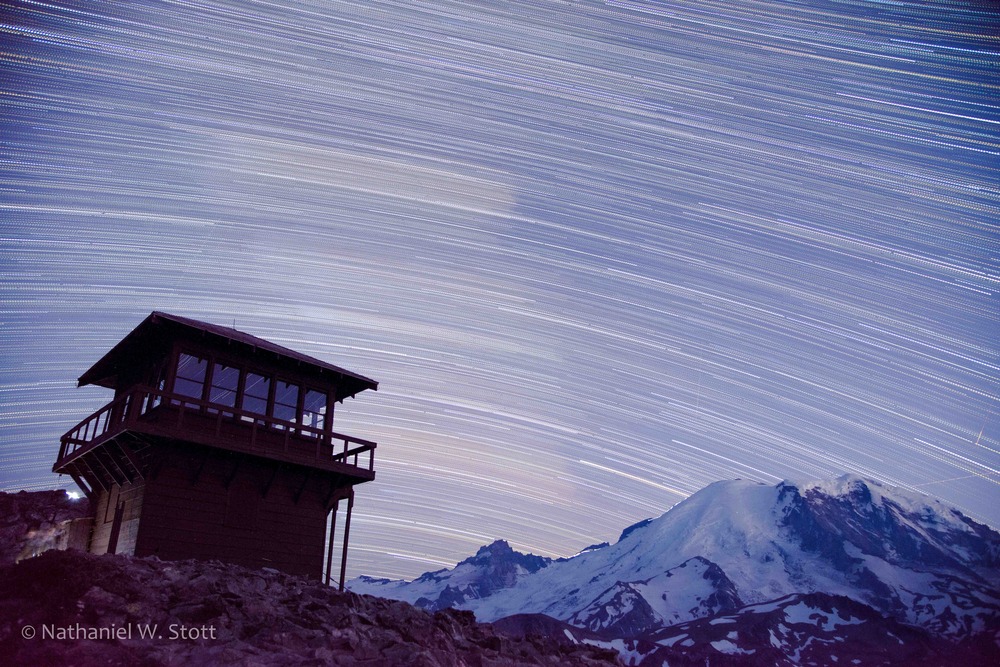
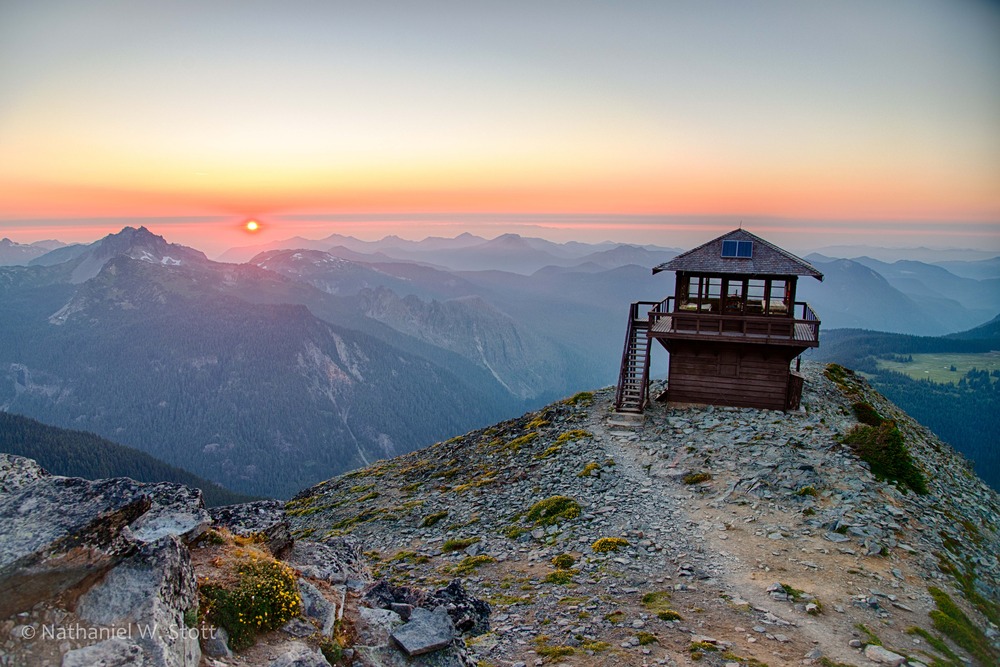
2012Anne and I talked about a few different places to go. Eastern Washington was a prime candidate, given the very high likelihood of clear skies. We discussed Vantage specifically because we thought the rock formations around the “Feathers” might provide a pretty awesome foreground element to the images we had in mind. We also discussed heading to Sunrise at Mt. Rainier since there is a relatively easy hike to Fremont Lookout that would also make for an interesting foreground. I’d seen night shots of fire lookouts before and been captivated by the internal illumination and how it gave a sense of warmth to the image so Fremont Lookout really peaked my interest.
Mt. Rainier was a great candidate, but we also wanted to make sure we didn’t run afoul of the regulations National Parks have for being out overnight (which was a real likelihood). I called the ranger station and asked about the situation, explaining that we intended to be out well past dark taking pictures. It appears that this sort of thing is a “gray area” in the rules. Technically, you can hike at any time in the park. However, you can only “camp” in designated spots and for that you needed a permit. As long as we didn’t “camp” we were fine. Information and location in hand, we made some quick preparations and set off Saturday around 3pm for Mt. Rainier.
We got to Sunrise and started hiking around 5:30pm or so. Our packs were pretty heavy since we had camera gear, food, water, and warm clothing. Camera gear was the bulk of the weight. I brought two cameras, two tripods, and other assorted gear since I wanted to set up for two angles on the lookout. The hike itself was relatively short with the bulk of the uphill happening right out of the parking lot. It had been a scorcher of a day but fortunately the altitude combined with the hour had caused some of the heat to abate. So we arrived in good time to the lookout, greeted the clouds of mosquitos, and sat down to dinner.
Cliff Mass has been reporting on the Asian wildfires that have led to a reduction in air quality over the Northwest. As we drove to Rainier earlier in the evening, we’d seen the impact in air quality. However, that dense layer also lead to a relatively stunning sunset which we enjoyed completely.
It wasn’t long before dark overtook the light and we started seeing the first of what would be many meteors to pass. The Perseids emanate from the northeast out of the constellation Perseus. So that was the direction we started looking. However, it quickly became apparent that most of the meteors were falling just over Mt. Rainier which made the show almost magical. Anne and I huddled up on a thermarest, drank a little whiskey I had brought along in a flask, and watched the heavens unfold before us until just after midnight. With our batteries drained we set back to the car.
Neither of us normally hike at night. In fact, I don’t think most people hike at night. But I found the experience to be almost as magical as the meteor shower. The temperature was cool and the enormity of the space was tangible (made more so by the small bubble of light we traveled in). Somehow, it just felt perfect. As we walked we could see the occasional meteor pass above. We could also see the lights of climbers making their way up towards the summit of Rainier, a trail of luminous ants.
We got back home at 3am. We were both tired, but I wouldn’t have traded it for anything!
05
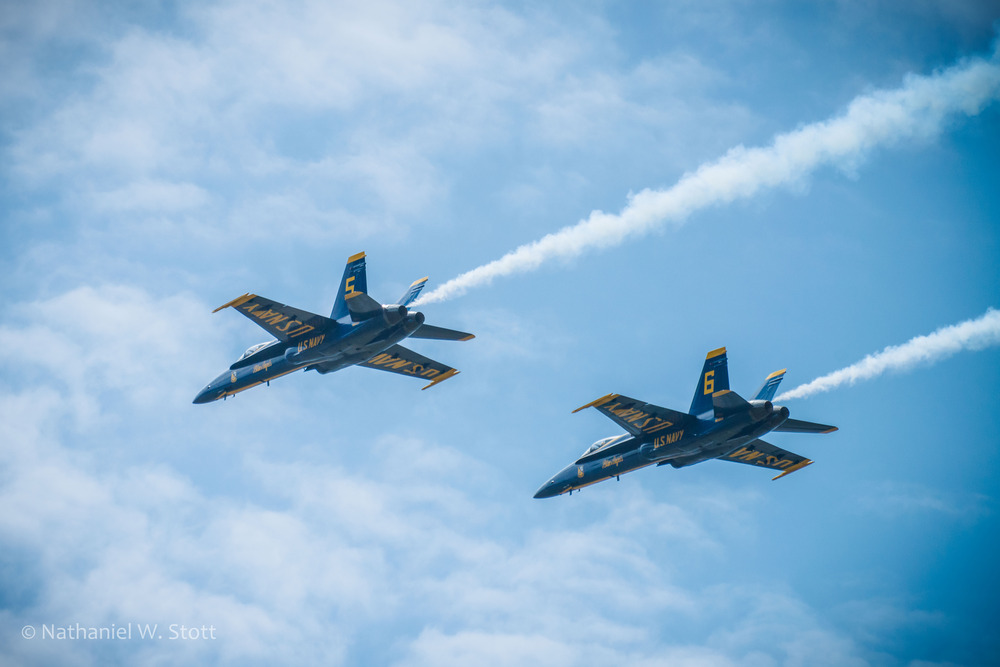
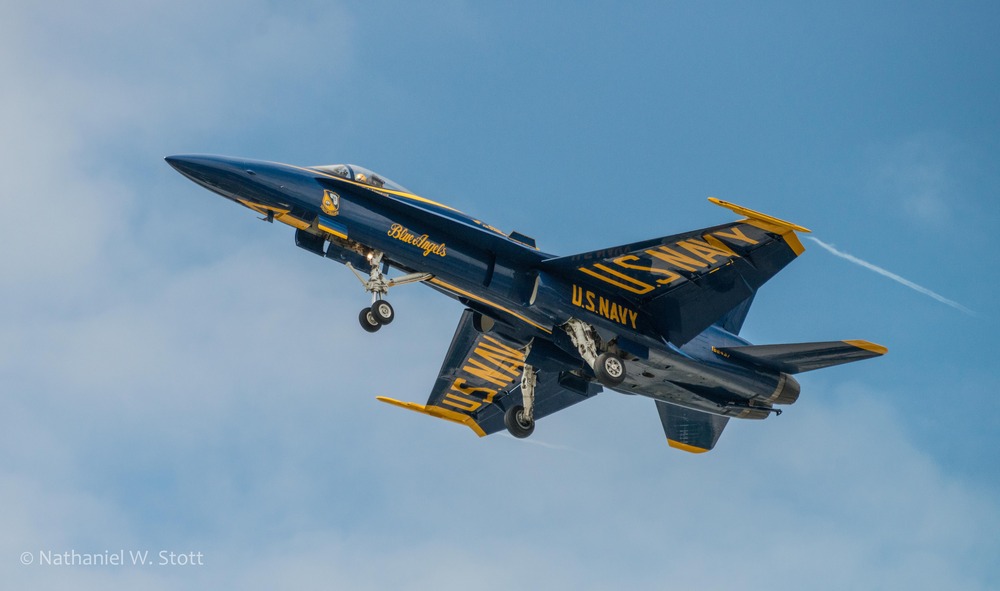
2012My boss (check out his photos here) and I did a quick run to grab some pictures of the Blue Angels taking off and landing for their practice in advance of Seafair. They’re stationed at Boeing field while they’re in town, which has relatively decent access to the north end of the runway as well as a wide vantage at the south end.
We positioned ourselves at the north end, given the prevailing wind conditions, which allowed us to be right under the flight path for landing. Given the speed of the F/A-18, their first pass over the runway was a bit of a shock. There was really only a couple seconds of “warning” the planes were approaching. Fortunately, I’d made sure to check the settings on my camera to ensure I was in the appropriate continuous shooting mode and that the auto-focus system was set to track objects through the frame. For the purposes of this event, it worked perfectly! They made an initial high speed pass then came in one at a time for landing.
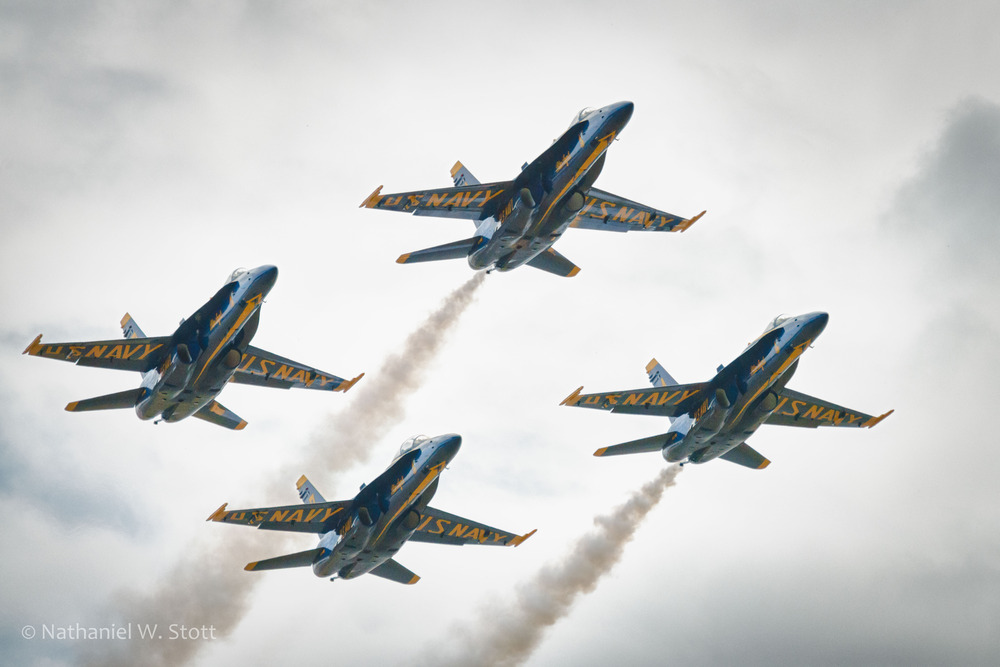
We grabbed a quick lunch and set up for take-off. Whereas landing was just for 5 and 6 (the solo planes), take-off comprised the primary diamond formation (planes 1 through 4) in addition to another two aircraft (I’m assuming 5 and 6, but not sure). We had lots of advance setup time and positioned ourselves again at the north end of the runway in the direction of take-off.
All up, the entire event was a lot of fun but with only several seconds of worthwhile photographic opportunity it was also quite difficult.
15
2012Anne and I grabbed a Living Social deal to stay a weekend at The Adrift Hotel back in December and had a great time so when we saw another deal pop up we were pretty quick to hop on it. The hotel sits virtually on the beach and the area has some good hiking trails, an awesome ocean front boardwalk, and a paved trail that allows you to bike for miles. There’s also some great nearby photography so it’s an all-around win and a great way to unwind after a stressful week. Due to a last minute change of plans, Anne was able to take the week and head to Yellowstone, which left me solo to enjoy the southern Washington coast.
Saturday morning I started myself out with a 12 mile round trip bike trip to Ilwaco to check out the Saturday Market and the harbor. This entire stretch is serviced by the “Discovery Trail,” a paved trail that runs along the ocean front and then climbs steeply over the coastal ridge and back down into Ilwaco. I’d brought my mountain bike, and at times found the trail so steep that I was having trouble both keeping the rear wheel from spinning and the front wheel on the ground. Regardless, the ride was a good refresher for the morning and left me energized for the afternoon.
Having wet my appetite for long exposure photography in Bandon, I focused on more long exposure photography during the day. My plan was to head towards the Peter Iredale wreck in Fort Stevens State Park. That would take me through Astoria (beer, bridges, etc) and then over to the coast for afternoon and evening sunset.
I made my way slowly towards Astoria, generally exploring all the little side roads and ports and stumbled upon the McGowan church right on the side of the highway just a little west of the Astoria Bridge on 101. The church looked to have been restored and there was fresh work done on the fence in front. With the clouds in the sky and the driftwood in front, it made for an irresistible subject.
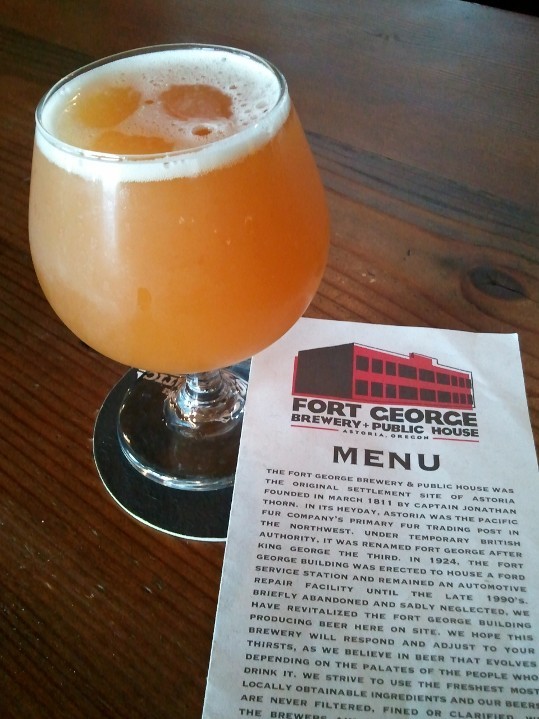
I carried on to Astoria where I satisfied two different hungers. The first was a stop by the Oregon Liquor Store where I was finally able to find a bottle of Rogue Pink Spruce Gin. Since they closed the state liquor stores in Washington and privatized everything, it’s been impossible to find anything. The next hunger was satisfied by the Fish and Chips at the Fort George brewery where I also helped myself to a seasonal mango beer (which was impressively tasty for sounding so nasty).
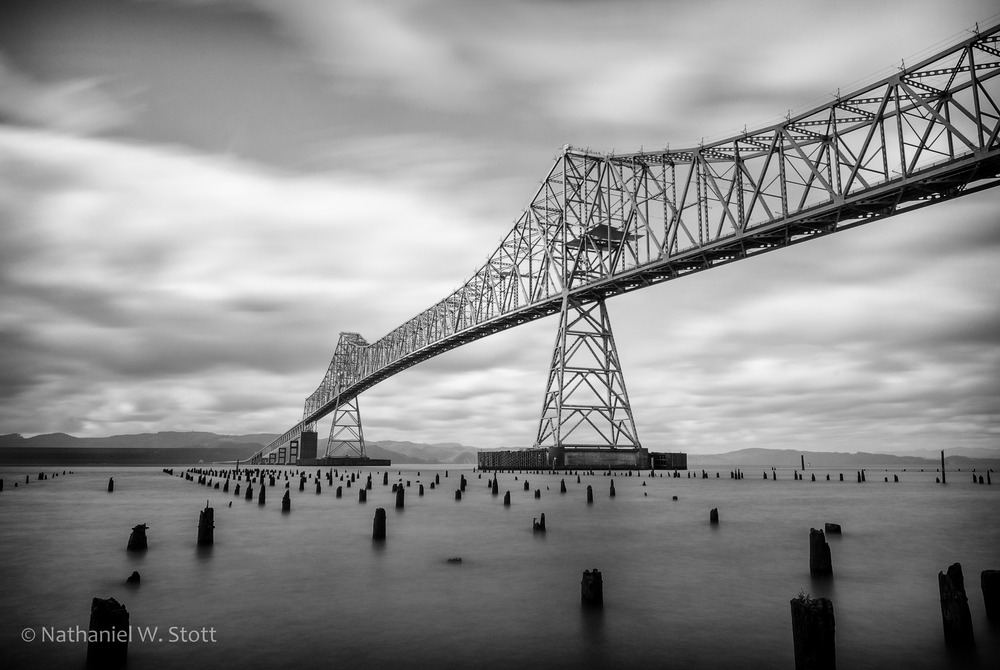
Satiated, I headed for the waterfront to find a vantage point for the Astoria Bridge that would provide a good perspective as well as an interesting foreground. I parked at the Cannery Pier Hotel and walked along the waterfront to the Maritime Memorial.
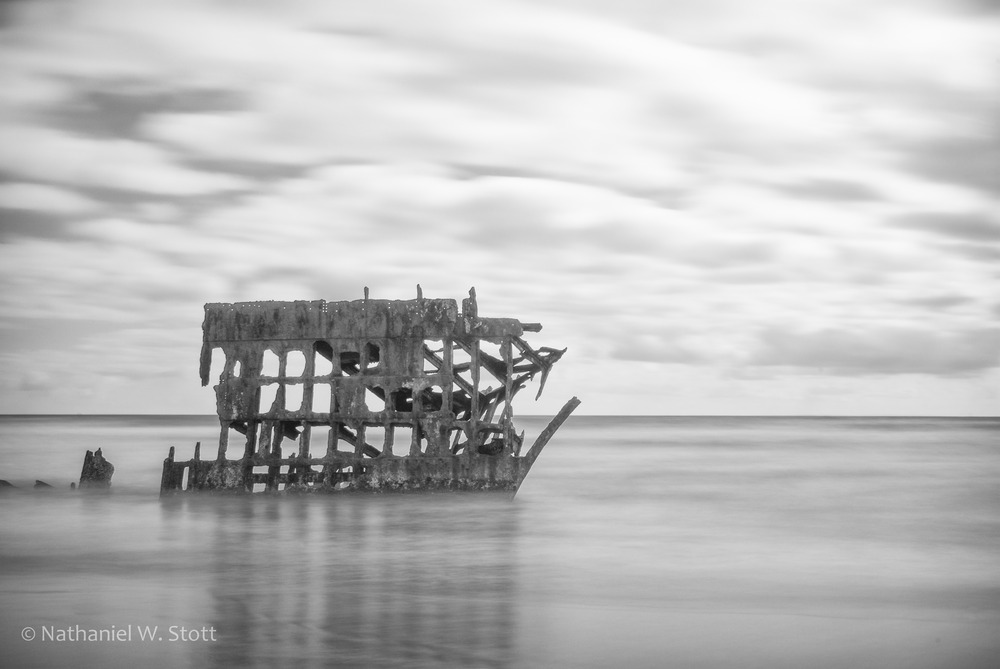
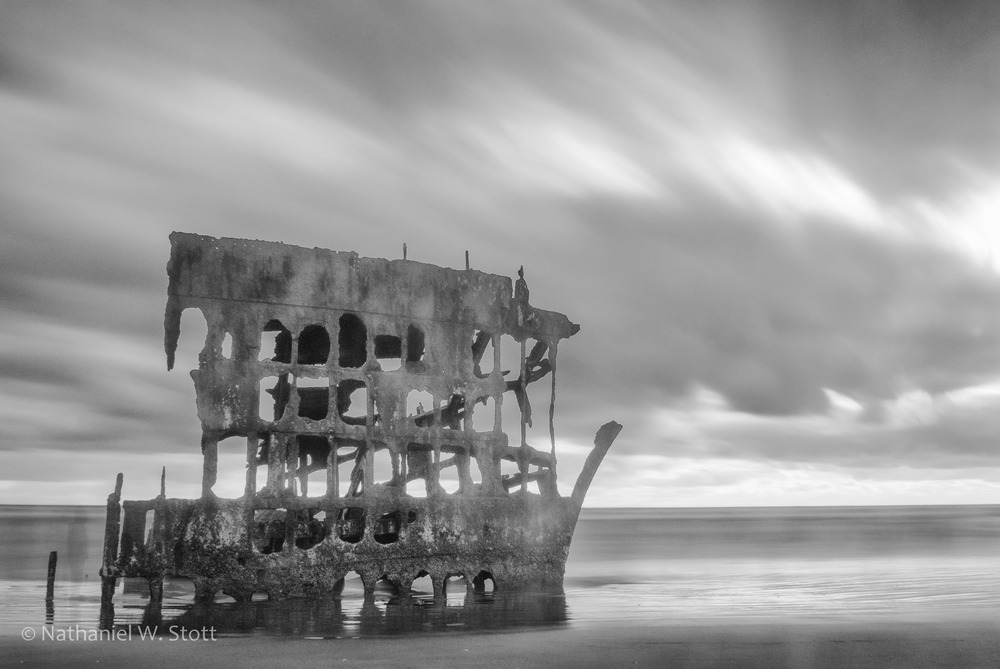
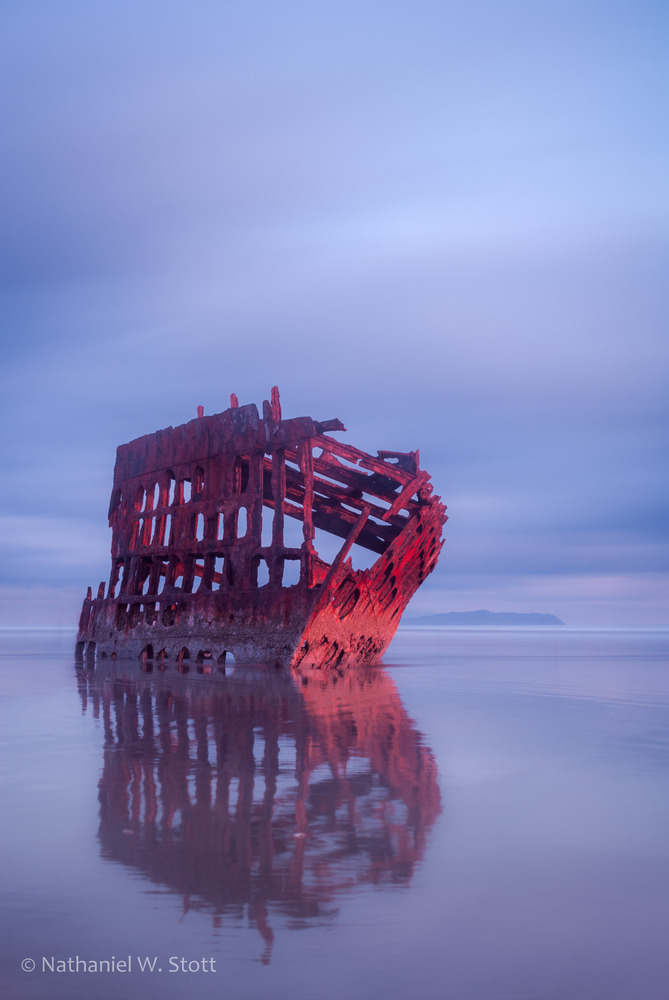
From there, I headed to Fort Stevens State Park and the Peter Iredale. The Iredale is the wreck of a beached sailing vessel that ran aground in 1906. I was interested in trying to capture the wreck in water, so I wanted to make sure I got there before the tide was too far out. The wreck itself is easily accessible, no more than 100 yards from the parking lot so I was able to take my time and wait for the weather and tides to find the “sweet spot.”
The wreck itself is quite the attraction and I was joined not only by other photographers but also probably 20 or so kids who weaved in and out of the wreck as I was taking pictures. Generally, the light wasn’t favorable to photography since it was coming from the ocean side and the wave action was such that I couldn’t get out far enough to catch the sunny side.
However, just before sunset the clouds parted and the tide was by then far enough out to allow for a single image (a three minute exposure) that perfectly captured the mood and the mystery of the wreck.
The next day I woke up feeling crummy, having spent the better part of 3 hours outside in the cold the evening before. Rather than try and force something that wasn’t meant to be, I instead packed up and headed back to Seattle. But I’ll be looking out for more deals to stay at the Adrift Hotel so I can get back to Long Beach, Astoria, and the Peter Iredale.
29
2012Anne and I decided to take advantage of the long Memorial Day weekend to travel to Bandon for some Oregon coastal photography. In general, the Oregon coast is spectacular for its coastal sea stacks and its vivid topography. Bandon especially has a bunch of interesting features that make it spectacular for photography. We knew in advance that we wanted to focus on long exposures so we invested in some 10-stop neutral density filters that would allow us to slow our shutter speeds down during the day. As well, we wanted to experiment with light painting and especially with light orbs.
While Oregon is just the next state south, Bandon is closer to California than it is to Washington so it took roughly 8 hours to make the journey. We stayed at a nice little hotel just directly across from Old Town on 101 called The Inn at Old Town. The place was nice and quiet and provided great value (though the bed could have used some work), especially since we could just walk across the road to grab food and take pictures of the harbor area.
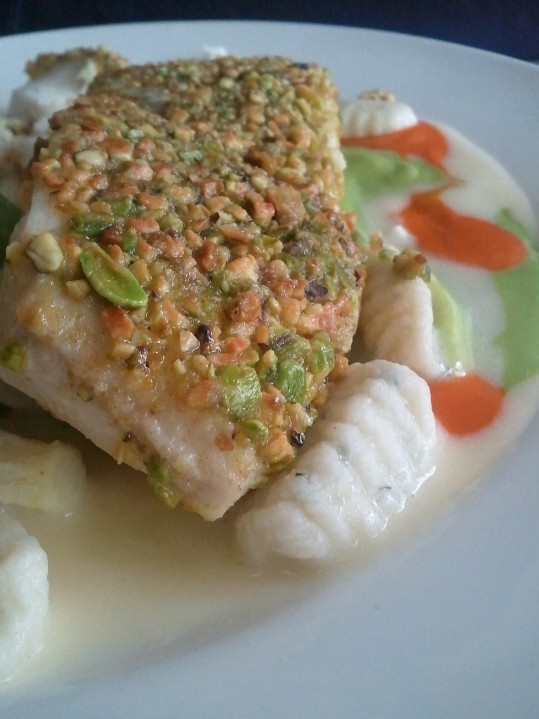
We came into town hungry from the drive and so we jumped across the street to eat at the recommended Alloro Wine Bar & Restaurant. The food and service were excellent. I had a Pistachio Crusted Halibut for my main course and it was probably one of the finest fish dishes I’ve ever had. The place was so good that we wound up coming back during our trip, which is something we rarely do on short trips because we try to get maximum variety.
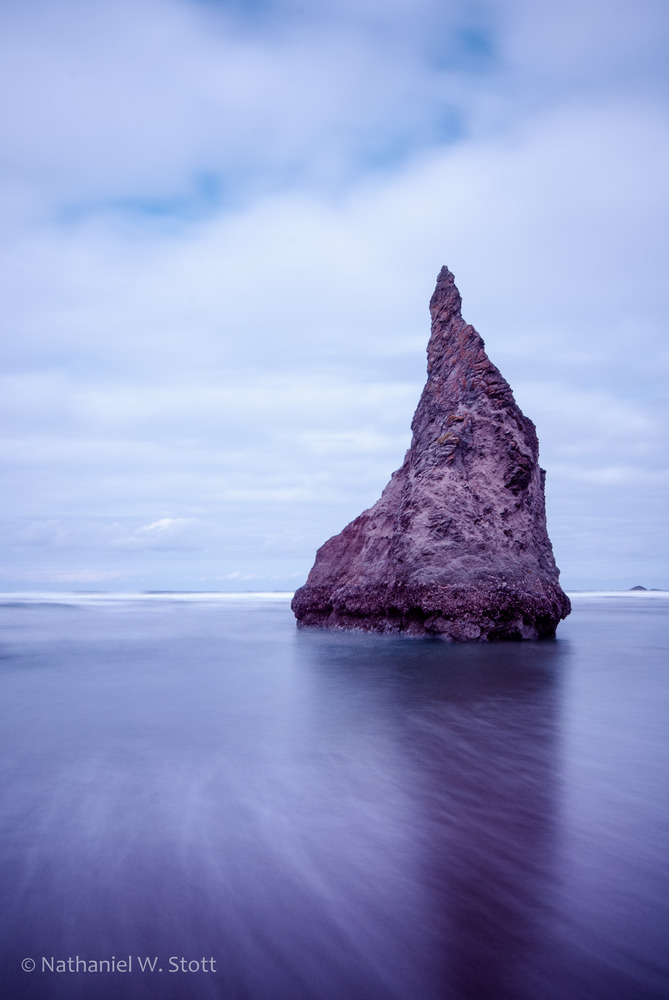
We spent Saturday morning working the Bandon beach sea stacks with long exposures. The tide was heading out, which provided good opportunities to wander in and amongst the rocks and get some of the finer detail. It also allowed us to form a proving ground to help us see what worked and what didn’t with the longer exposures. We both had rubber boots, which allowed us to set up in the surf.
This is a tricky business, because every ten minutes or so a larger wave would come in that would require a retreat to higher land (Pro Tip: I missed one of these and wound up with a boot full of water. Always keep your eyes on the water.). Also, these larger waves tend to cause your tripod to sink into the sand at each turn, and with long exposures that can lead to blurred subjects. The trick is to get your tripod fully embedded by pushing it down until it hits firmer sand deeper down as a wave passes and liquefies the top layer.
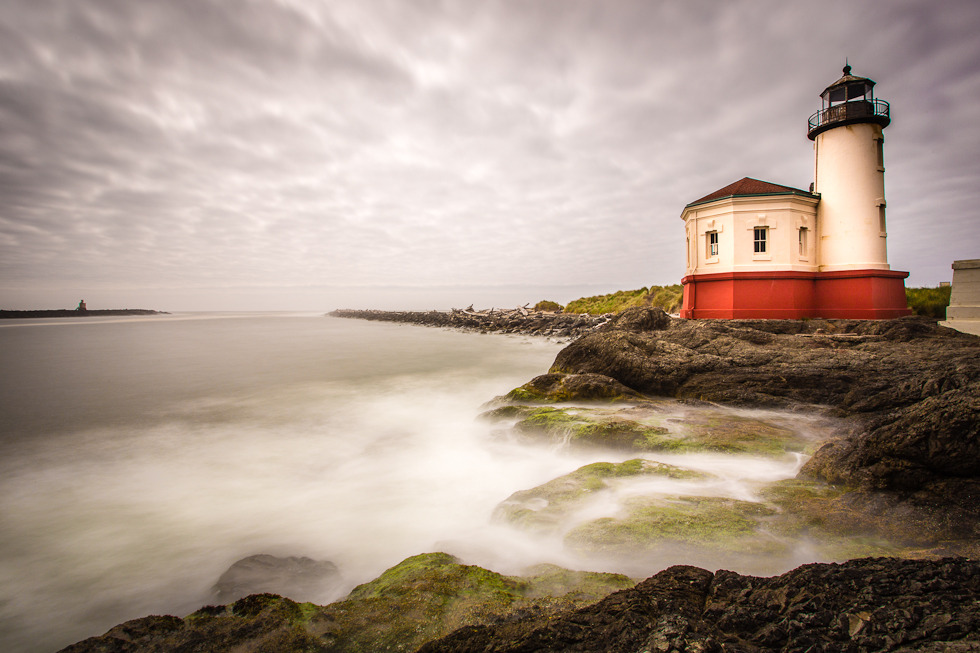
In the afternoon, we spent time at the Coquille River Lighthouse. While the light isn’t as large as some, it has an interesting octagonal keeper’s house and rich colors, which make it impressive in its own right. As well, it’s possible to get out on the rocks and shoot back at the light, so you can grab some longer shots that incorporate the waves coming up the mouth of the river.
(photo by Anne Archambault)
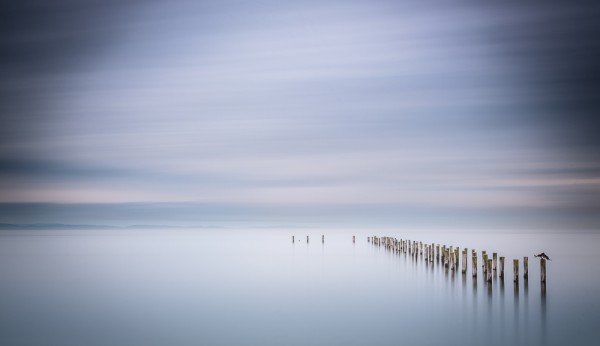
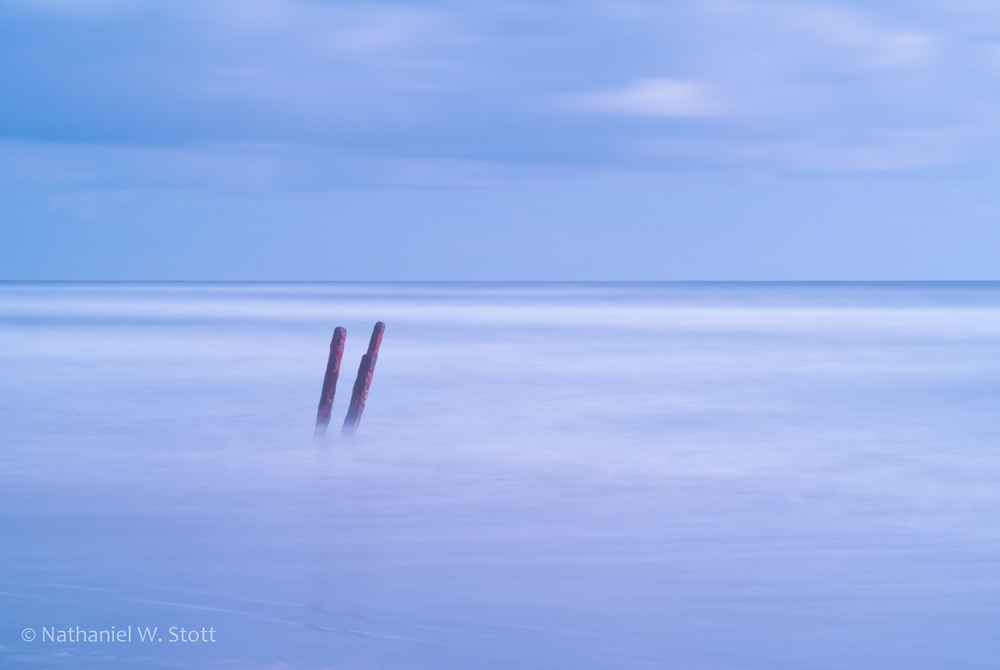
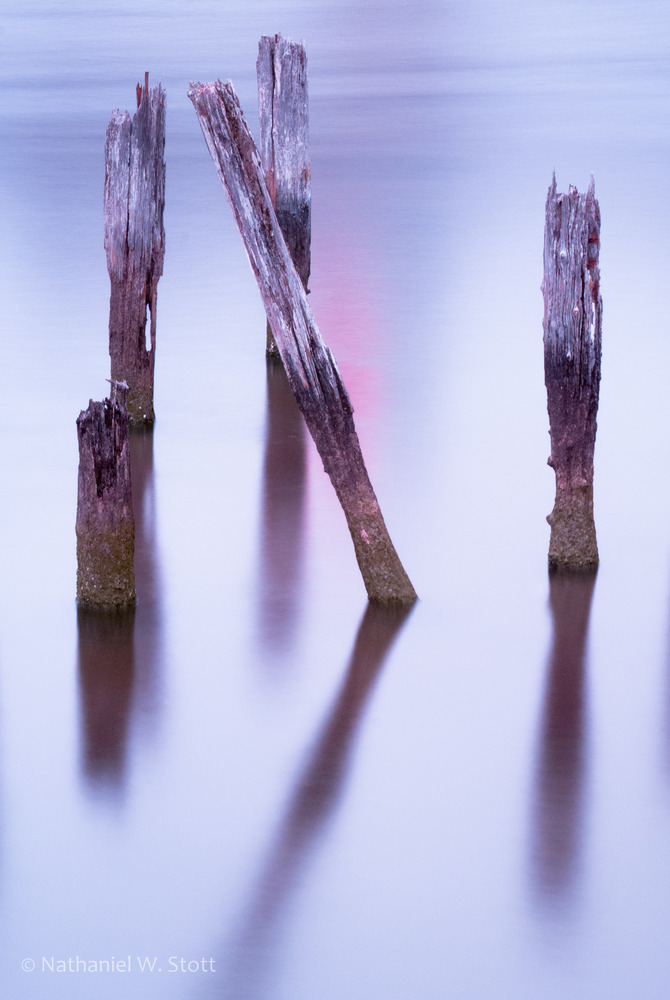
We also spent time working on shooting various pilings in the water. I’ve always had great interest in the somewhat ghostly appearance of long exposure images of lone pilings, so we took advantage of the waning light to really work some of these subjects before dinner.
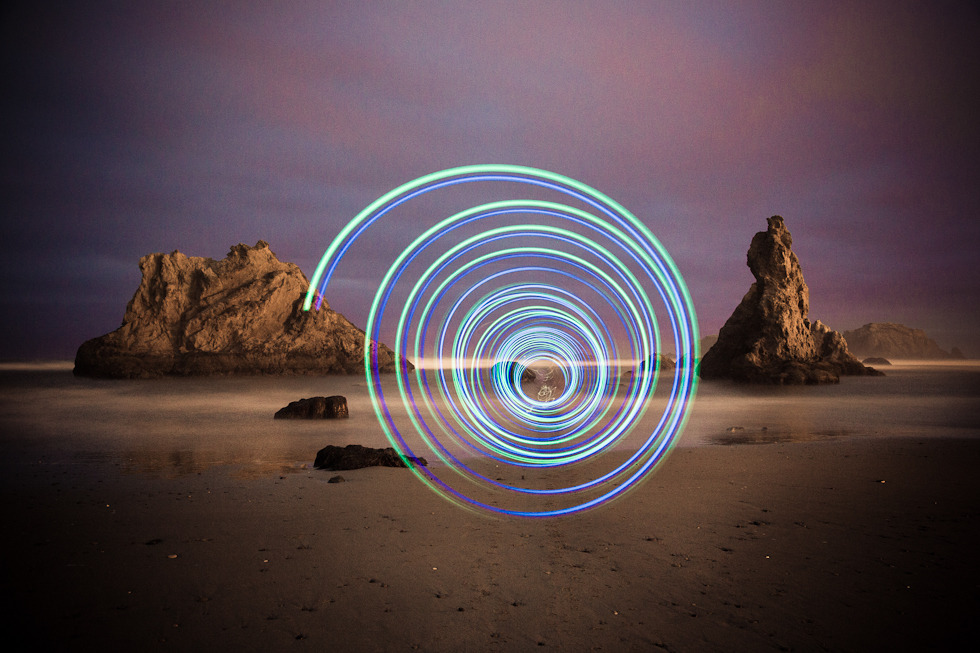
Finally, we closed out the evening with some night shots of orbs on the beach. We’d practiced making orbs at home before the trip and had rigged up a strand of portable LED Christmas lights we’d purchased for a Christmas camping trip to Death Valley several years ago. The basic idea is to bundle most of the lights in a wad near the end of the strand so you have a concentrated mass of light. You can also add color to the bundle by adding cinematic gel (or some other translucent colored substance). You also need to black out any remaining lights on the strand by covering them with black duct tape (or gaffing tape if you have it). With this setup and a little practice, you can start creating light orbs pretty much anywhere you can get long exposure times.
(photo by Anne Archambault)
Sunday we spent the day further afield. Our intent was to do one of the various hikes around the area and also try and capture some tidal pools for macro work. We drove south to the Cape Blanco lighthouse and spent time there working the various angles around the light and also spent time doing some close-up work on the iris that grow in this particular area.
We decided on the Blacklock Point hike (about halfway back to Bandon from Cape Blanco) and we made the short hike out to the point just after noon. The path was a little soggy, but most places with standing water also had boardwalks or side paths that avoided getting wet. We’d packed a picnic lunch and so we were able to enjoy a wonderfully private lunch overlooking the Pacific Ocean. Afterwards, we scrambled out to the bluff and spent time making images and taking panoramic pictures.
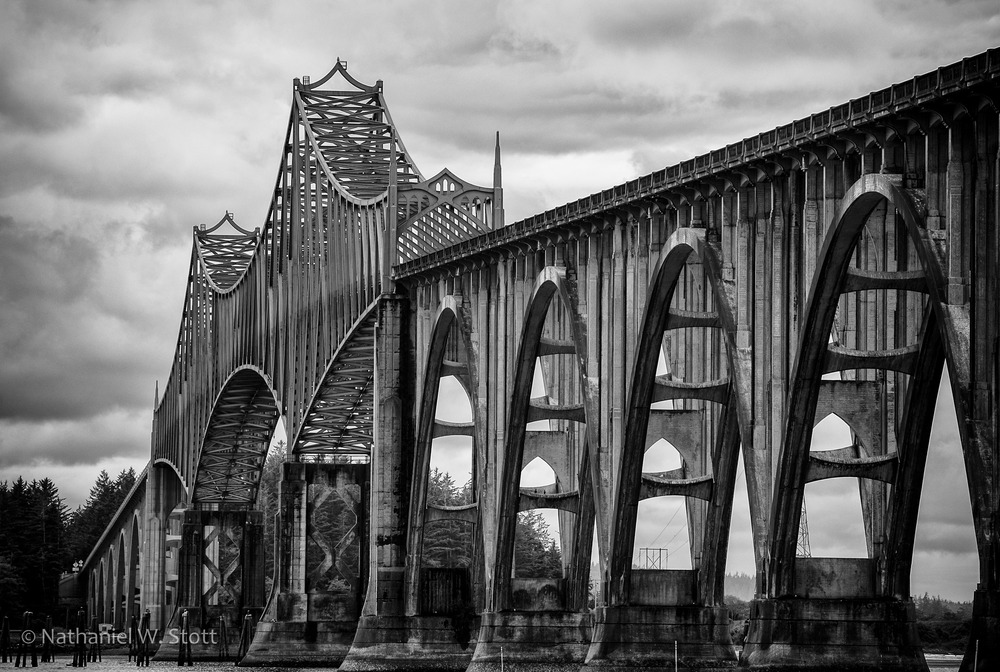
The final stop of the day was the McCullough Bridge up in Coos bay. I’ve been fascinated with the bridges of highway 101 since I saw a TV special on them some years ago. In Oregon especially they have wonderfully elegant spans. We took up position on the Trans-Pacific Parkway that led to Horsefall Beach as the light started to fad and the rain started to come down. It turned out to be a pretty bad vantage point, too far away to provide perspective I was after.
On Monday, we needed to head slowly back to Seattle. In order to try and dodge a little traffic, we decided to spend the morning in Bandon and then come back in the evening so we were able to spend Monday morning on the beach, again working the sea stacks against low tide. This allowed me to learn from a bunch of the mistakes I’d made on Saturday morning and better tune my compositions. We also had hints of blue sky, which also helped to set the images apart from the previous day.
Since we had to return via Coos Bay, I was also able to give the McCullough Bridge another attempt. This time I found a small access road just under the bridge on the north approach (off East Bay Drive) which provided the composition I was looking for. Low tide was mandatory to gain access to the beach just east of the bridge without getting wet. This allowed for the perspective I was really after the day before.
Our last stop along the coast before heading inland to I-5 was Thor’s Well. You can see excellent images of this on Flickr. Anne and I didn’t hold high hopes because we weren’t going at the right tide nor were we going at sunset. While I was able to get some images of the water draining into the well, I was also able to conclude that the best images of this location involve significant risk to both photographer and equipment! To be sure, it’s a truly awesome location, and I hope to come back and do more photography around the Yachats area of the coast.
