May
20
2013Anne and I concluded our trip to Iceland with a day trip to the Snaefellsnes Peninsula. Famously, the Snaefells Volcano is where Jules Verne set his classic “A Journey to the Center of the Earth”. Our adventures were somewhat less epic but I think no less fun (and probably easier on the blood pressure).
The peninsula is an easy (albeit long) day trip from Reykjavik and can be done via numerous tour agencies or through a private car rental. Anne and I opted for the car rental option and we made the trip with some friends from the photo tour. Despite the winter weather, we had no problems with the roads or the mountain passes (partially because rental cars in Iceland are equipped with studded tires during the winter).
We set out with several specific targets in mind:
- Kirkjufell
- Búðirkirkja
- Arnastapi
- Lóndrangar Lighthouse
Since we wanted to save Kirkjufell for sunset (and hopefully auroras), we started at Búðirkirkja and worked our way around towards the tip of the peninsula before backtracking and heading over route 54 to Grundarfjörður.
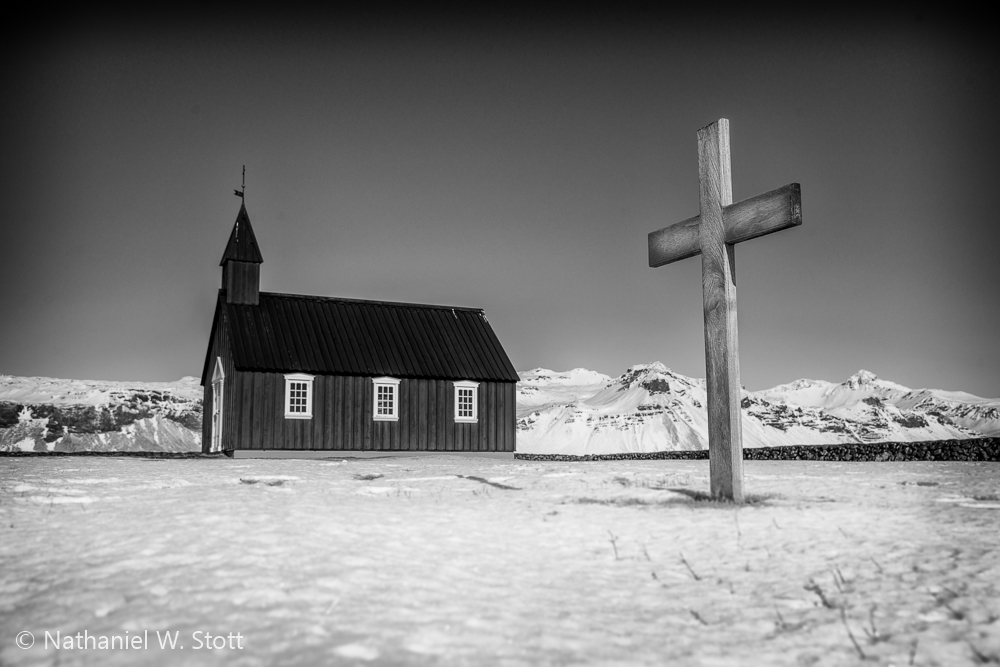
Búðirkirkja
Búðirkirkja is a small church that is notable because of its stark black color. It’s a simple structure that juxtaposes well against snow draped Snaefellsjokul.
On arrival, we were greeted by a small bus of Japanese tourists. Normally, running into any bus of tourists would not be a cherished event but in this case one of the tour participants had hand crafted a string of kites and was flying them over the church. They invited us to take turns flying the kites.
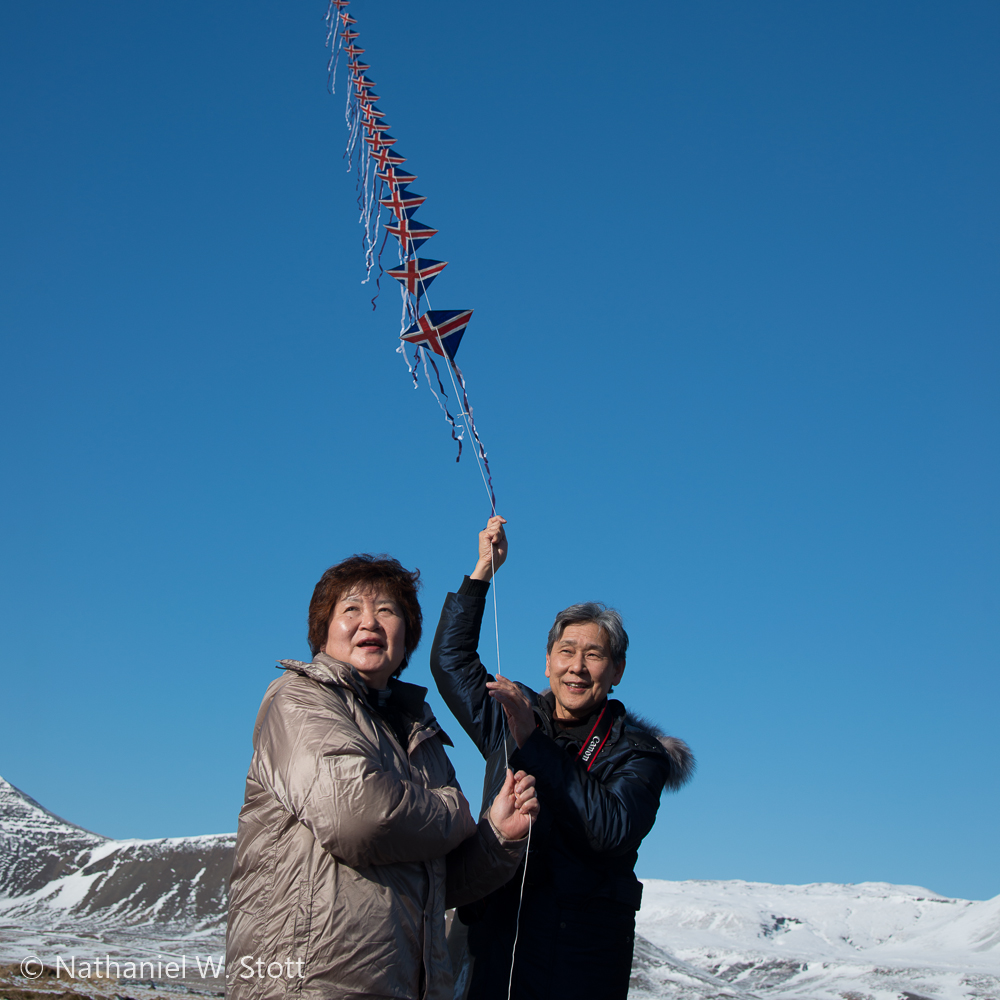
Pictures were taken all around of people flying the string of small kites, each kite with the colors and insignia of the Icelandic flag. It was a unique moment and an absolutely unique event.
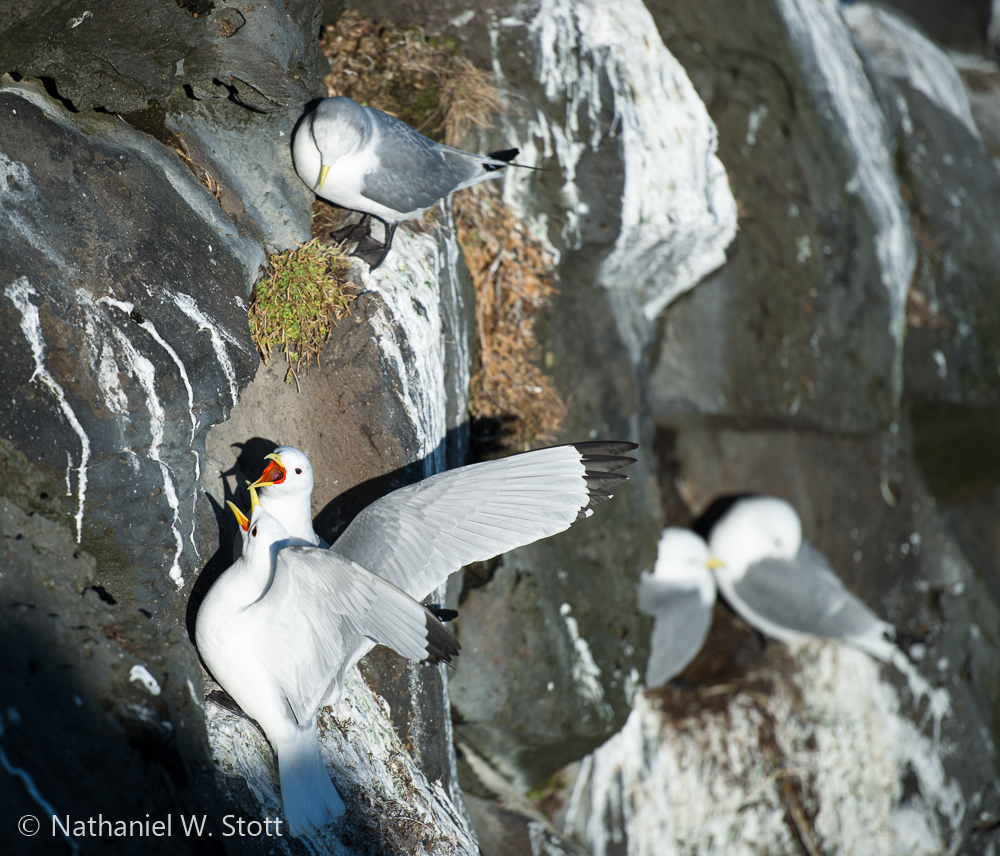
Arnastapi
Arnastapi is a small fishing village that has a wonderfully secluded little harbor and a nice walking path around a series of coves. The coves serve as a rookery for nests that line the cliffs with an abundant array of bird life. We sat for a long time watching the mesmerizing aerial dance as fulmars flew about the coves against a backdrop of wonderfully clear blue north Atlantic water.
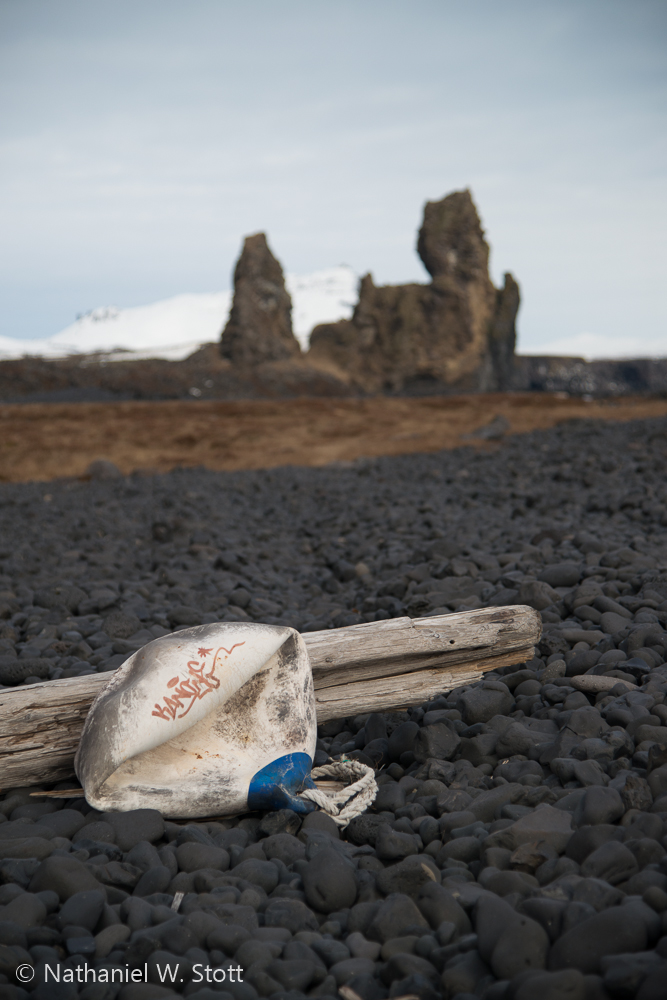
Lóndrangar
Lóndrangar is home to a pair of ancient volcanic basalt plugs that sit just on the coast. There are a couple access points but the “best” drives down to a lighthouse that overlooks an old fishing port. In addition to the sea stacks, the site has several small buildings that are photographically interesting along with beaches and various ocean debris that make for interesting foreground elements.
Churches
While not explicitly on our sight list, we also took the opportunity to photograph several additional churches along our route. The simple lines and iconic landscape make these churches hard to pass by without stopping.
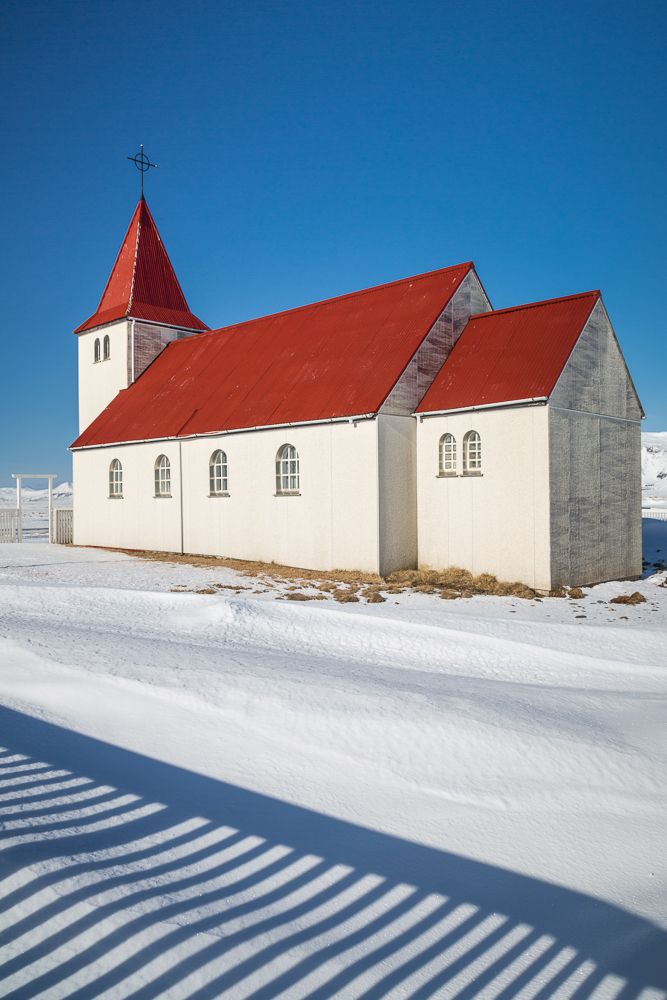
(photo by Anne Archambault)
Kirkjufell
We concluded our tour of the peninsula with a stop at the iconic Kirkjufell Mountain and waterfalls. This vista has rapidly grown in popularity and is now common on photo sites like Flickr. Regardless, we hoped that we’d be able to harness sunset or an aurora and come away with some interesting images.
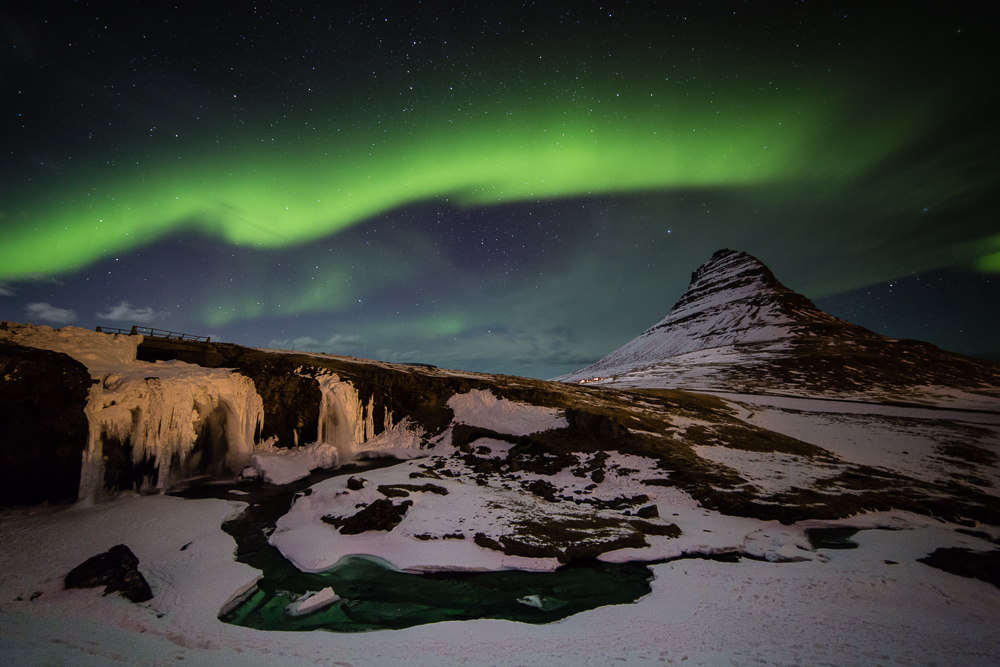
(photo by Anne Archambault)
While we weren’t rewarded with a magical sunset, we did manage to catch the aurora as overcast skies parted about an hour after sunset.
Summary
The Snaefellsnes Peninsula was a perfect ending to a great vacation in Iceland. It also allowed us to utilize a lot of what we’d learned during our week along the south coast and apply it to our photography. We were able to spend time with new found friends and see the aurora for one last time over an iconic Icelandic mountain. My only regret for the trip? We didn’t spend more time.
May
13
2013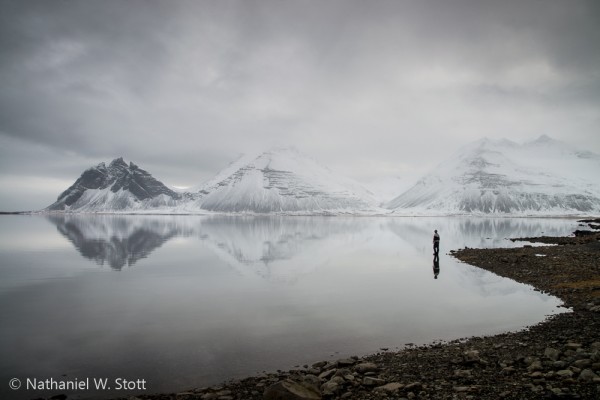
It’s hard to go anywhere in Iceland without feeling the power of water. Water shapes the landscape through rivers and waterfalls. It scours mountains through massive glaciers. Water is an epic force and it’s truly everywhere to behold in Iceland.
Waterfalls
It’s literally impossible to drive and not see waterfalls rushing over cliffs near the road. On our trip to Iceland we visited some of the most well know waterfalls along the south coast: Selfoss, Gulfoss, Oxararfoss, Seljalandsfoss, and Svartifoss.
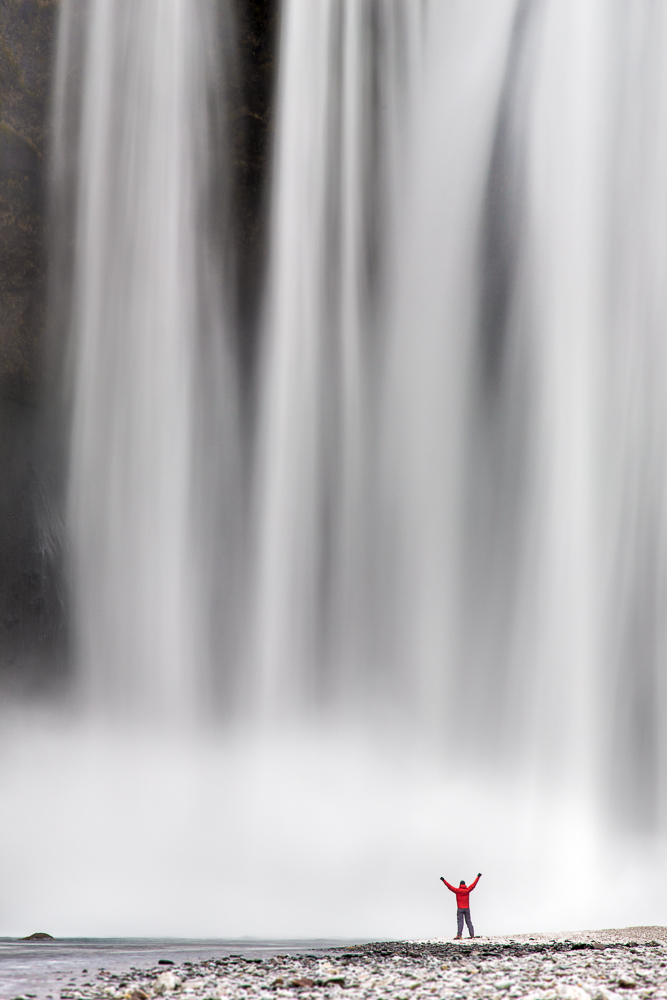
(photo by Anne Archambault)
Of those mentioned, Gulfoss and Selfoss are perhaps the most well-known but may be the most difficult to photograph well. Both tend to lose the sense of scale without an appropriately positioned person for scale. Of course if you do head there, be sure to take colorful rain gear which will not only provide needed protection from the spray but color for other photographers!

Of the waterfalls we visited, I think I most appreciated the time we spent photographing Oxararfoss in Þingvellir National Park. Combined with ice it provided myriad compositions for hours of enjoyment.
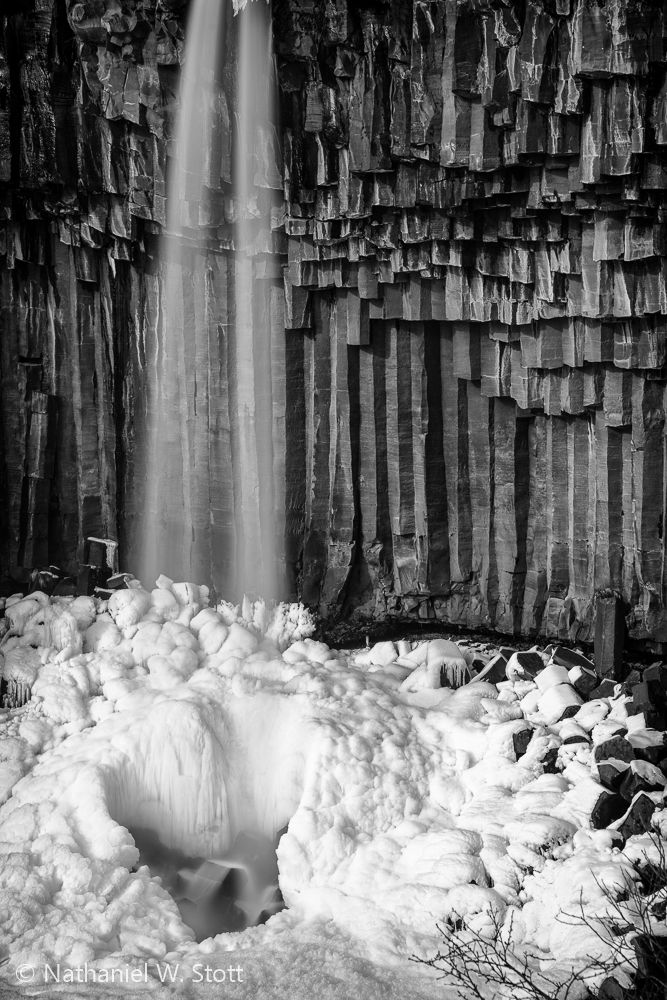
Similarly, the short hike to Svartifoss paid off with striking basalt columns and a generally wonderful scene. I found capturing the essence of the place to be difficult, but it was a magical place to be and I’m truly sorry I missed it on my first visit to Iceland
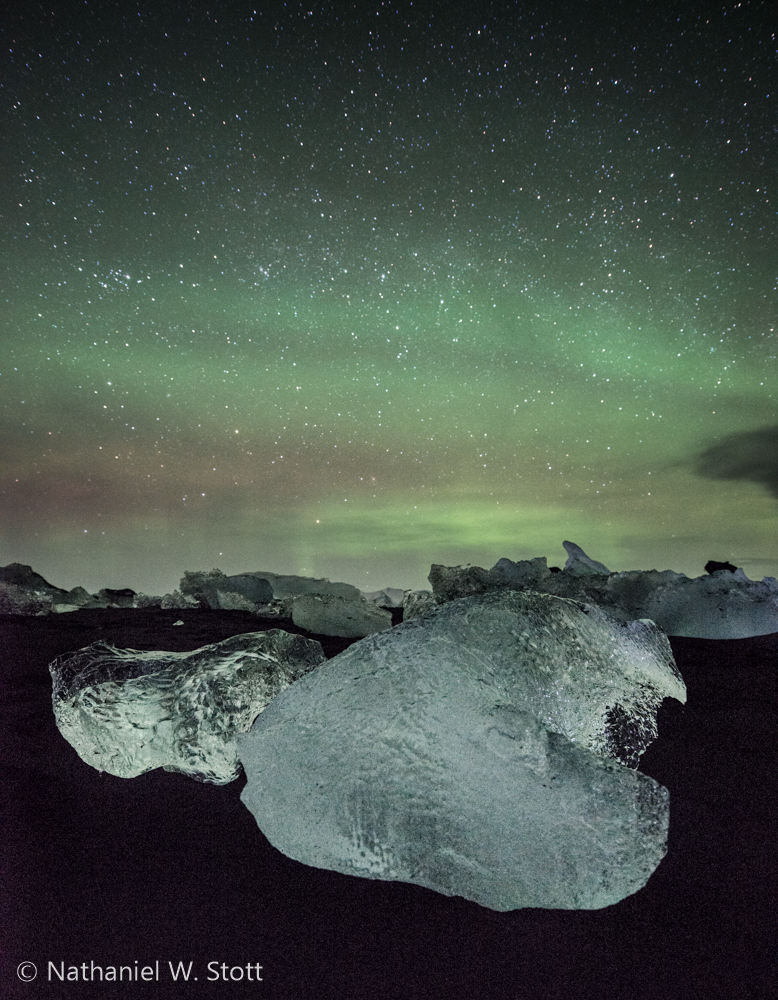
Icebergs
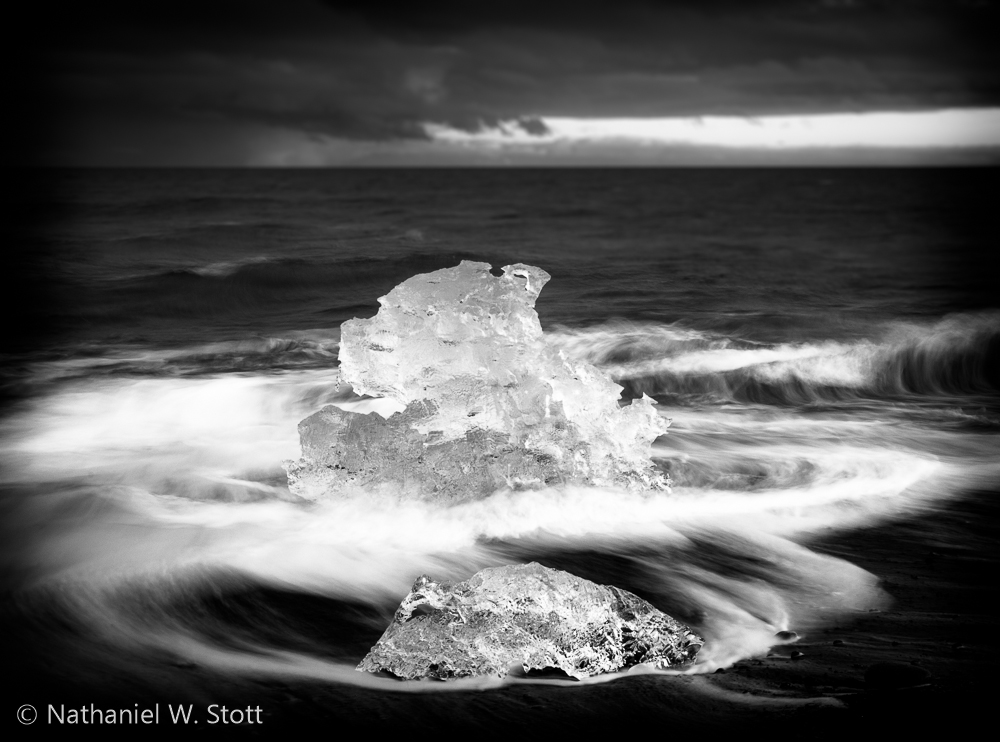
Of course no trip to Iceland is complete without a trip to the iceberg lagoons around Jökulsárlón. The lagoon is stunning and provides a double whammy, icebergs in the lake on the lagoon side and icebergs on the beach on the ocean side.
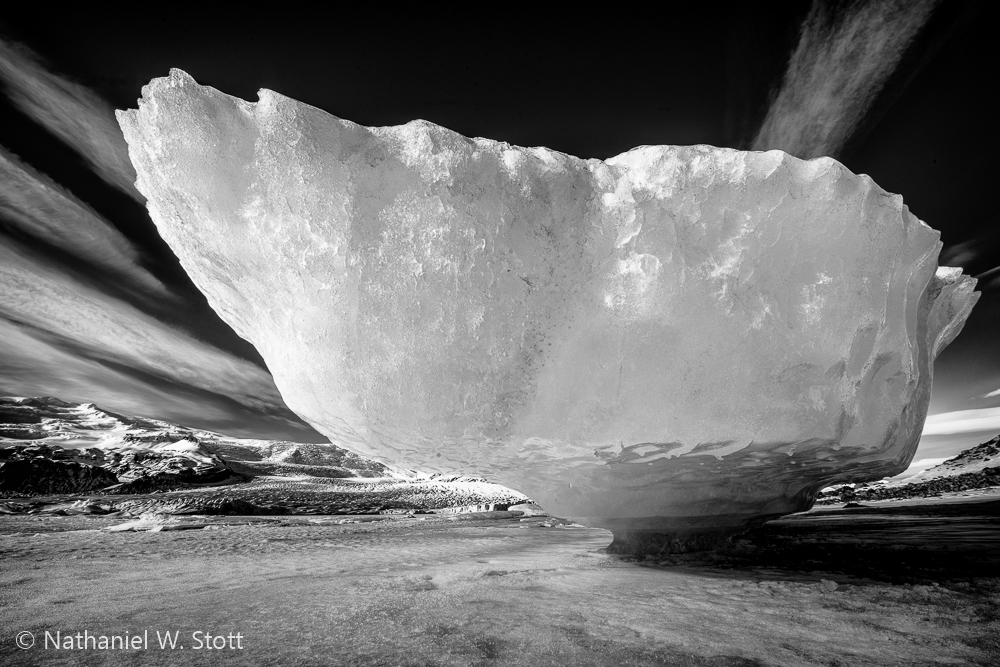
While we certainly spent time photographing the icebergs in the lagoon, it would be a mistake to ignore the beach. I found the beach to have wonderful compositions at both morning and evening and was a highlight of the trip.
The Ocean
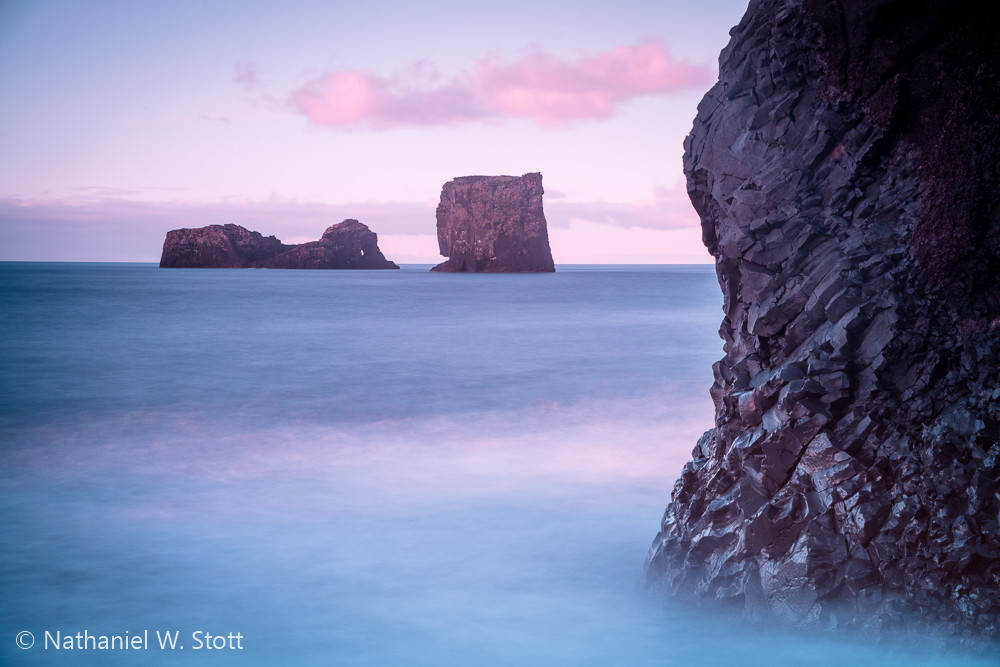
The ocean provides a ton of opportunities to play with wonderful shorelines and offshore sea stacks. Around Vik there are several sea stacks that provide dramatic scenes against black beaches. I found the promontory at Dyrhólaey to be my favorite location in the area. It afforded some outstanding views of sea stacks, the coast line, and the lighthouse.
Of course, these are only a handful of the wonderful “water based” locations along the south coast. These are indeed highlights, which was evidenced by the sheer number of tourists and photographers that we saw at these locations. If you’re going to visit, I’d recommend planning time to check them out in either early morning or late evening light. It will help you avoid the day tours from Reykjavik and also allow you to capture the incredible beauty these places have to offer.
Apr
27
2013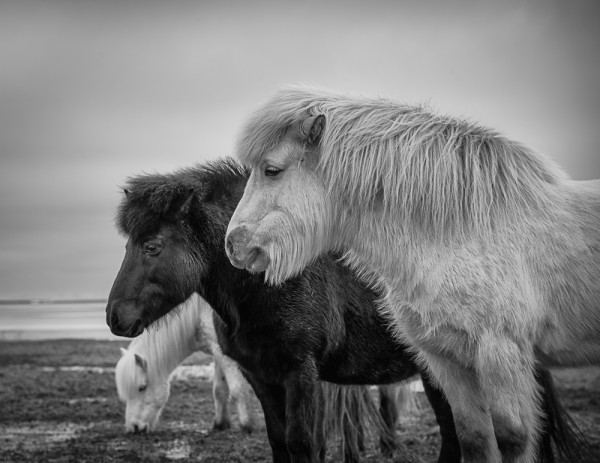
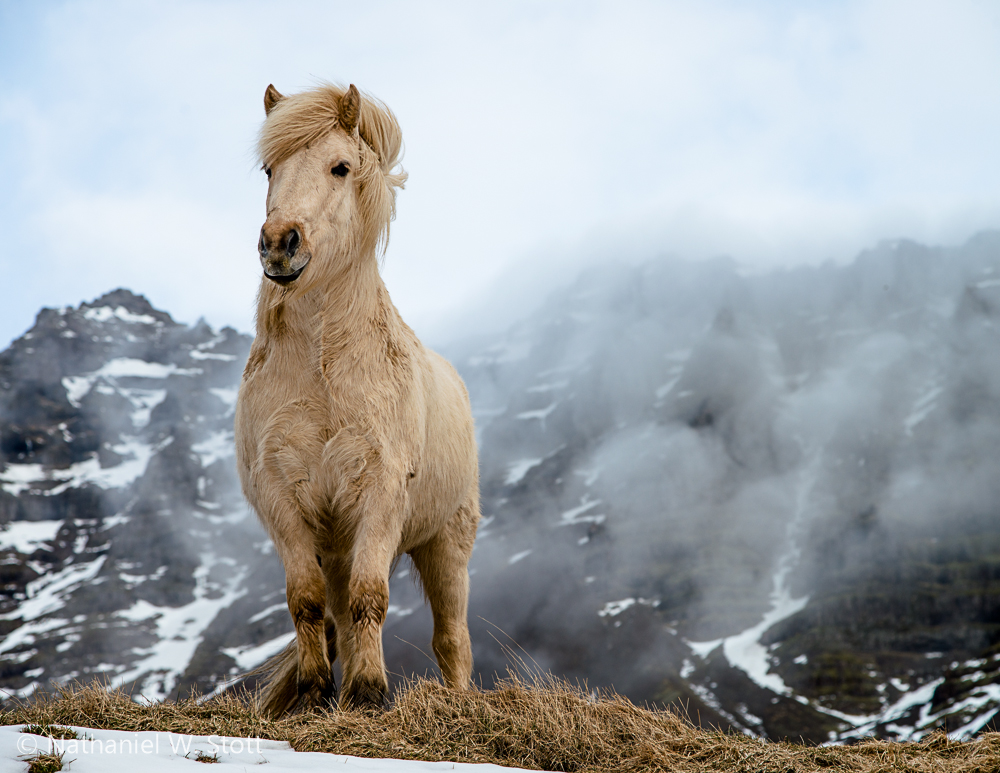
The Icelandic horse is one of the more iconic aspects of Iceland. Dating back to the 9th and 10th centuries, these horses are a distinct breed to the island and the only type of horse that’s allowed on the island. Even Icelandic horses that leave aren’t allowed to return for fear of disease.
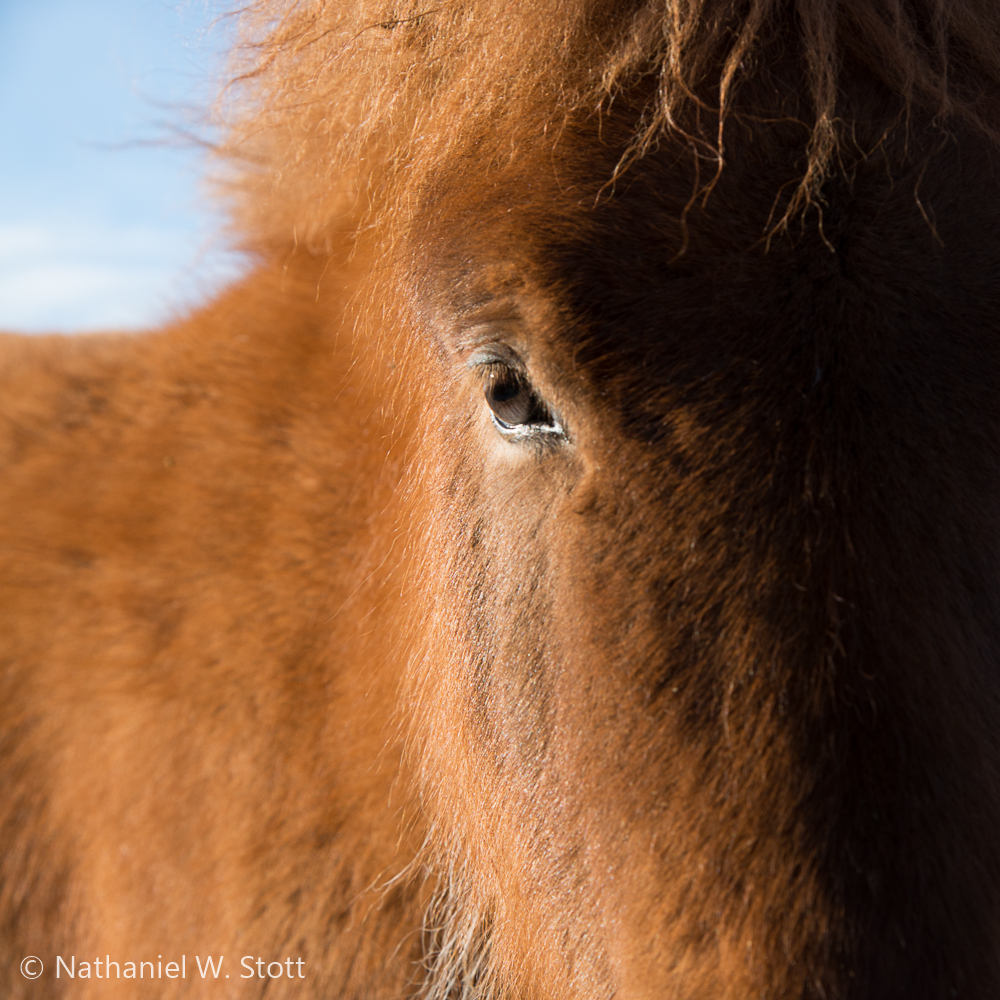
The Icelandic horse has a wonderful personality. They are naturally playful, good tempered, and are simply a joy to be around. Stopping by any pasture and hopping out of the car will almost certainly result in horses coming over to greet you and seek your undivided attention. More intrepid visitors can jump the fence and interact with the horses without any divide. I was initially scared to “jump the fence” and stroll into the pasture, probably because a similar act in the States would almost certainly result in a verbal barrage if not an actual volley of gunfire. However, the people of Iceland are far more even tempered about such things and you may even find that your foray into pasture paparazzi may net interesting conversations with locals.
Once committed to the pasture, I was immediately surrounded by horses seeking attention or just otherwise inquisitive of me, my camera, and my pack. Licking and nudging wasn’t uncommon, so expect that you may get a little horse snot on you! At one point, I had no fewer than four horses surrounding me. The horses get so close and are so inquisitive that it’s a challenge to frame good shots. I often found myself backing up to keep the subject in view. Having a companion to keep the horses attention was helpful, so bring friends who love horses!
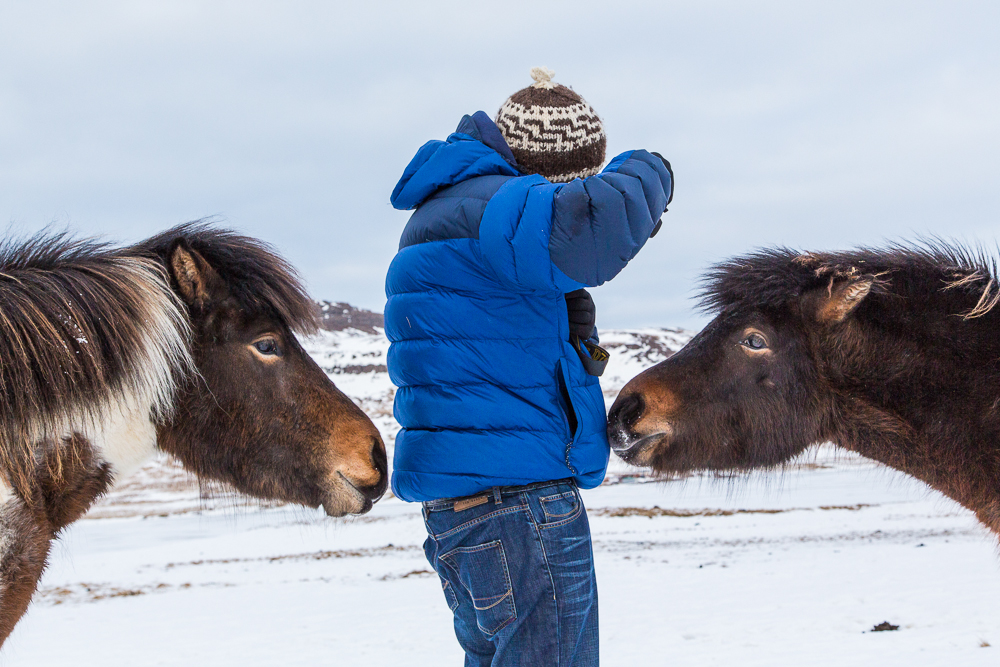
(photo by Anne Archambault)
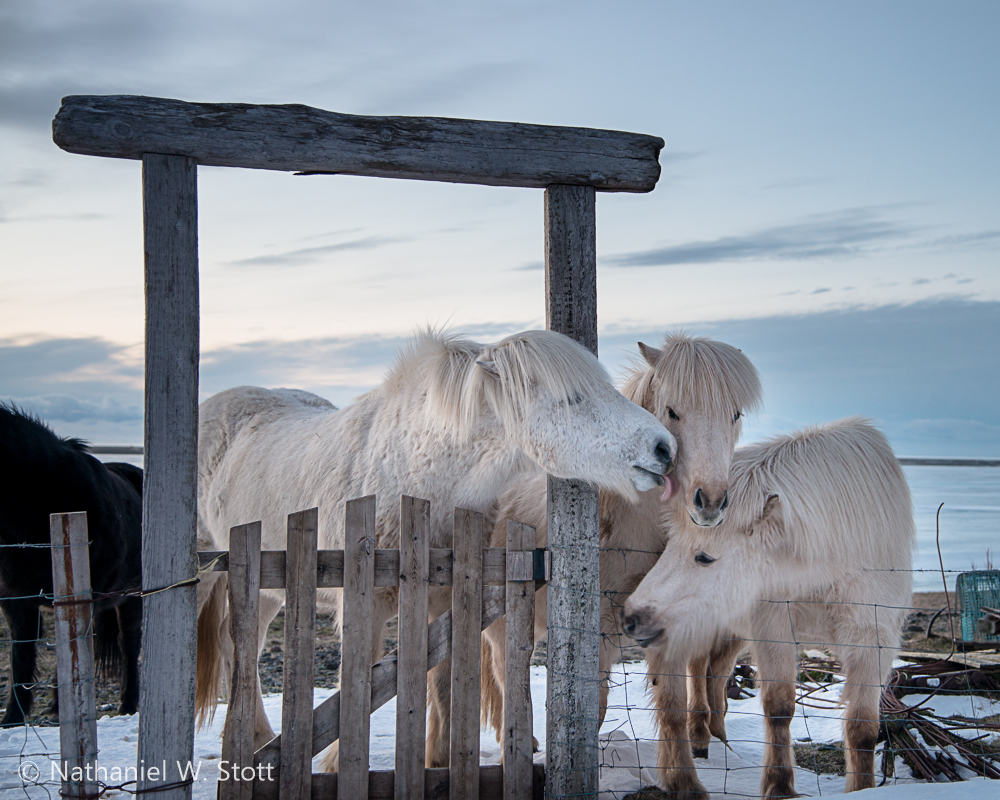
Icelandic horses are also as hearty as they are playful. The weather in Iceland can be brutally cold and is often rainy and windy. These horses come custom built with thick winter coats and a sturdy, stoic disposition that suits the weather perfectly. As such, it’s not uncommon to turn around and find one of the herd striking an almost kingly pose. It’s not hard to see why the ancient vikings respected these horses and incorporated them into Norse mythology.
I’d dare to say that no trip to Iceland is really complete without a stop to see Icelandic horses. They’re simply a joy to interact with and photograph. If Iceland is on your bucket list, don’t let yourself leave without some time in a pasture!
Apr
12
2013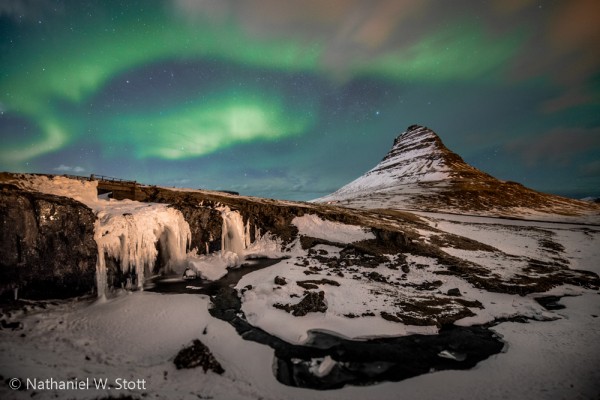
A
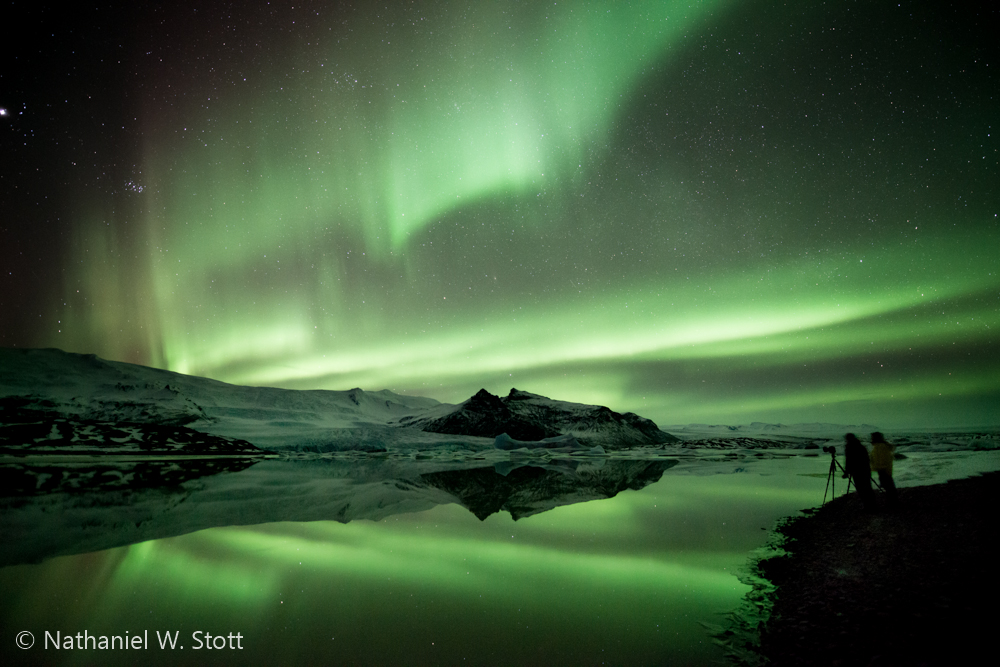
s I mentioned in the previous post, a primary reason for our trip to Iceland was photographing northern lights. I’ve had the lucky pleasure of seeing them multiple times in my life and it’s quite simply a magical experience. The aurora runs in cycles that are tied to solar cycles, with the sun running on an 12-year solar activity cycle. The year also has a monthly cycle with auroras being more prominent in October and March. This year, March 2013 marked the peak of activity in both of these cycles.
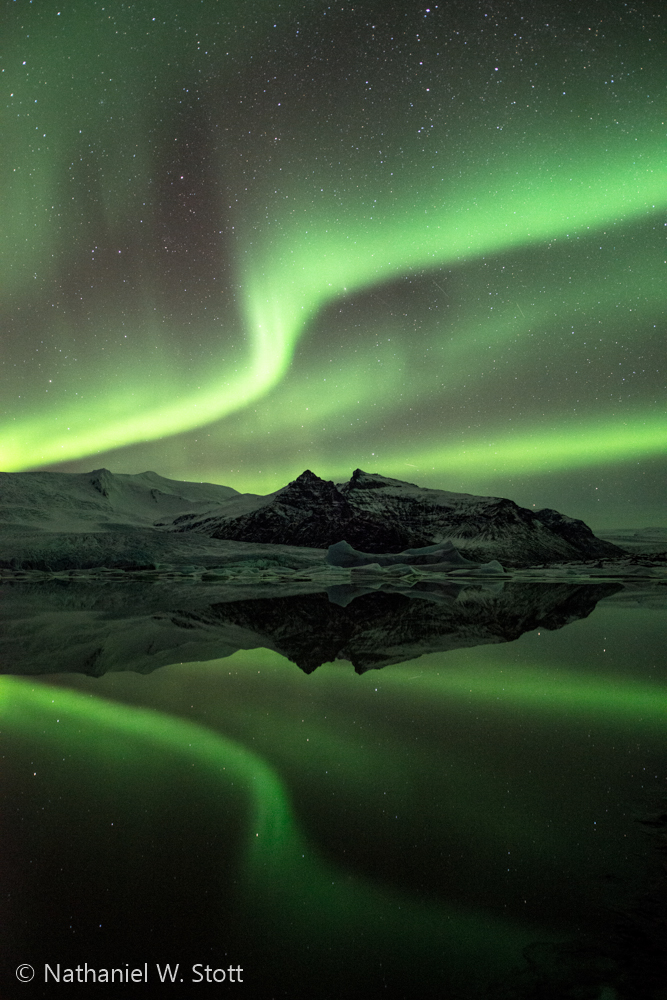
Aurora Photography
Taking pictures of the aurora borealis is a somewhat specialized variation of night photography. Hence, you should have a camera that’s capable of taking photographs in low light and at high ISO values. However, unlike night photography, it’s possible for the aurora to get bright enough that you can take relatively short exposures at reasonable ISO values and still get excellent results. In fact, for active aurora displays you’ll want to have relatively short shutter speeds (~8 seconds or even less) in order to capture good definition in the bands of light.
Anne and I read up quite a bit on the subject and there are a number of excellent articles and e-books on the subject. As a short read, EPhotoZine has a nice article outlining some of the basics: How to Photograph the Northern Lights.
A far more complete tutorial written by Patrick Endres on how to photograph the northern lights can be found on his website AlaskaPhotographyBlog.com. It comes in iBook or PDF formats and we found it to be a thorough reference guide. You can find a link to his eBook “How to Photograph the Northern Lights” here.
As a general rule, the aurora tends to be seen more commonly between 9PM and about 3AM. It can also have brief periods of intense activity so you do need to be ready to click the shutter at a moment’s notice. This means setting up your tripod and camera and then waiting patiently for the right conditions.
You can check space weather conditions at popular sites like Spaceweather.com or the OVATION aurora forecast. There are also numerous apps that allow you to see the planetary Kp as well as aurora probability ovals.
Cold Weather Photography
Of course, if you’re taking pictures of the aurora then chances are you’re in a cold place, which brings with it another set of photography challenges. You’ll want to get pretty familiar with operating your camera in the dark, by touch, and with gloves on. All while trying to stay warm!
There are a lot of simple things to think about, but here’s a short list that was helpful to me:
- Know your camera controls by feel
- Keep a headlight handy, preferably one with a red filter that allows you to keep your night vision
- Dress warmly. The old adage about dressing in layers doesn’t really help much in the cold (it’s better for activity). Rather, look for as much loft as you can get. Down is best, but heavy fleece works too. I also had a pair of Wetland Hi-Cut Muckboots that were excellent in keeping my feet warm (they are also waterproof and can keep your feet dry)
- Your head, neck, and face count; get a good hat and neck gaiter. These really help when you’re standing still for hours.
- Keep your spare batteries warm by keeping them in interior pockets.
- Keep your lens covered by a lens cap when not in use to prevent frost buildup.
After shooting, you’re going to want to take care of how you bring your camera back up to room temperature. Take your battery and memory cards out while you’re still outside. Before you come back inside, you’ll at least want to put your camera into your camera bag and leave it there to slowly warm up. In more extreme cold, you may want to go so far as to put your camera in a zip-lock bag with desiccant to absorb condensation and insulate as best you can so it comes back to room temperature slowly.
Composing the Scene
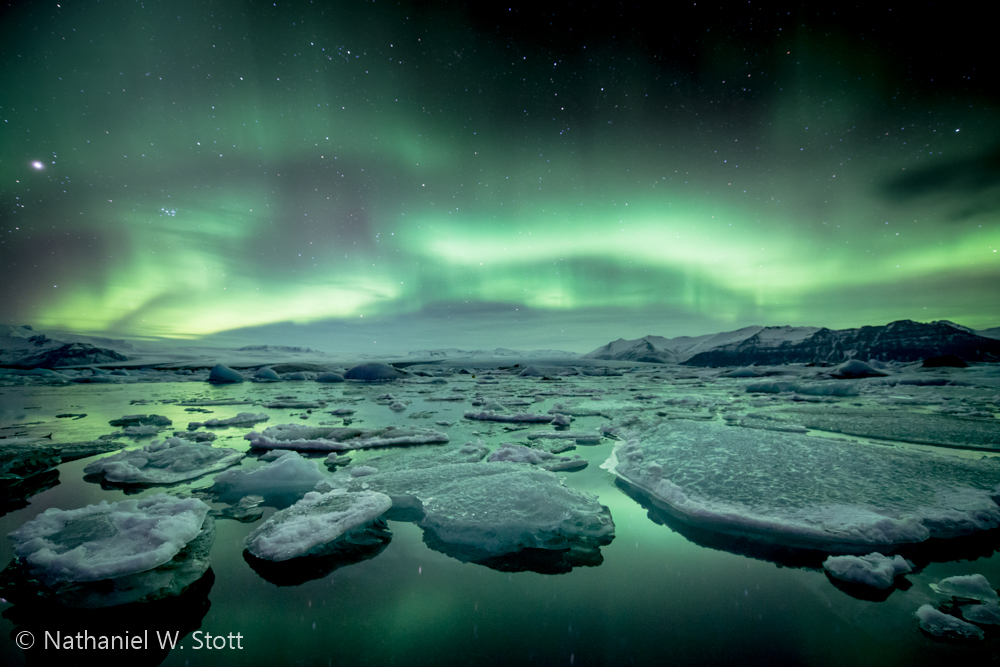
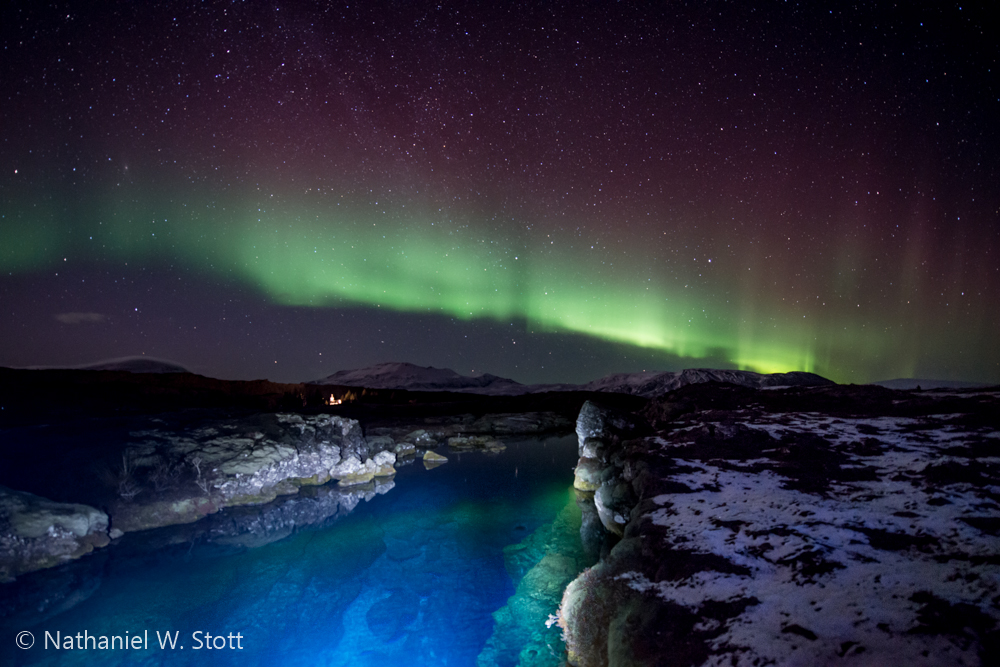
Composing an interesting scene for aurora (or star) photography is the real challenge. There are a ton of pictures out there than show the aurora but don’t have interesting foregrounds or good layering (and I’m certainly guilty of this as well). However, when you’re trying to take good pictures of the aurora finding an interesting foreground is a must.
We had the luxury of having the aurora out for several nights across a wide range of locations, which gave us the ability to experiment. Our strongest aurora sighting was over the iceberg lagoon of Jokulsarlon, which was spectacular and added a great foreground to the composition. We also tried various other locations like Geysir, Kirkjufell, and Thingvallir.
If you can, scout your location before dark to identify good foregrounds. You’ll also want to think about how your foreground composes to the north, where the aurora will likely be. If you don’t get the chance to scout in advance, you’ll need to do the best you can. You ’ll also probably need a light to help you illuminate the scene and generate an initial composition. I found that this helped me to get the general framing. After that I was able to refine the composition by shooting at very high ISO to help me achieve a high enough shutter speed to quickly refine my composition by previewing on the camera back.
If you have a bunch of photographers around, then realize that setting your initial framing with your headlight will likely impact their image, so do try and be as considerate as possible!
Focusing
Focusing in the dark is also a challenge. When shooting for the aurora, you’ll want to focus your lens at infinity and leave it set there. Turn off automatic focus or else you’re in for trouble. I was shooting a Nikon 14-24mm lens and found that the indicated setting for infinity was nearly spot on. You probably won’t be able to just rack your lens all the way to one infinity by hand since most modern lenses focus past infinity. A couple things that may help:
- Use Live view: You should also be able to focus using live view by zooming in on the stars and focusing to make them sharp, though I found this to be awkward and untrustworthy.
- Focus on the Moon: If the moon is out, it should make for a sufficiently large and bright enough target to get your focus and reframe
ISO, Shutter Speed, and Aperture
ISO, shutter speed, and aperture are also pretty important when you’re shooting the aurora because you’ll want to capture images that are sufficiently bright but that are also of high enough shutter speed to keep the definition of the light bands. You’ll be shooting in manual mode, but the good news is that you can fix your aperture so that you only need to play with shutter speed and ISO. Here’s what I found to be helpful:
- Use F2.8, or the smallest aperture you can get – I rented a Nikon 14-24mm f2.8 lens specifically for this trip. If you don’t have glass that’s capable of at least f2.8, you should probably try and rent something because you’ll want the speed and you won’t really need the depth of field
- A shutter speed of 8-10 seconds is probably as slow as you’ll want to go. Slower and you’ll risk smearing the aurora into a nebulous blob rather than delicate bands
- ISO: Use an ISO that helps you attain #2. I started with a high ISO (4000 or so) and dialed back as needed to attain a shutter speed that captured the aurora in a pleasing way
Enjoy the Scene!
I certainly found that when I was actively shooting the aurora, I was taking a lot of time on the mechanics of photography at the expense of the sheer awe of the moment. Do take some moments to step back from the viewfinder and immerse yourself into the magic of the moment!
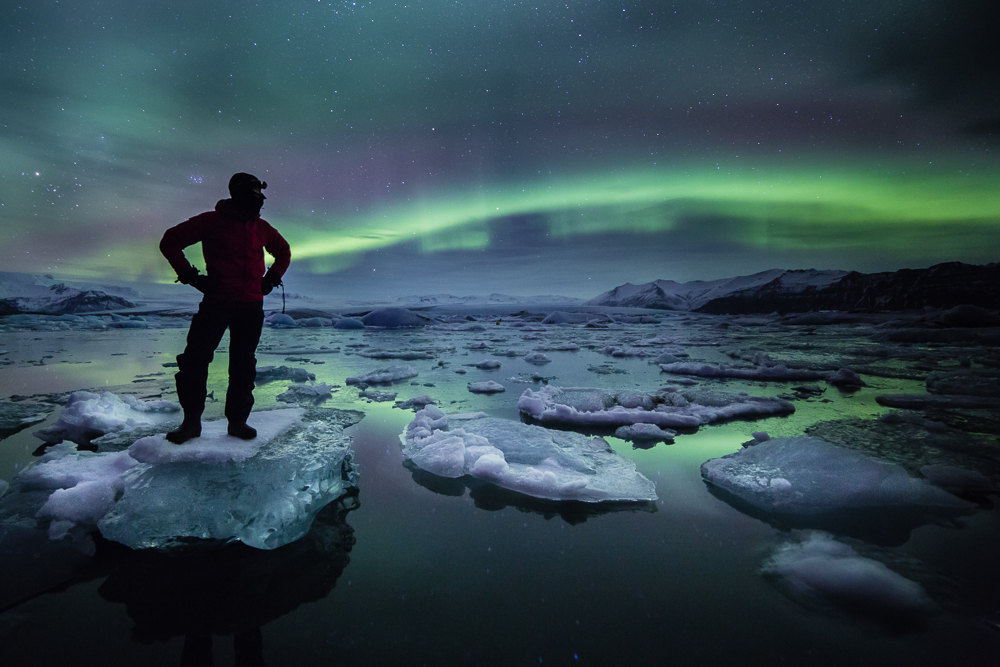
(photo by Anne Archambault)
Apr
09
2013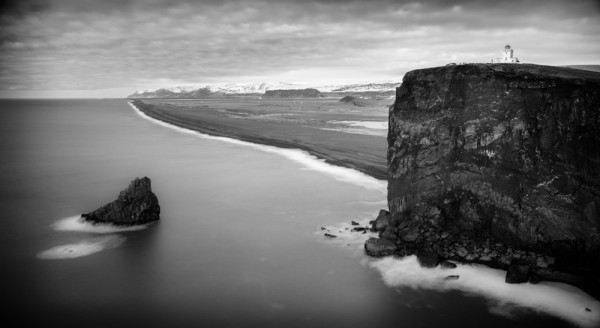
Anne and I recently returned from a 10-day trip to Iceland. It’s been on Anne’s bucket list for a long time and even though I had been there before, I welcomed the opportunity to return. What made this trip special for us were two things.
First, we signed up for a photography tour. We’re both pretty experienced travelers and we’ve both done a bunch of photography in our independent travels. The opportunity to engage in a photo tour offered a couple opportunities for us that we wanted to explore. Primarily, it freed us from thinking about an itinerary. The tour leader would know the best spots to visit and would be able to help with the “cultural” aspects we might encounter. It also promised to take our flexibility away, which was an intriguing new leaning opportunity for me. When Anne and I travel alone, we’re free to come and go as we please. On a tour, we might be forced to “get creative” when we’re not feeling the creative photo bug.
Second, the tour offered a relatively unparalleled opportunity to view the aurora borealis. Our tour coincided with both the 11 year solar cycle as well as the yearly cycle. March 2013 was *THE* time to be in a high northern latitude.
Since the photo tour thing was new to us, I wanted to document some learning’s about the trip for anyone else considering a photo tour to Iceland or some other destination.
Logistics
As surmised, the ability to leave logistics up to a guide lowered significantly the overall amount of effort required in planning the trip. Neither Anne nor I wanted to be completely logistically unaware, so we did get a rough itinerary ahead of time to ensure we were going to go to places we generally wanted to go. Clearly, you should look for trips that will be touring to the spots that you want to go and have accommodations that are appropriate for your desired level of comfort. For example, Anne and I both knew that travel in Iceland involved stays at guest houses, some of which only had shared bathrooms. It was hardly a hardship. The point is, ask up front so you’re not surprised when you get on site.
As surmised, the daily logistics were also set by the group, and not by us as individuals. This meant that sometimes we would spend more time in a location that I might normally. Personally, I enjoyed the challenge of knowing that I was going to be somewhere for a while and that I would need to make the best of it photographically. Most of the time I felt like I didn’t have enough time to accomplish what I wanted to because I’d been able to get over the “creative hump.” Only a couple times was I really at a loss for what to do photographically and I was able to stop taking pictures and enjoy the incredible place that I was in.
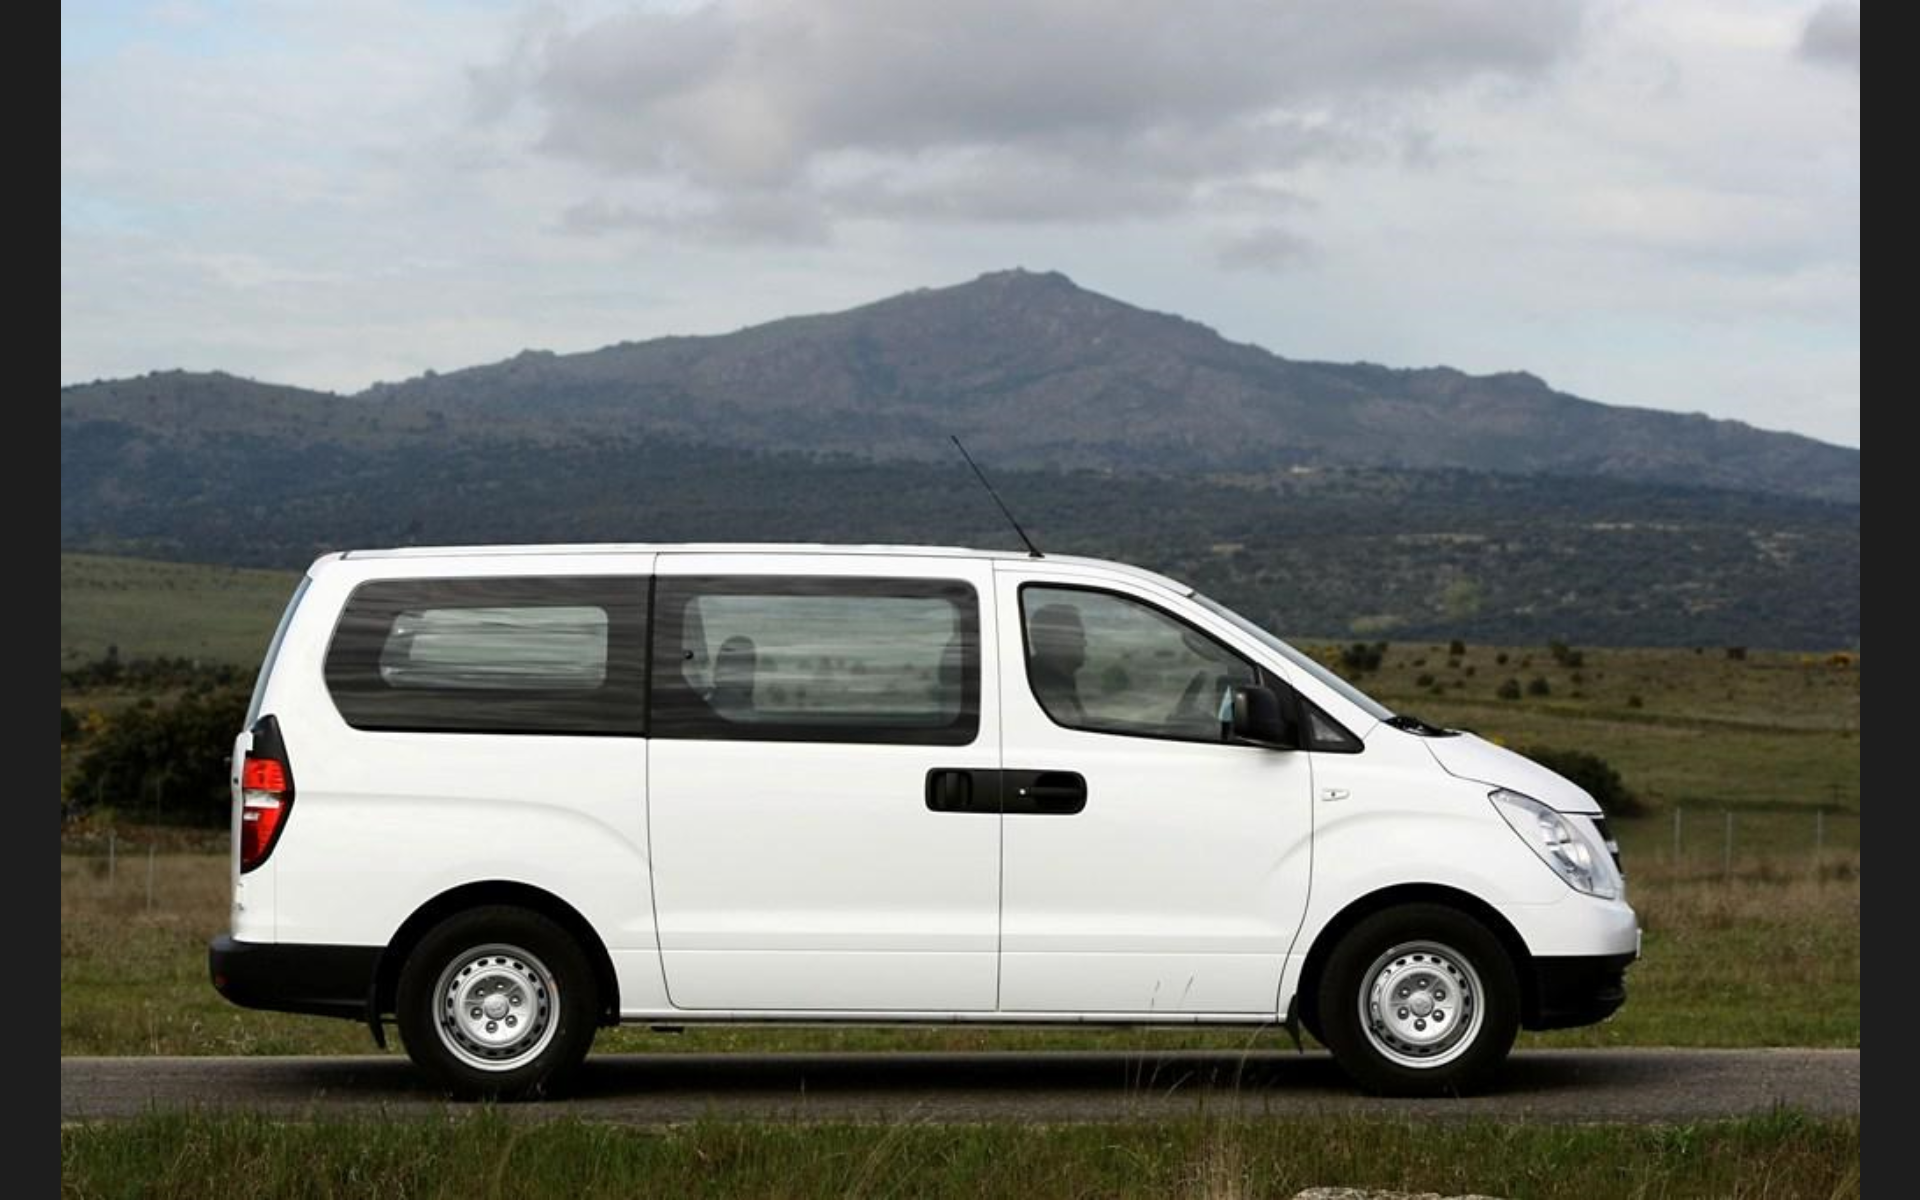
Transport
Our trip included transportation, which in our case was a “9” passenger van. It worked, but it was pretty tight and could have very easily been insufficient with slightly more luggage. Fortunately, our trip leader had advised us in advance so we could pack accordingly.
As photographers, we travel a little heavy by design. We’re often carrying a lot of gear that we *MIGHT* need but is often in excess of what we really need on a day to day basis. For my part, I fit my luggage into a Medium North Face Base Camp Duffel and all my photo and video gear into a Gura Gear 30L Kiboko pack. Anne and I also shared a computer bag containing two computers, power cords, and magazines for reading. This was a pretty “small” travel setup and was probably at about the max each person could have brought and fit into the van comfortably.
Certainly inquire of your trip leader about the travel accommodations, including the type of vehicle you’re traveling in (if transportation is included), how many others will be sharing with you, and if there will be any space constraints so you can plan accordingly.
Trip Style
Anne and I intentionally chose a photo tour as opposed to a “workshop.” We weren’t really after a lot of instruction but rather wanted the “freedom” that came from leaving logistics up to others. The photo tour promised to take us to the sights we wanted to see, and to arrange to see some places that we might not have otherwise seen, like ice caves. The tour also provided some local expertise that enabled us to do things that I might not have done had I been there alone. The photo tour also allowed the opportunity for some creative instruction, but that wasn’t the explicit point.
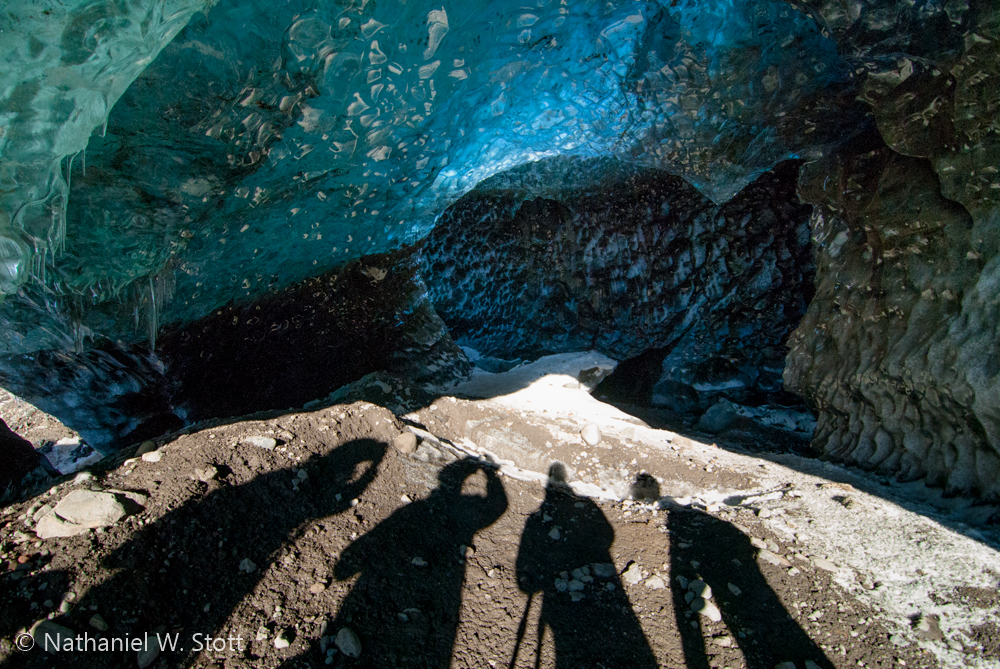
Photo tours may not be for all, especially those looking for a more hands on approach where a workshop style may be more appropriate. If you’re looking to specifically advance your photography, a workshop may be more appropriate. So certainly be aware of the type of trip you’re looking into and ask questions to make sure the style is appropriate for what you want to get out of it.
Shooting
As part of an organized trip, you get to see a lot of beautiful places. You also get the pleasure of doing that with the rest of your group. In this respect, both group size and common courtesy are critical. Obviously, the more people you have in a location, the higher the chance that you’re just going to get in each others way. You’ll need to pay special attention to try and work as a group, starting at the same place and working the subject in roughly the same way. If you move forward you may very well be on someone else’s frame. So ask and look regularly.
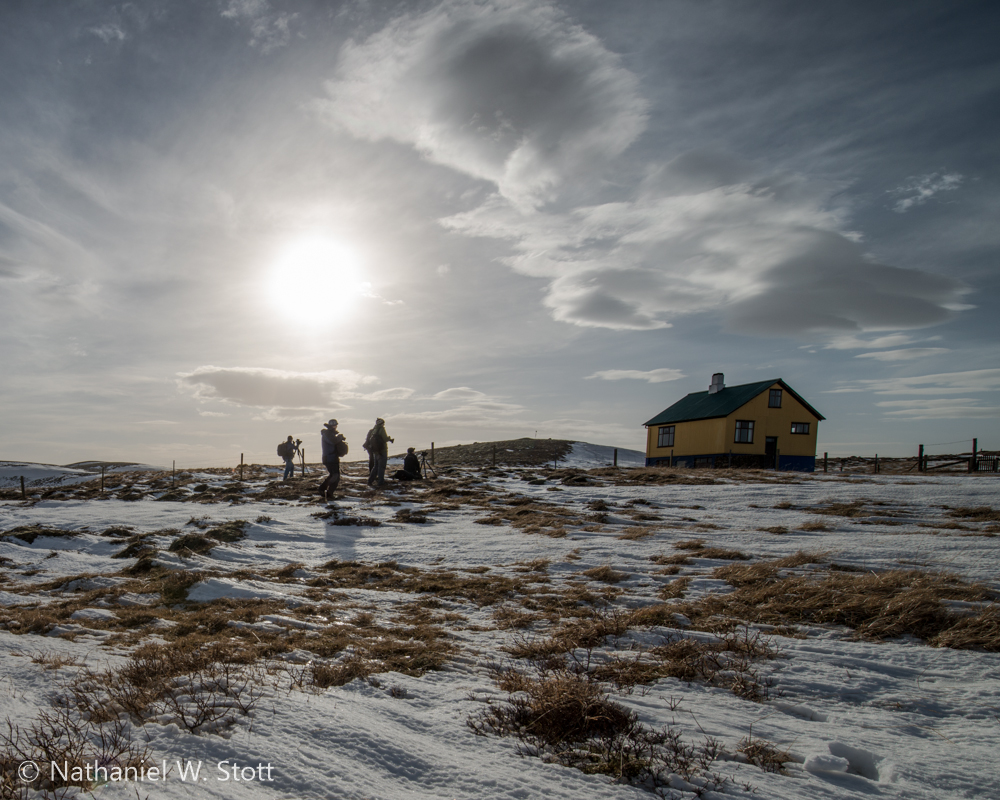
Our photo tour group shooting a vacation home on the way to Thingvallir.
Even so, you may feel like you’re part of a herd. My introverted personality hates this sort of thing so I’d often try to find a new vantage point or subject away and in the opposite direction from others. Sometimes it’s just unavoidable that you’ll get in everyone’s way so do your best to be polite, courteous, and wait your turn. For both of us, a group of 6 would be the largest we would consider if we ever chose to go on another photo tour.
Summary
Lest it sound like Anne and I didn’t have a good time, much the opposite. We had a great time seeing some incredible sights in a wonderful place. We met wonderful photographers who were a joy to be around. The companionship was actually a great highlight of the experience. And we came away with great photos, some of which we’d never have gotten had we not been on this tour.