12
2013Photographing Auroras in Iceland
A
s I mentioned in the previous post, a primary reason for our trip to Iceland was photographing northern lights. I’ve had the lucky pleasure of seeing them multiple times in my life and it’s quite simply a magical experience. The aurora runs in cycles that are tied to solar cycles, with the sun running on an 12-year solar activity cycle. The year also has a monthly cycle with auroras being more prominent in October and March. This year, March 2013 marked the peak of activity in both of these cycles.
Aurora Photography
Taking pictures of the aurora borealis is a somewhat specialized variation of night photography. Hence, you should have a camera that’s capable of taking photographs in low light and at high ISO values. However, unlike night photography, it’s possible for the aurora to get bright enough that you can take relatively short exposures at reasonable ISO values and still get excellent results. In fact, for active aurora displays you’ll want to have relatively short shutter speeds (~8 seconds or even less) in order to capture good definition in the bands of light.
Anne and I read up quite a bit on the subject and there are a number of excellent articles and e-books on the subject. As a short read, EPhotoZine has a nice article outlining some of the basics: How to Photograph the Northern Lights.
A far more complete tutorial written by Patrick Endres on how to photograph the northern lights can be found on his website AlaskaPhotographyBlog.com. It comes in iBook or PDF formats and we found it to be a thorough reference guide. You can find a link to his eBook “How to Photograph the Northern Lights” here.
As a general rule, the aurora tends to be seen more commonly between 9PM and about 3AM. It can also have brief periods of intense activity so you do need to be ready to click the shutter at a moment’s notice. This means setting up your tripod and camera and then waiting patiently for the right conditions.
You can check space weather conditions at popular sites like Spaceweather.com or the OVATION aurora forecast. There are also numerous apps that allow you to see the planetary Kp as well as aurora probability ovals.
Cold Weather Photography
Of course, if you’re taking pictures of the aurora then chances are you’re in a cold place, which brings with it another set of photography challenges. You’ll want to get pretty familiar with operating your camera in the dark, by touch, and with gloves on. All while trying to stay warm!
There are a lot of simple things to think about, but here’s a short list that was helpful to me:
- Know your camera controls by feel
- Keep a headlight handy, preferably one with a red filter that allows you to keep your night vision
- Dress warmly. The old adage about dressing in layers doesn’t really help much in the cold (it’s better for activity). Rather, look for as much loft as you can get. Down is best, but heavy fleece works too. I also had a pair of Wetland Hi-Cut Muckboots that were excellent in keeping my feet warm (they are also waterproof and can keep your feet dry)
- Your head, neck, and face count; get a good hat and neck gaiter. These really help when you’re standing still for hours.
- Keep your spare batteries warm by keeping them in interior pockets.
- Keep your lens covered by a lens cap when not in use to prevent frost buildup.
After shooting, you’re going to want to take care of how you bring your camera back up to room temperature. Take your battery and memory cards out while you’re still outside. Before you come back inside, you’ll at least want to put your camera into your camera bag and leave it there to slowly warm up. In more extreme cold, you may want to go so far as to put your camera in a zip-lock bag with desiccant to absorb condensation and insulate as best you can so it comes back to room temperature slowly.
Composing the Scene
Composing an interesting scene for aurora (or star) photography is the real challenge. There are a ton of pictures out there than show the aurora but don’t have interesting foregrounds or good layering (and I’m certainly guilty of this as well). However, when you’re trying to take good pictures of the aurora finding an interesting foreground is a must.
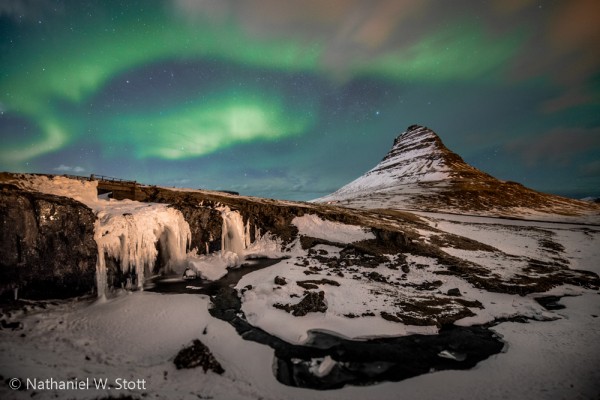
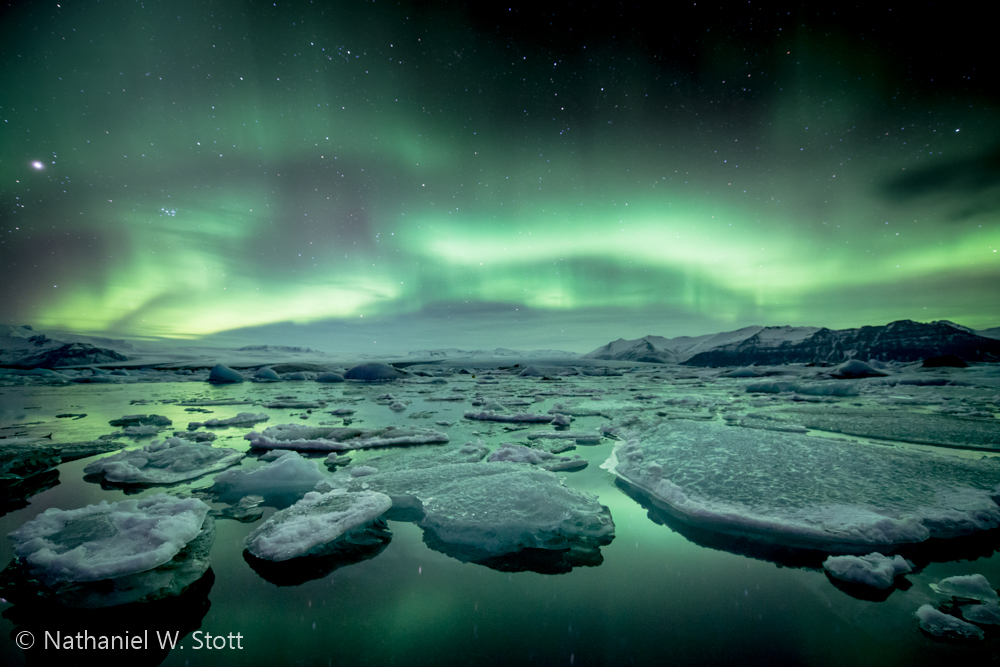
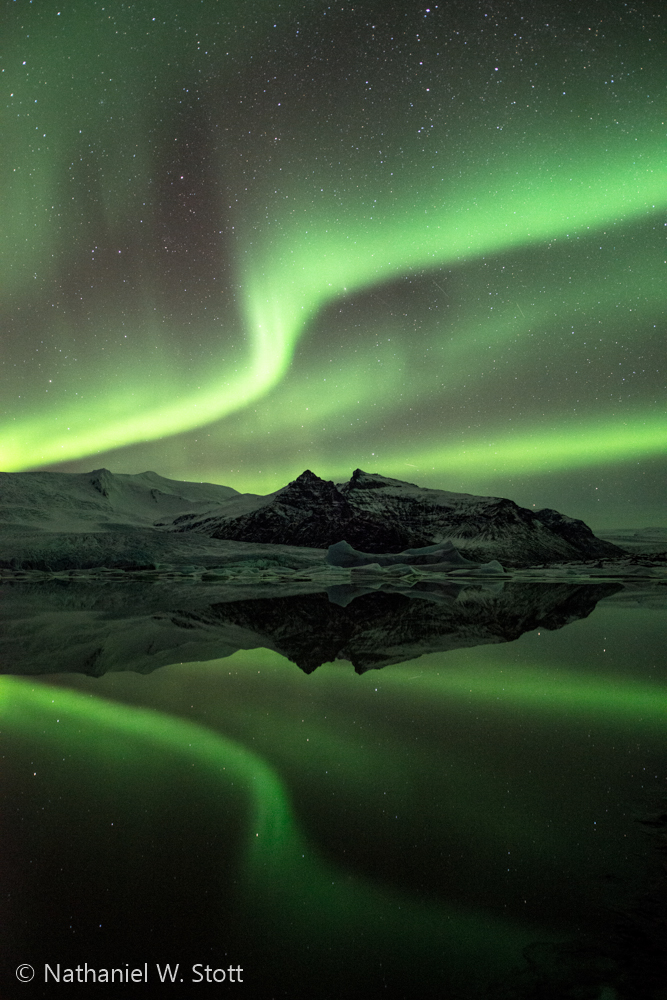
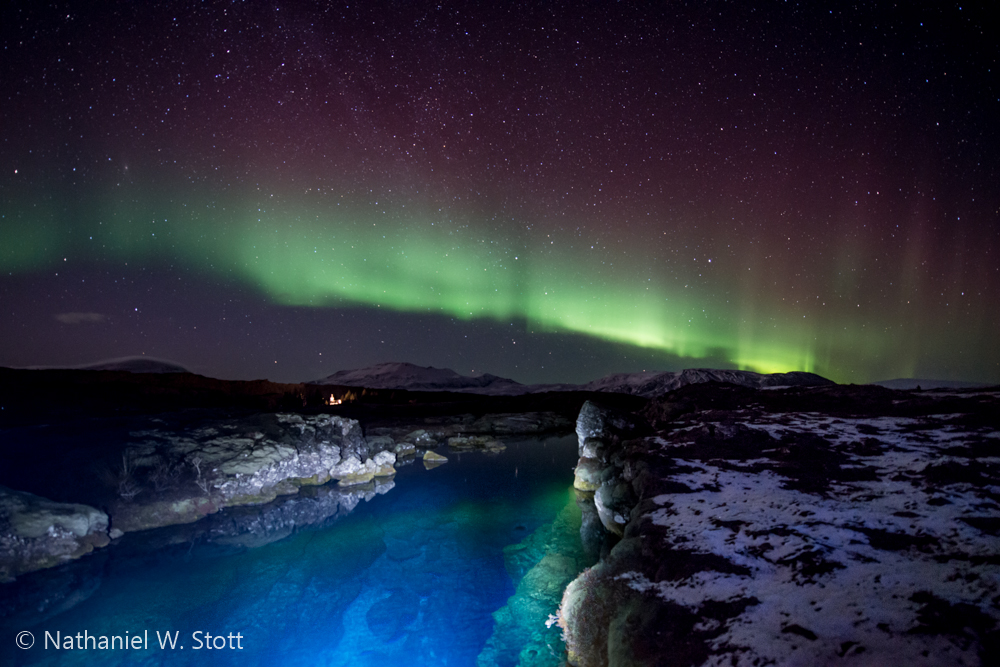
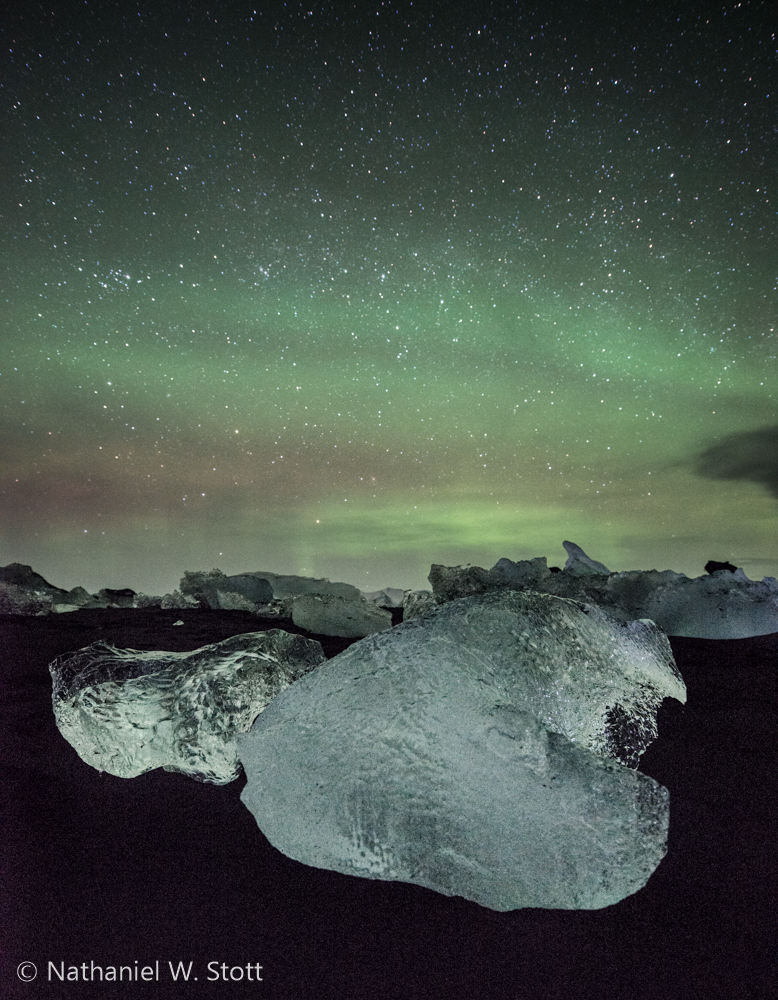
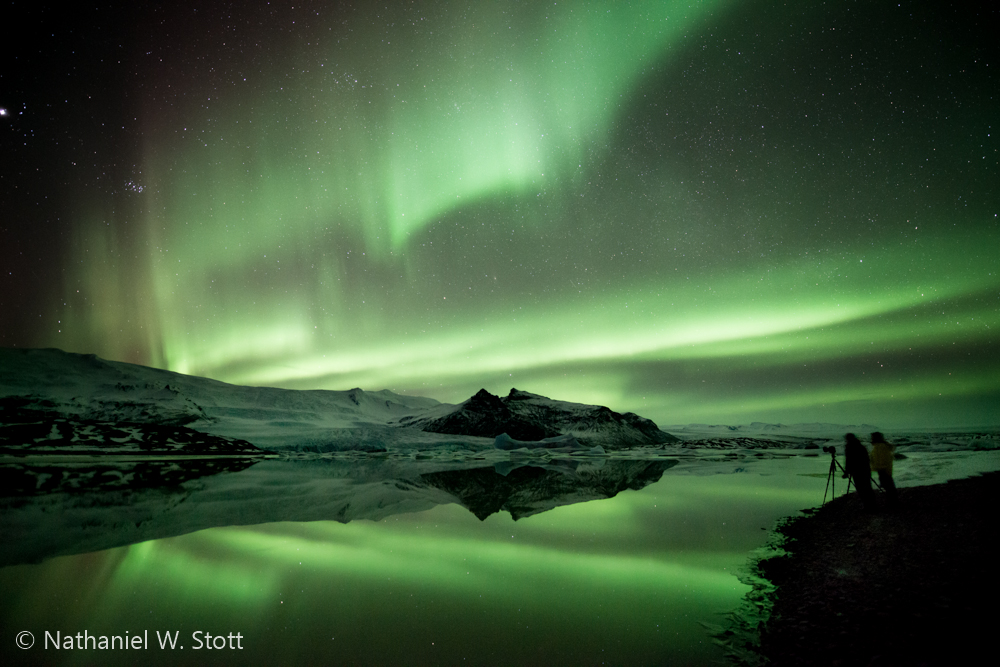
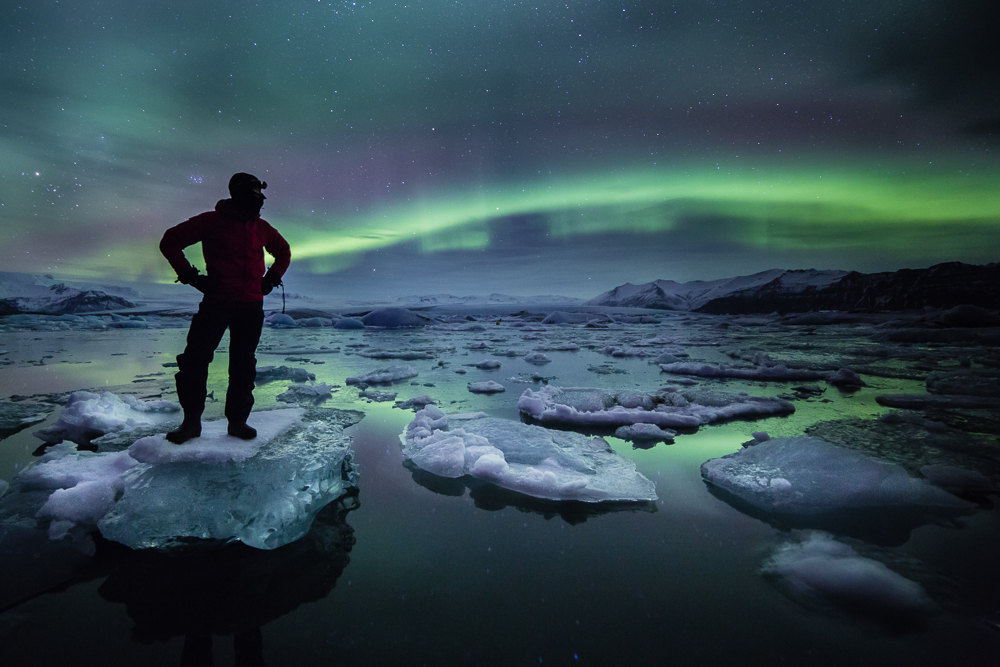
We had the luxury of having the aurora out for several nights across a wide range of locations, which gave us the ability to experiment. Our strongest aurora sighting was over the iceberg lagoon of Jokulsarlon, which was spectacular and added a great foreground to the composition. We also tried various other locations like Geysir, Kirkjufell, and Thingvallir.
If you can, scout your location before dark to identify good foregrounds. You’ll also want to think about how your foreground composes to the north, where the aurora will likely be. If you don’t get the chance to scout in advance, you’ll need to do the best you can. You ’ll also probably need a light to help you illuminate the scene and generate an initial composition. I found that this helped me to get the general framing. After that I was able to refine the composition by shooting at very high ISO to help me achieve a high enough shutter speed to quickly refine my composition by previewing on the camera back.
If you have a bunch of photographers around, then realize that setting your initial framing with your headlight will likely impact their image, so do try and be as considerate as possible!
Focusing
Focusing in the dark is also a challenge. When shooting for the aurora, you’ll want to focus your lens at infinity and leave it set there. Turn off automatic focus or else you’re in for trouble. I was shooting a Nikon 14-24mm lens and found that the indicated setting for infinity was nearly spot on. You probably won’t be able to just rack your lens all the way to one infinity by hand since most modern lenses focus past infinity. A couple things that may help:
- Use Live view: You should also be able to focus using live view by zooming in on the stars and focusing to make them sharp, though I found this to be awkward and untrustworthy.
- Focus on the Moon: If the moon is out, it should make for a sufficiently large and bright enough target to get your focus and reframe
ISO, Shutter Speed, and Aperture
ISO, shutter speed, and aperture are also pretty important when you’re shooting the aurora because you’ll want to capture images that are sufficiently bright but that are also of high enough shutter speed to keep the definition of the light bands. You’ll be shooting in manual mode, but the good news is that you can fix your aperture so that you only need to play with shutter speed and ISO. Here’s what I found to be helpful:
- Use F2.8, or the smallest aperture you can get – I rented a Nikon 14-24mm f2.8 lens specifically for this trip. If you don’t have glass that’s capable of at least f2.8, you should probably try and rent something because you’ll want the speed and you won’t really need the depth of field
- A shutter speed of 8-10 seconds is probably as slow as you’ll want to go. Slower and you’ll risk smearing the aurora into a nebulous blob rather than delicate bands
- ISO: Use an ISO that helps you attain #2. I started with a high ISO (4000 or so) and dialed back as needed to attain a shutter speed that captured the aurora in a pleasing way
Enjoy the Scene!
I certainly found that when I was actively shooting the aurora, I was taking a lot of time on the mechanics of photography at the expense of the sheer awe of the moment. Do take some moments to step back from the viewfinder and immerse yourself into the magic of the moment!
(photo by Anne Archambault)