Dec
06
2014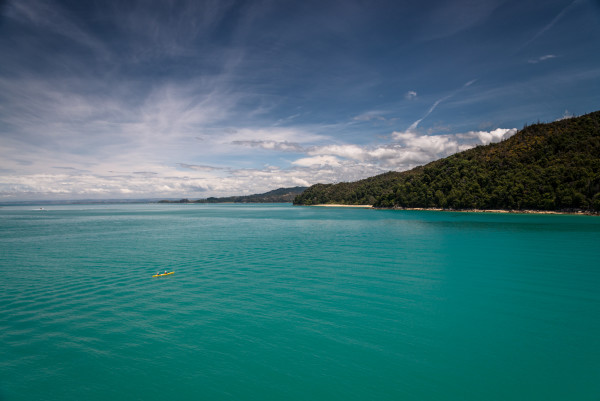
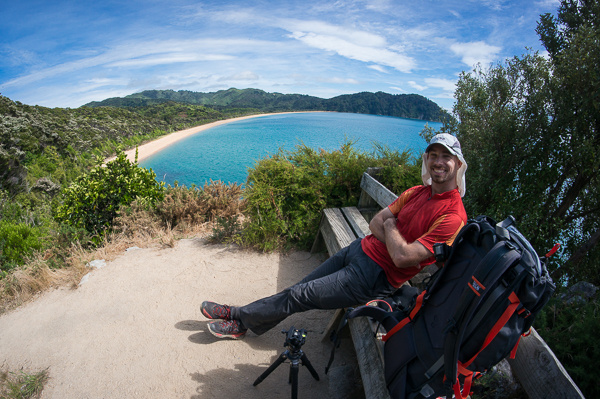
There are several “Great Walks” in New Zealand that receive very positive reviews in guidebooks and online. The Abel Tasman Track is one of these walks that generally receives “not to be missed” praise. It is in fact the most popular Great Walk in New Zealand. Located in the Abel Tasman National Park on the South Island’s northwest coast, the walk extends roughly 56 km from the start at Marahau to the end of the track at Wainui. Anne and I did a shortened version of the trip over 4 days in December (6-9) from Marahau to Totaranui covering 41.4 km.
(photo by Anne Archambault)
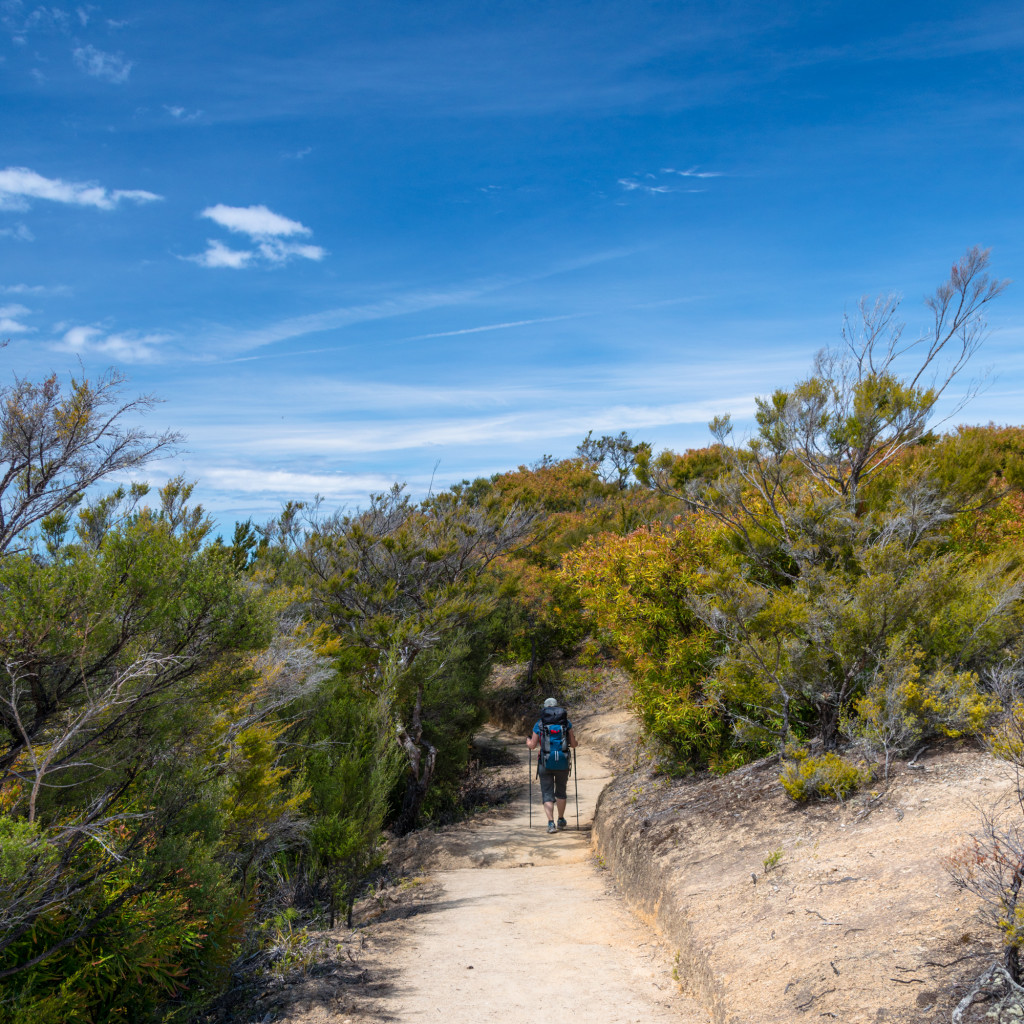
The track mostly follows the coast line, sometimes on beach but mostly on very well maintained trails in the forest overlooking the Tasman Sea. The myriad streams and small canyons along the way are bridged — some with impressive suspension bridges. In two places, there are relatively significant tidal crossings that can only be done within an hour or two of low tide.
Overnight accommodation is provided in both Department of Conservation (DOC) huts as well as campgrounds. The huts must be booked well in advance and provide drinking water, toilets, and sleeping pads in bunk style dorm rooms. The length of the track (through Totaranui) is serviced by water taxi, which allows hikers to access any point along the trail easily. This is a blessing and a curse, it allows for myriad options to explore the trail, but also allows scores of day trippers to visit huts and campgrounds that would otherwise be 2 days from the trailhead.
(photo by Anne Archambault)
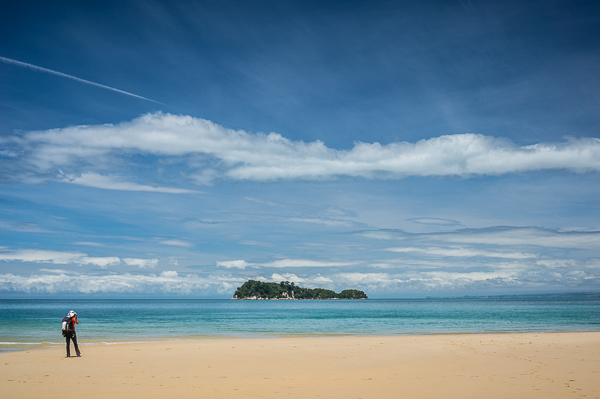
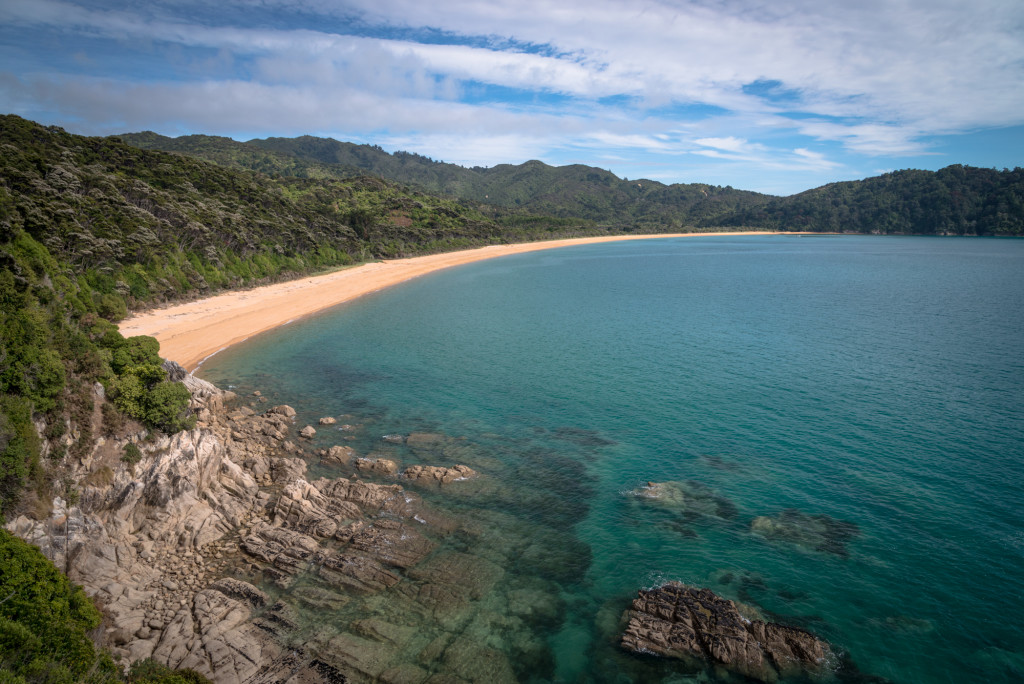
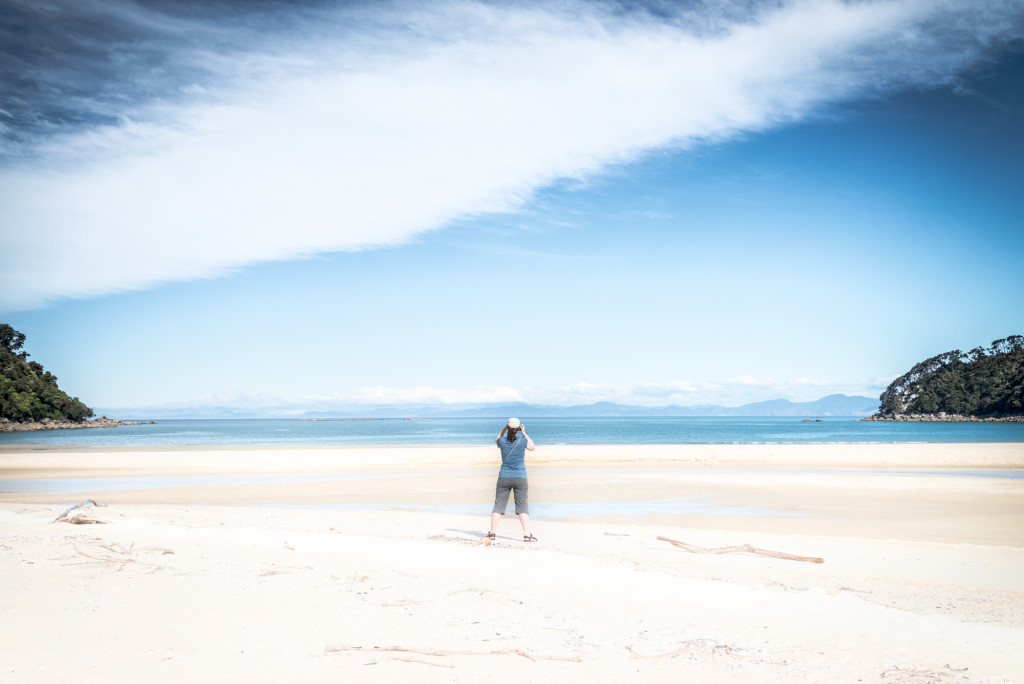
Beaches and Beautiful Blue Water
The highlight of the track is the proximity to the beautiful beaches and pristine blue water of the Tasman Sea. Without knowing better, it would be easy to mistake the coastline for beaches in Thailand or Hawaii.
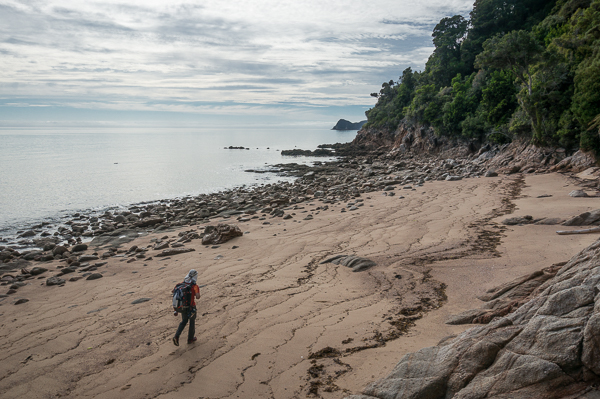
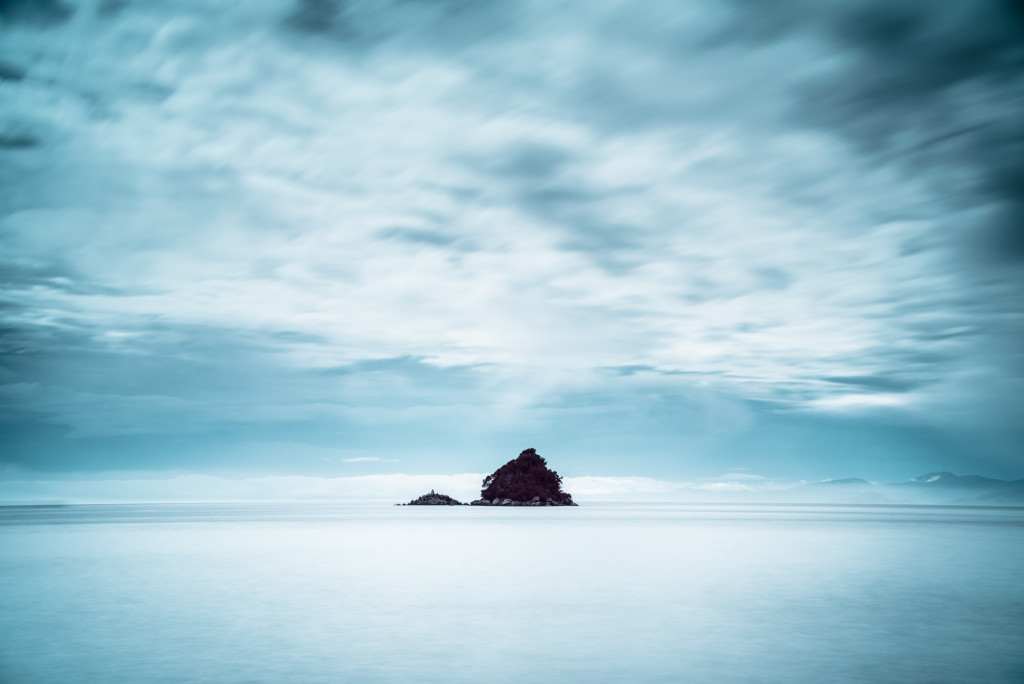
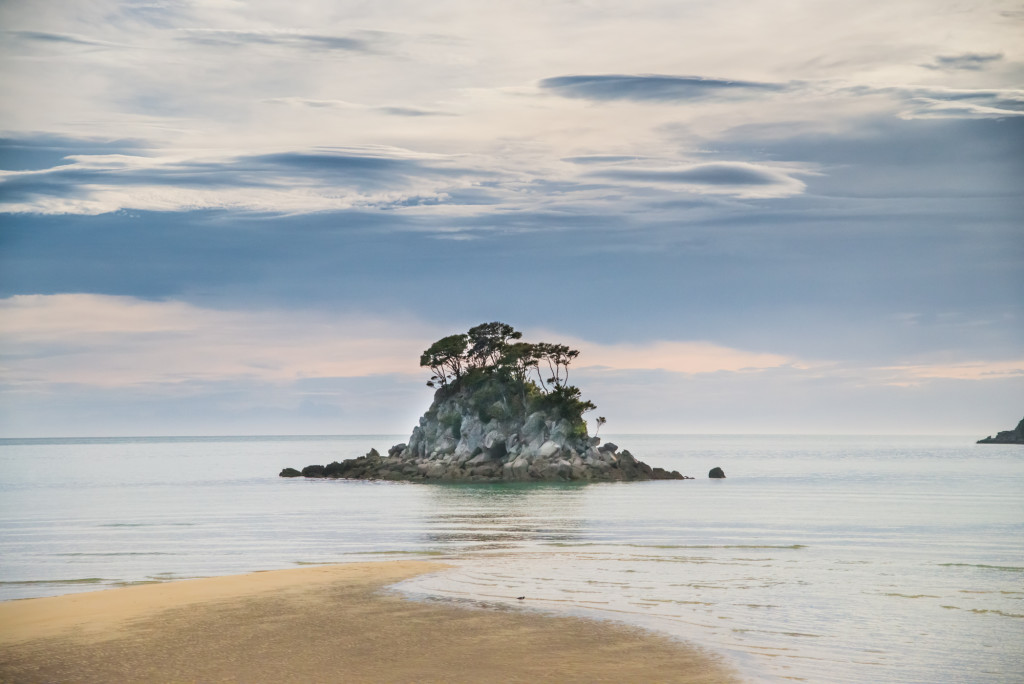
In some places, rocky granite outcroppings form small islands just offshore. These provided a wonderful opportunity for us to take a break from the walk and pull out the camera gear. We didn’t use the tripod often, but in these cases it was very handy for long exposure compositions.
Because of the way the hike is laid out, Anne and I were generally able to complete our hike by early afternoon, giving us plenty of time to rest and relax at the hut. Alternatively, many hikers took the opportunity to stop along the way at secluded or otherwise wonderful beach locations and relax.
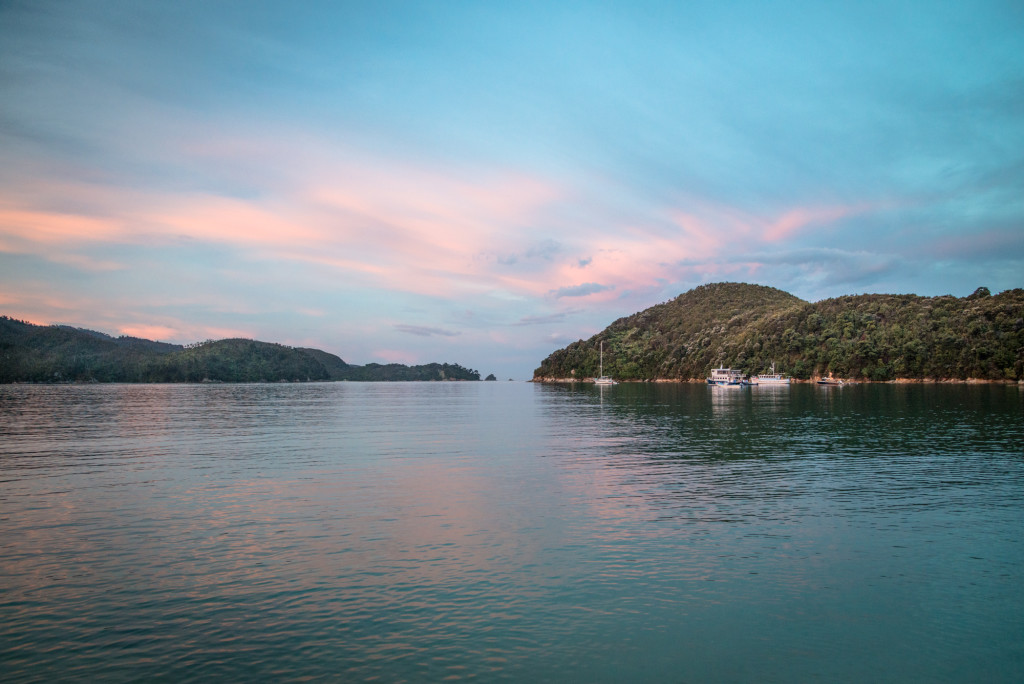
Of course the beaches also provided wonderful sunrise and sunset photography. At Anchorage Bay, we had to be up at 5am to make the tidal crossing and were able to watch an amazing sunrise bloom over the hills.
Wildlife
The national parks we visited on the South Island all had robust conservation efforts in place to help protect indigenous species. Invasive species such as possums, rats, and stoats have decimated the native bird populations. Along the track are literally hundreds of traps designed to kill these predators.
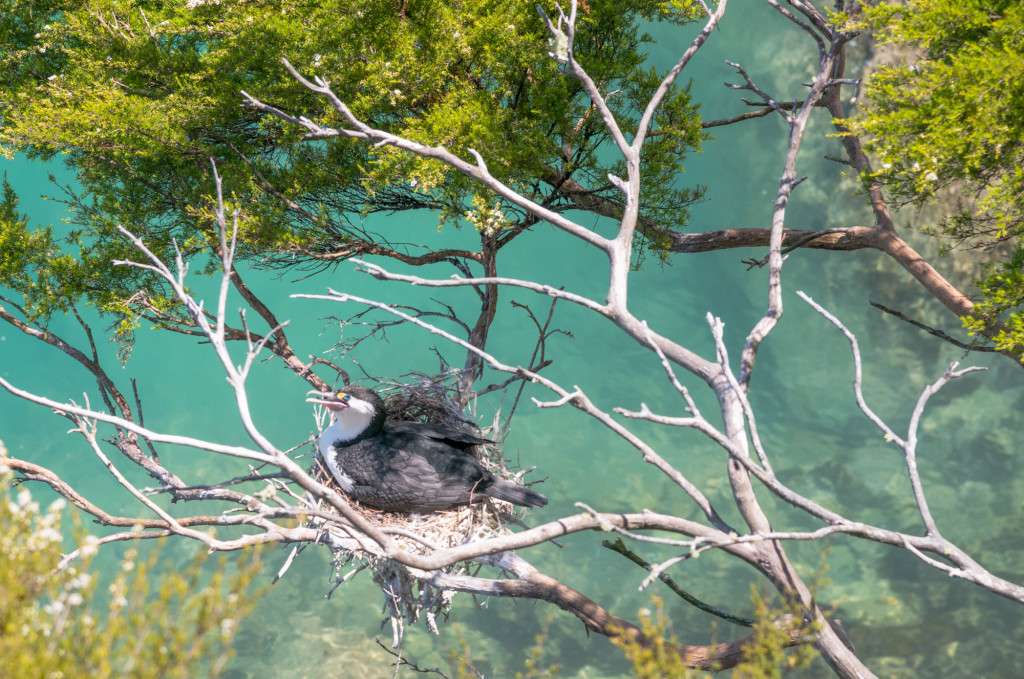
Many of the islands visible along the track are sanctuaries where native species can nest in relative safety. There is also the Tonga Island Marine Reserve to help protect dolphins, seals, and the many native species that inhabit the diverse system of waterways, estuaries, and bays. Fur seals come here to lay their pups and penguins sleep along the rocky headlands.
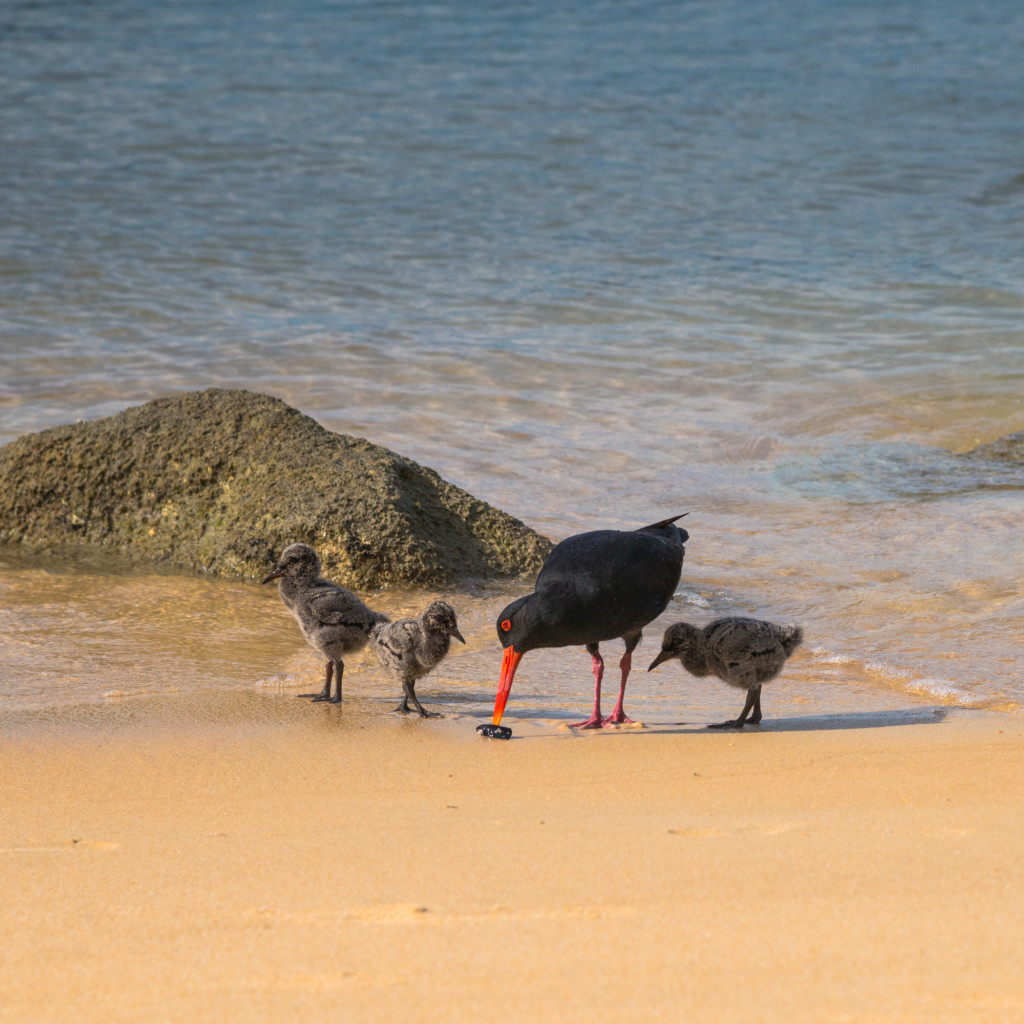
Because we were walking the track in the southern hemisphere’s summer, we were also able to see a lot of young chicks. At Anchorage Bay, a pair of variable oystercatchers had a set of three chicks that allowed us to approach during low tide.
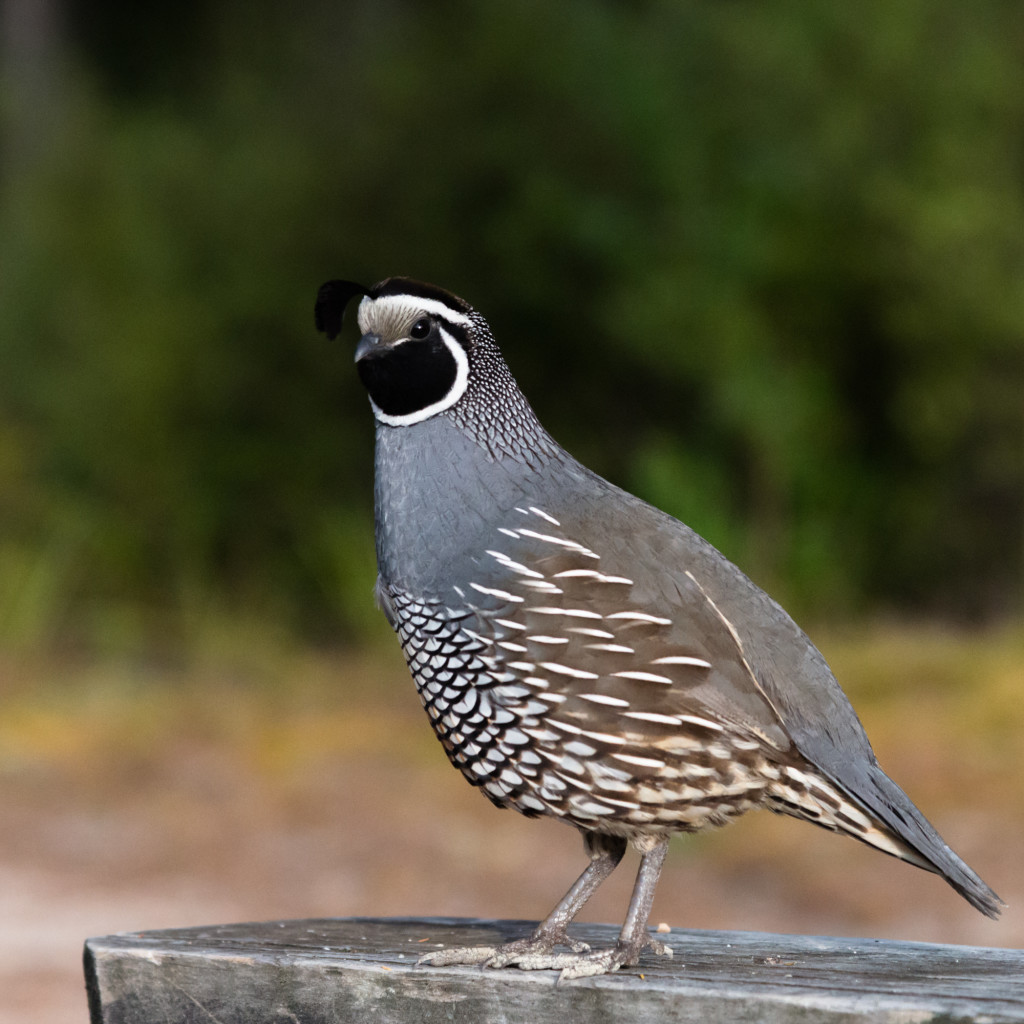
We also saw many of the native quail, some with broods as large as 6 or 8. Some of these quail were quite tame and even posed a little.
Incredible Flora
It’s hard to discount the incredible flora of New Zealand. In Abel Tasman National Park, the forest is dominated in the undergrowth by ferns both small and large. Tree ferns and beech form the bulk of the forest canopy, punctuated by fragrant flowering manuka trees (famous for their honey).
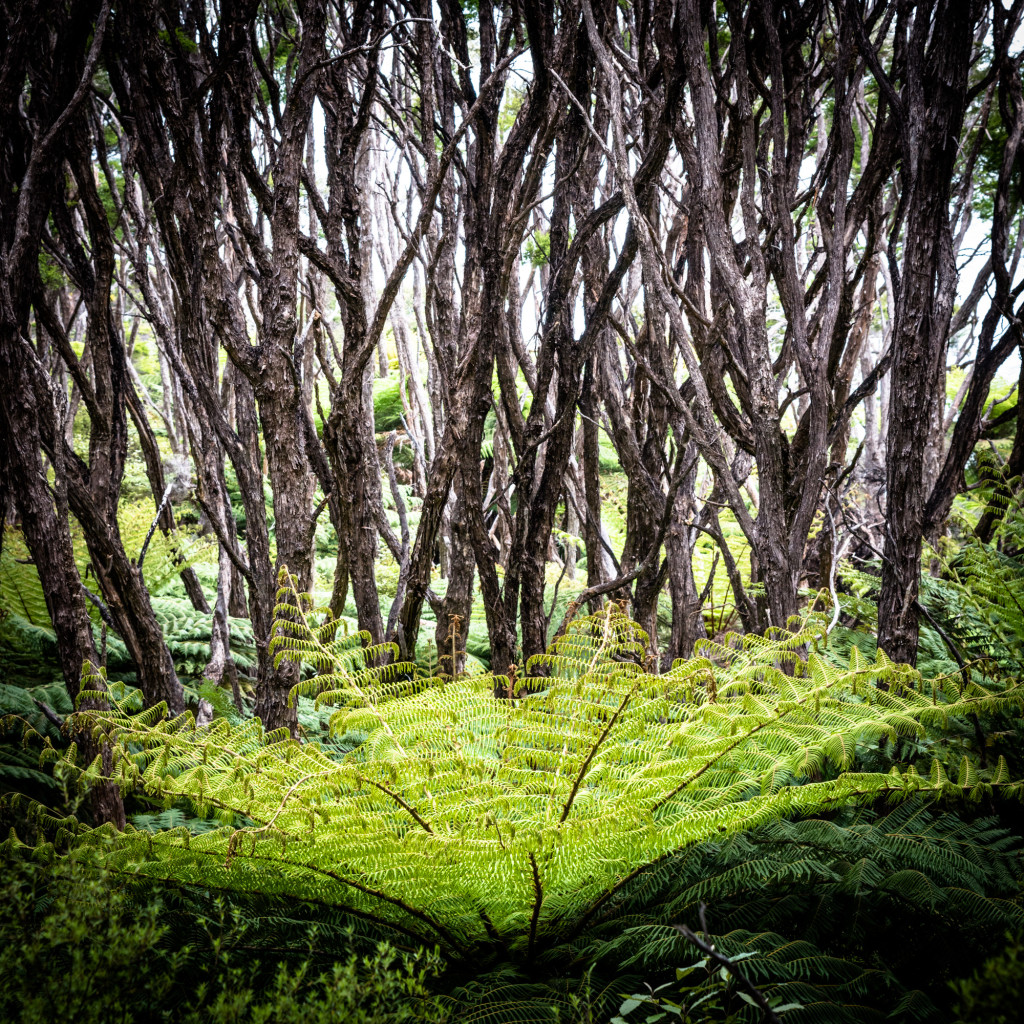
The ferns lend a prehistoric feel to the forest and you could be forgiven for thinking you might be walking on the set of Jurassic Park. In fact, we talked to one person who was sure they filmed some scenes from the movie in the park.

(photo by Anne Archambault)
Should you go?
In short, yes. The trail is fantastic, the days are short, and the scenery is well worth it.
The trail is a little more crowded than other tracks, both because of the relative ease and the easy access. It’s a great warm up for longer or harder walks and it’s also great for families (of which we saw many).
(photo by Anne Archambault)
And who could argue with lots of time on the beach? Anne and I both felt like 4 days was plenty; it provided enough time to get into the backpacking groove without feeling like we were spending more time than we should (the south island is big, we didn’t want to miss anything).
Total distance: 29.09 mi
Max elevation: 385 ft
Min elevation: -283 ft
Max elevation: 385 ft
Min elevation: -283 ft
Oct
11
2014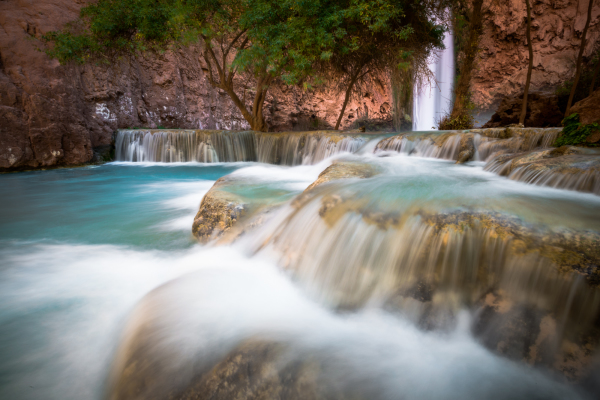
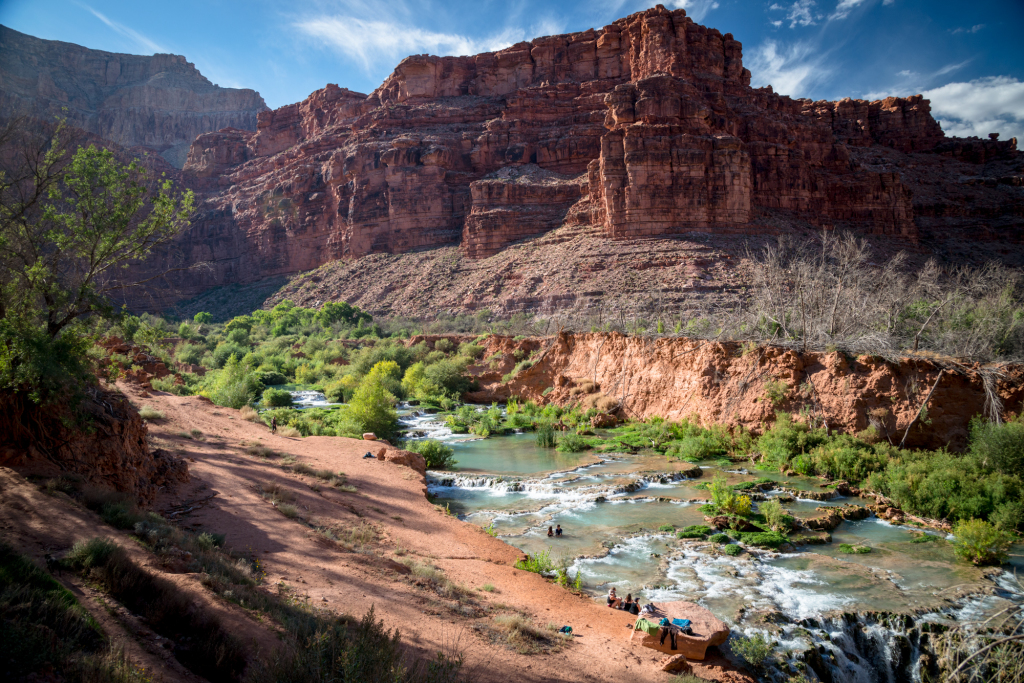
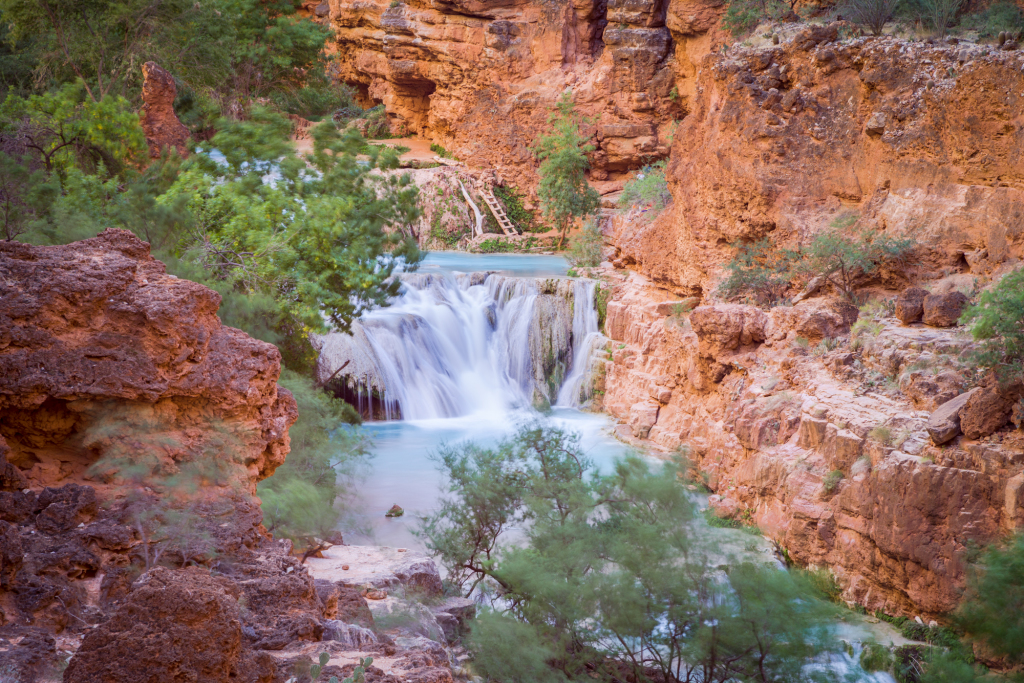
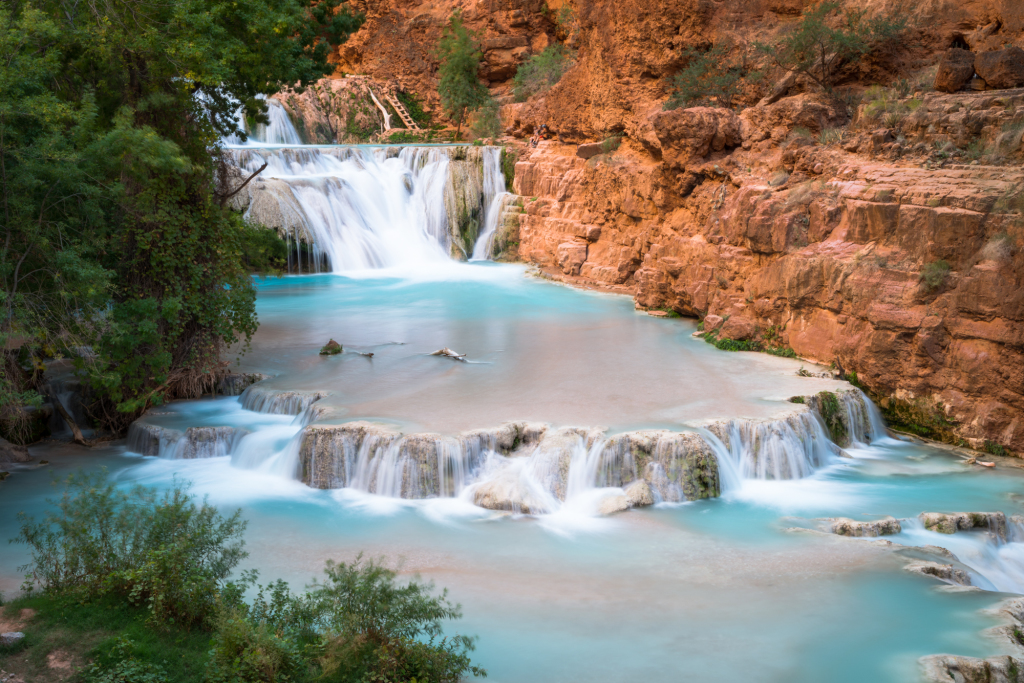
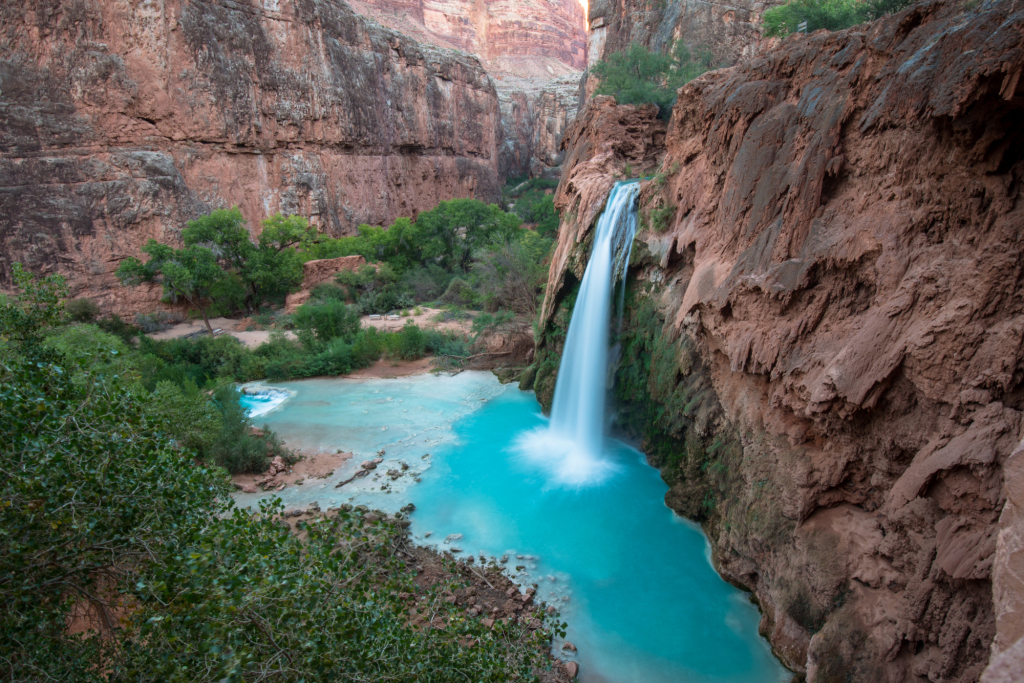
Anne was in Phoenix attending the Grace Hopper conference and so we made plans with our friend Valerie (of Haute Route fame) to hike into Havasu Falls and the Havasu creek canyon. Havasu creek is somewhat unique because of the high mineral content in the water, giving it an astounding turquoise color and building up beautiful travertine pools that provide for countless smaller cascades down the length of the canyon. The beauty of the canyon certainly puts it on the “bucket list” of hiking and photographic locations to visit. So Anne and I were both super excited, both because we got to spent time with Valerie as well as because we got to do it in such a wonderful location.
Camping reservations into the canyon are notoriously difficult to get given the popularity of the hike. However, Valerie was doggedly persistent and able to secure camping reservations by calling repeatedly until a camping space finally opened up.
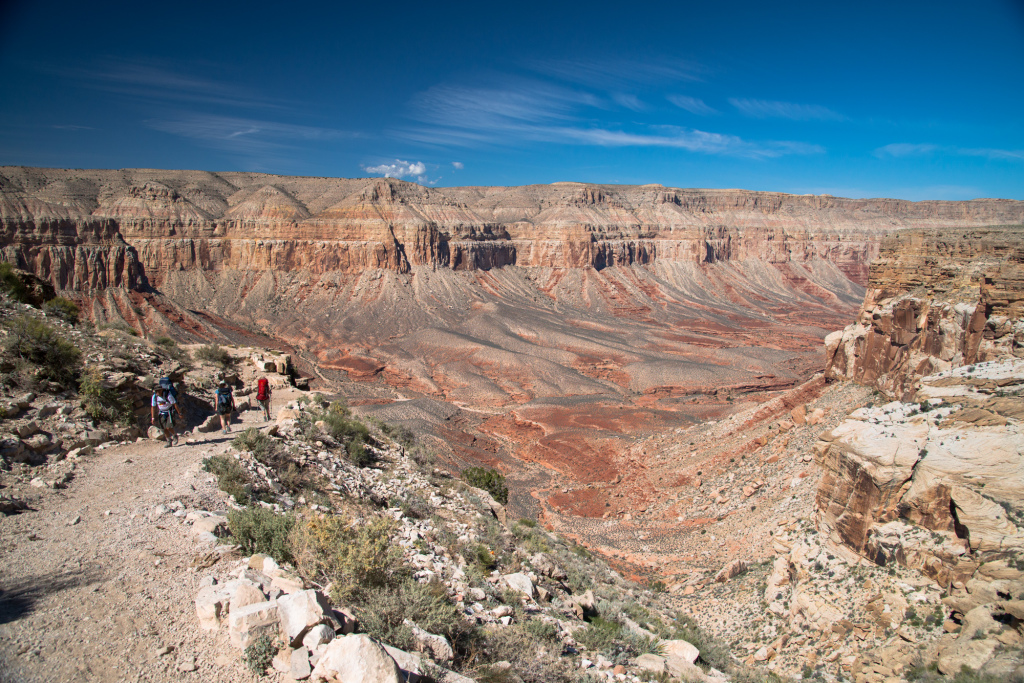
On paper, the hike is not a difficult one. From the trailhead to the campground my GPS clocked 10.75 miles with 2577 feet of elevation loss. However, the statistics don’t take into account the fact that most of the trail follows a river wash with a packed gravel surface. This provides a good path, but saps energy and makes the hike feel longer than it might on a firmer packed surface.
We started our hike on Saturday morning and arrived at the trailhead around 11:00 am after a relatively leisurely breakfast in Peach Springs. By that time the parking lot was already packed to overflowing, with cars parked well down the road. We rounded ourselves up for the hike quickly and set out on the hike right around 11:30 am . Luckily, the temperatures were still mild and made for a pleasant start.
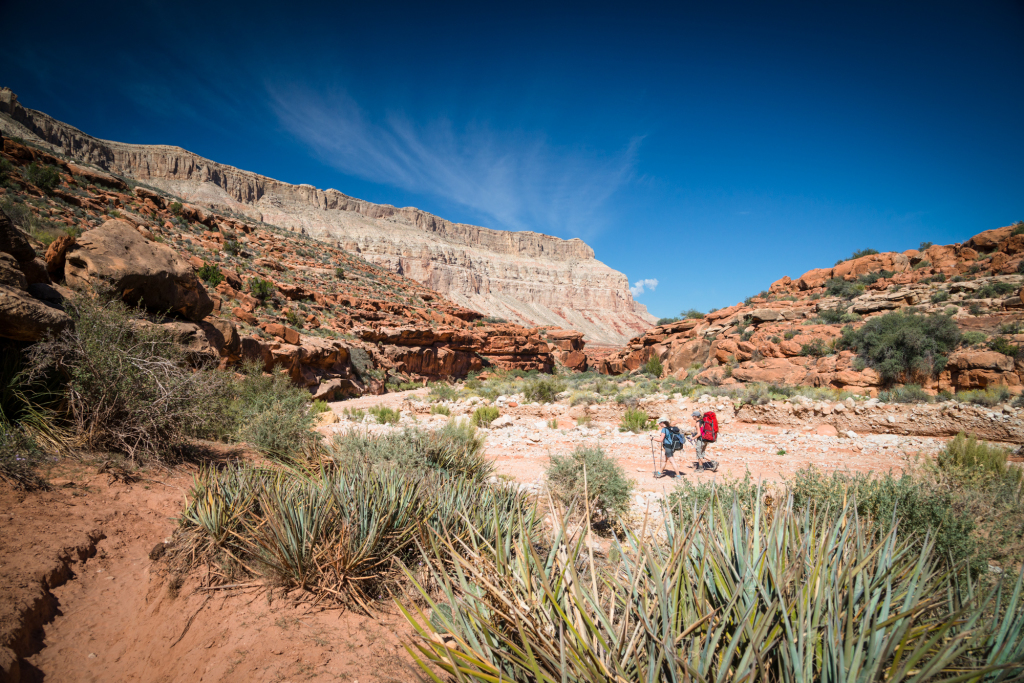
The hike drops elevation quickly as it makes its way down a series of switchbacks that joins a gentle ridge taking you down into the bottom of the canyon to the creek bed. This trail then winds its way very gently downhill, following a river bed to the town of Supai.
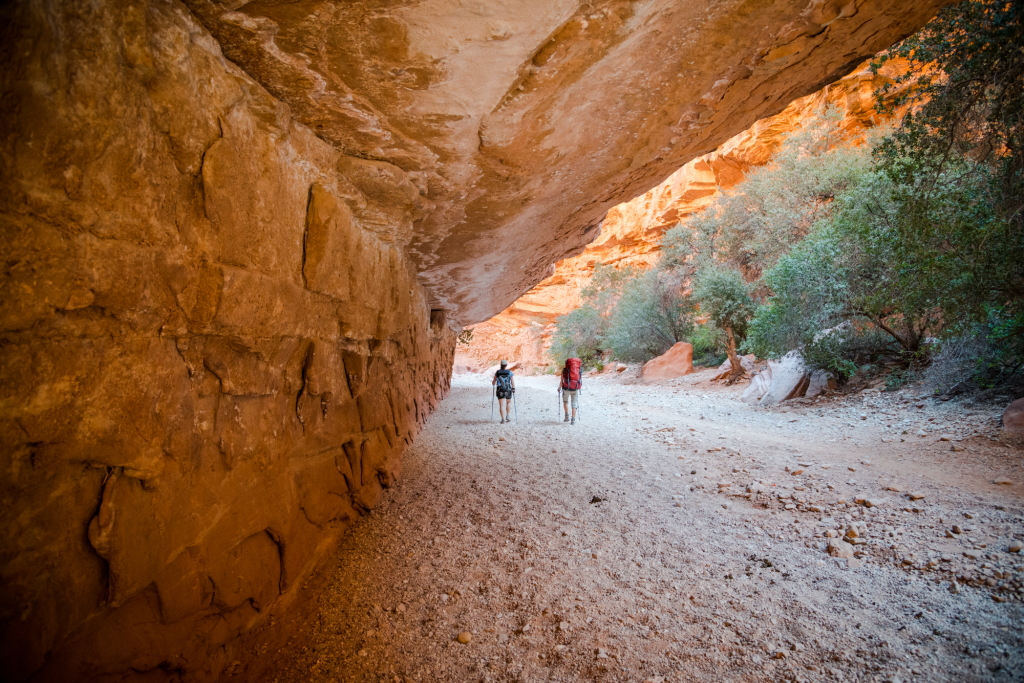
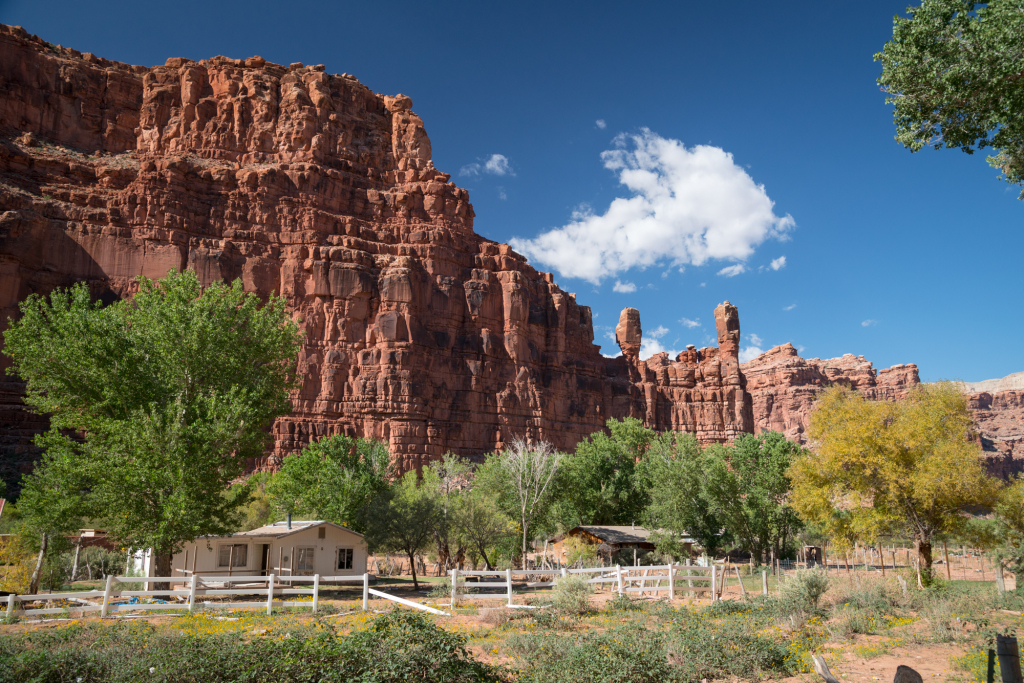
Along the dry creek bed, there are often braided trails that shortcut horseshoes in the creek and help facilitate both horse and human traffic. Plenty of horse droppings help confirm continually that you’re on the right track. Surprisingly, given our late start, the hike was a pleasant one with long sections of the trail being in partial shade. After about 3 hours, we reached a junction with a sign confirming that we were “almost” at Supai. The trail forked left and continued through a dense patch of trees where we first crossed Supai creek. Shortly thereafter we descended a small hill and arrived at the village of Supai. We wound our way around town and stopped at the Camp Reservations building (about 7.4 miles from the trailhead) where we picked up our camping permits consisting of printed wrist bands for each member of the party as well as a tent tag for each tent in the group.
Note to hikers: There is a water spigot at this building where you can fill your water bottles.
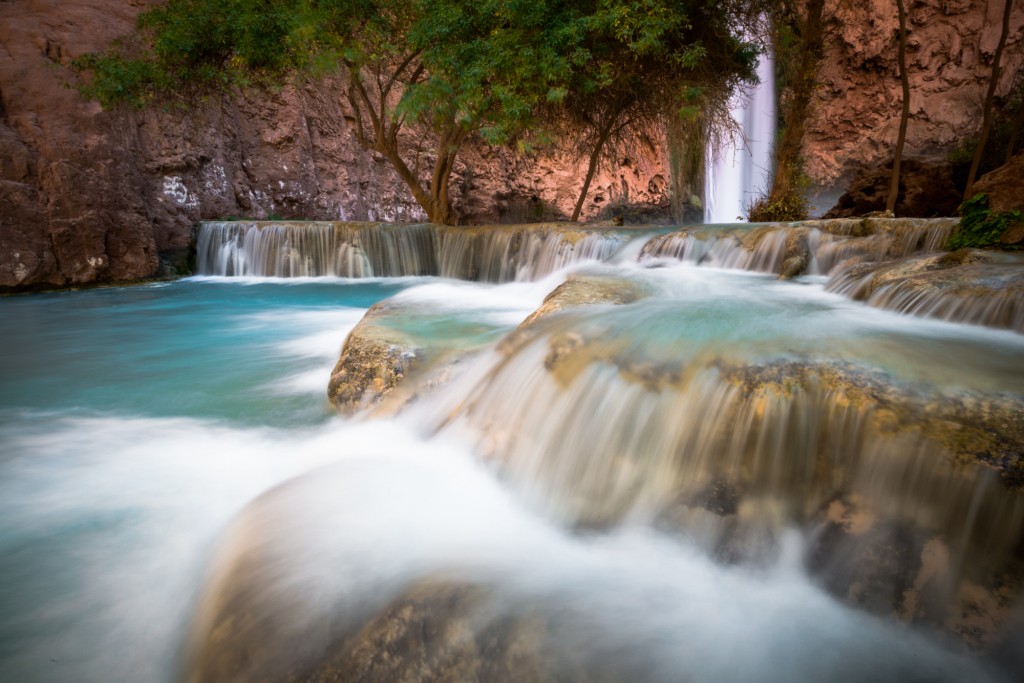
The trail leads quickly out of town to parallel Havasu Creek, which then again quickly brings you to your first set of small but beautiful travertine cascades.
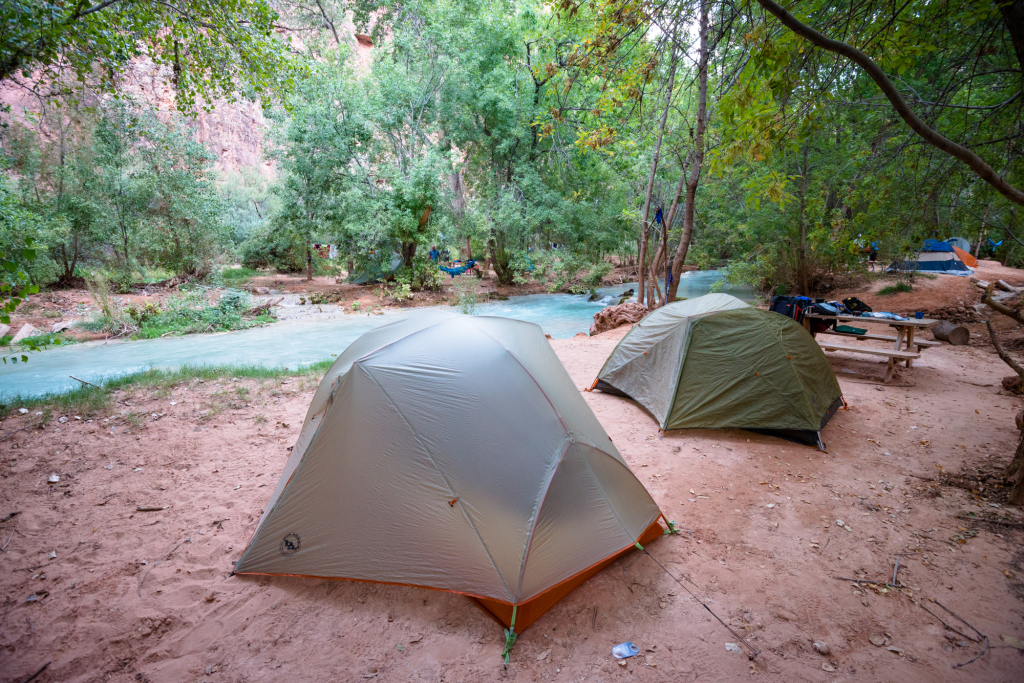
Not far beyond is Havasu Falls and the campground. We’d read about the campsite before we left and steered past the start of the campground, instead looking for sites after about the second bathroom. However, the campground was almost completely full with people which made campsite selection difficult. In the end, we wound up with an excellent, secluded spot next to the creek at the very far end of the camp group (close to Mooney Falls). Total time, about 5 hours.
On Sunday we hiked further down the canyon with the desire to photograph Beaver Falls. Just beyond our campsite was Mooney Falls, maybe a 5 minute walk from the end of the camp group. Here the trail winds down a series of increasingly steep ledges until it finally disappears into a hole in the rock that passes through a tunnel and to a series of chains and ladders that descend to the base of Mooney Falls.
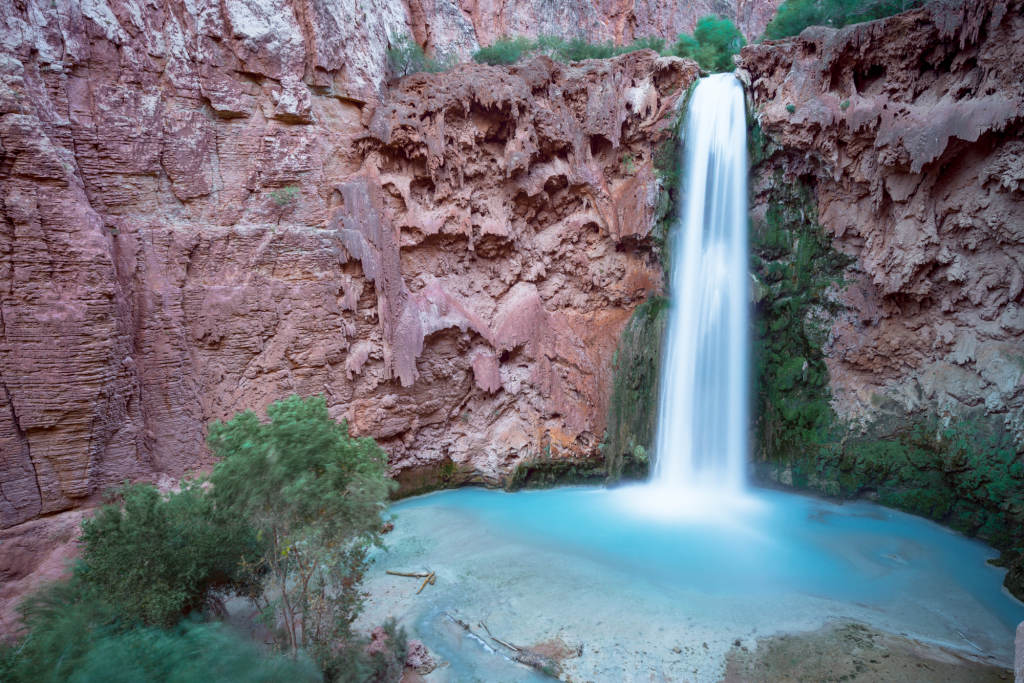
The lower section of the descent is perpetually wet from the spray off the cascade making for both muddy and slippery conditions. It’s not a particularly difficult descent, but does require care and is best done without others either coming down on top of you or climbing up immediately under you.
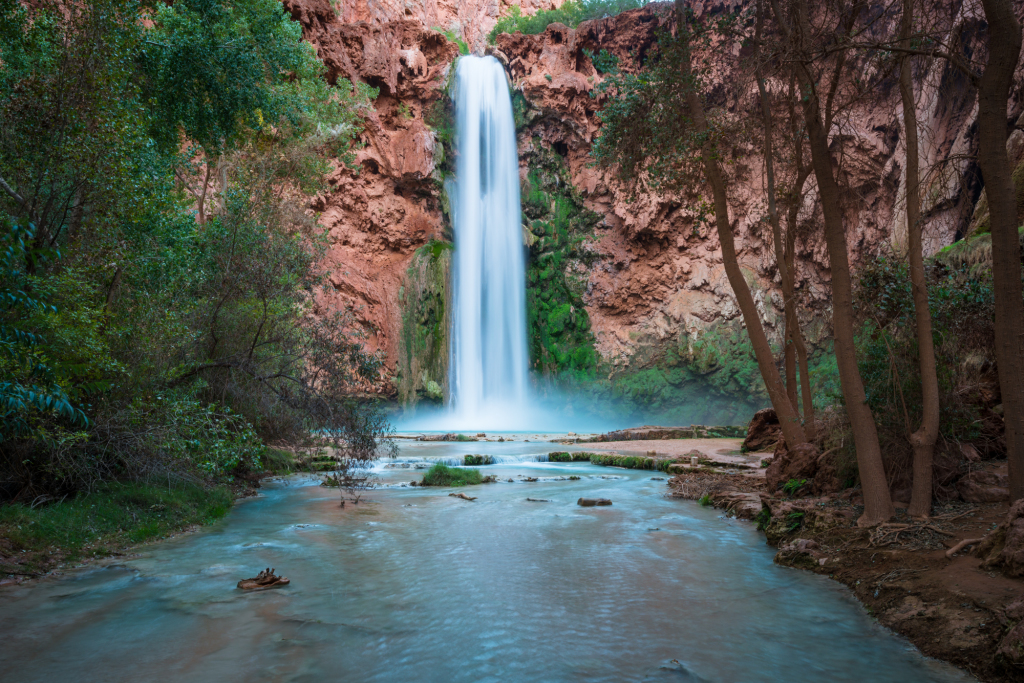
Mooney Falls and pools offer some really nice photographic opportunities. On the far side of the canyon from the ladders there are a nice set of travertine cascades that contrast beautifully against the red canyon walls. Get here early or late to avoid harsh sunlight.
Continuing further down the canyon brings you to two creek crossings. Here you’ll need to remove shoes (or be willing to get them wet) before you can continue dry the rest of the way to Beaver Falls. Havasu Creek continues down the valley with ever present pools and falls, all robed in the beautiful blue-green hues that makes it stand out so vividly against the red rocks.
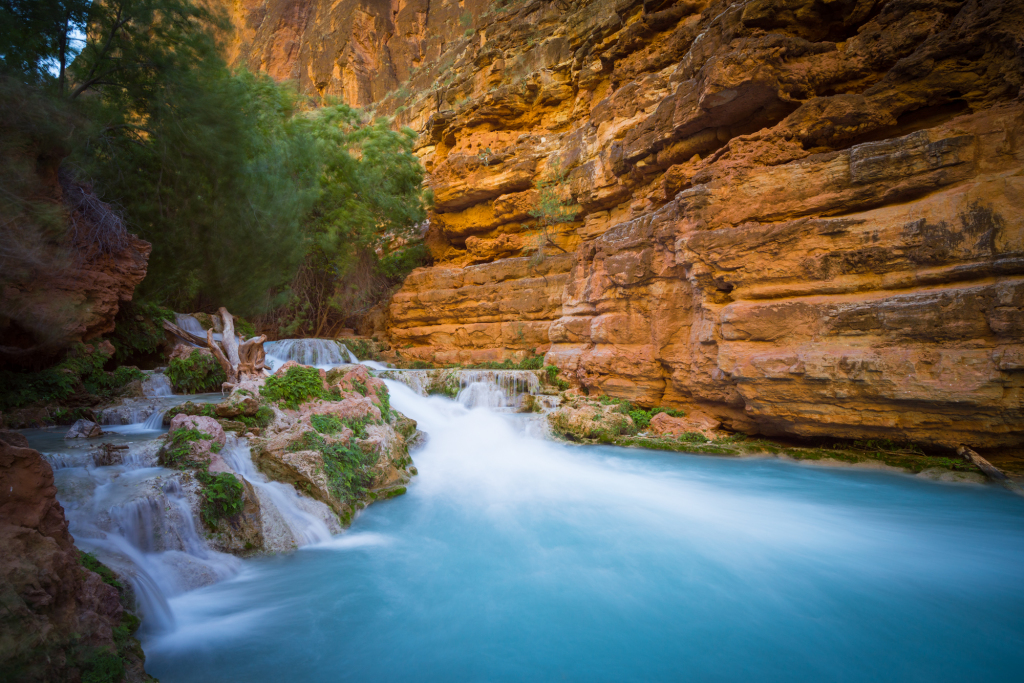
In a couple places, you ascent ladders or hewn logs to gain high trails that look down on the winding creek before finally ending at a tribal patrol station where your wrist band is checked. Before descending to the creek, you can make a short (~100 yard) detour to step inside Grand Canyon National Park and look back at Beaver Falls from a nice vantage point. It’s possible to continue another approximately 4 miles to the Colorado River.
The hike to Beaver Falls concludes with a descent down a series of three ladders where you cross Havasu Creek just under the falls. The river crossing below Beaver Falls is quite shallow and allows for easy placement of a tripod to get nice long exposure images of the falls and pool.
Notice to hikers, as we were ascending out of the falls I was hit in the head by a small rock falling from above. Thankfully, it left me with only a little pain but the consequences of such a hit could have been fatal. From that point on, I made a point of standing well clear of the canyon walls when I was able to.

We finished the day by hiking back to camp and up to Havasu Falls to catch sundown. Havasu Falls are best photographed in the early morning or late evening to avoid harsh sunlight and high contrast. As an added advantage, by the time we got there most of the day hikers and swimmers had left.
Because we had a 6pm flight out of Phoenix, we had to get a really early start on Monday morning. We woke at 4am, packed up camp, and were on the trail by 5am under bright moonlight and an incredible blanket of stars. Havasu Falls was well lit by the moon as we walked past, making for a magical scene. By the time the first sunlight was hitting the rim of the canyon we’d already passed Supai and were on our way up the wash. Because of the early start, we enjoyed cool temperatures and shade for all but about the last 30 minutes of the hike, and only about 15 minutes worth of that was in direct sunlight.
We ended the hike with sore feet and big smiles, excited about both the amazing sights in the canyon and the great companionship we shared over the weekend. Definitely a bucket lister!
Total distance: 21.78 mi
Max elevation: 5236 ft
Min elevation: 2585 ft
Max elevation: 5236 ft
Min elevation: 2585 ft
Jun
23
2013
(photo by Anne Archambault)
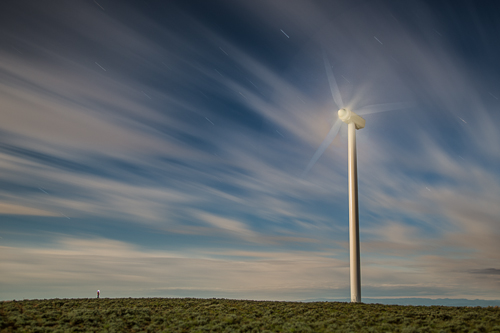
If you’ve driven through Washington on I90, you have probably seen the large wind farm that sits between the Columbia River and Ellensburg. Anne and I have often driven past and wanted to take pictures of the wind turbines but we’ve never stopped until this weekend.
Puget Sound Energy operates the facility, and as luck would have it they encourage people to visit! The Renewable Energy Center sits atop a ridge that has incredible views along with a windy disposition. The center itself has numerous educational displays to inform visitors about how the facility works and shows live data from the power output of the turbines and solar array.
A quick check-in allows you to get temporary use permits to travel around the facility and to walk just about wherever you please. There are of course some rules, the primary one being that you can’t get closer than about 100 yards to the turbines. However, the main access road crosses several lines of turbines, affording fantastic photographic opportunities right from your car.
While most locations favor a particular type of light (morning, evening), the direction of the turbines means that they could be facing in any direction at any time. Hence, locations that might make excellent morning compositions one day could change entirely when the turbines are angled differently. That said, we also found that the wide variety of terrain allowed for considerable freedom and we never felt like there weren’t opportunities.

(photo by Anne Archambault)
As a happy coincidence, our trip corresponded with the “Super Moon,” allowing us to watch it rise above the Columbia and the turbines of the wind farm. Combined with the “Super Moon” we were also witness to an absolutely breathtaking sunset.

Since the facility allows visitors to stay up to two hours past dusk, we used the time to work on our night photography. The “Super Moon” provided us with enough light to experiment with different ways to photograph the turbines. In addition to headlamps and flashlights, we’d also brought along our camera flashes. We were able to use these to strobe the turbine blades and add detail. Anne was able to use this technique combined with some long exposure to capture a great image that she’s posted in her blog post Windy Night:
May
22
2013
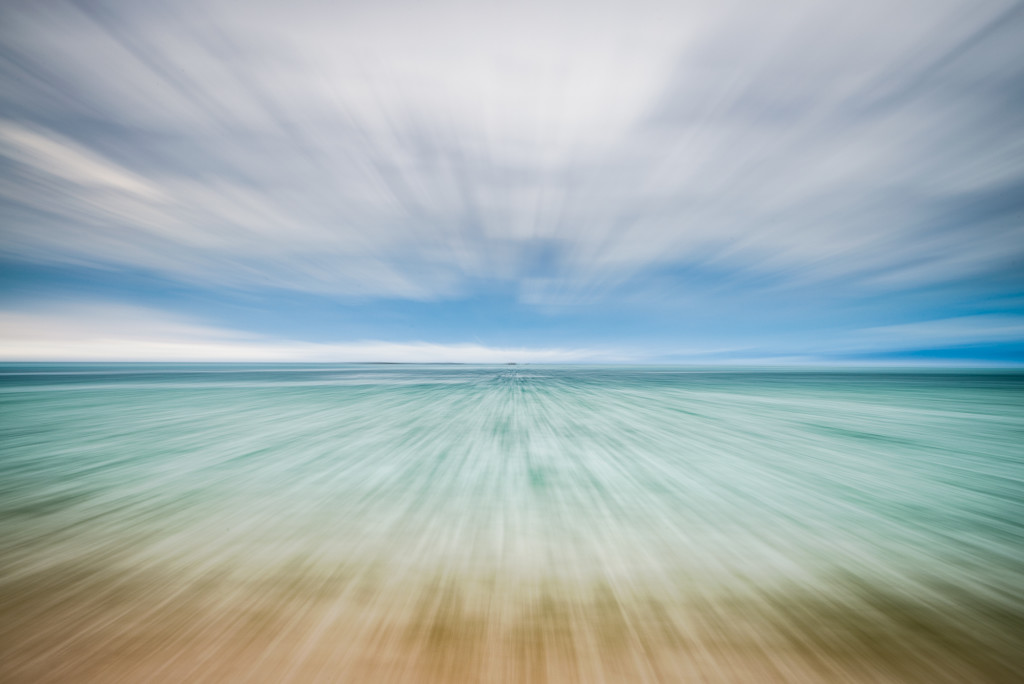
(photo by Anne Archambault)
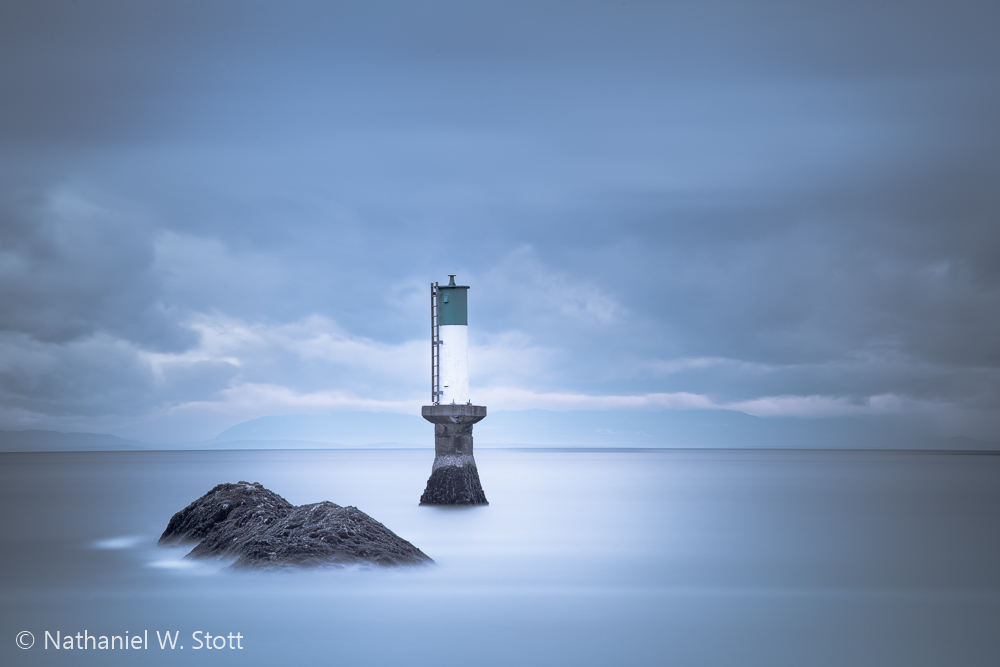
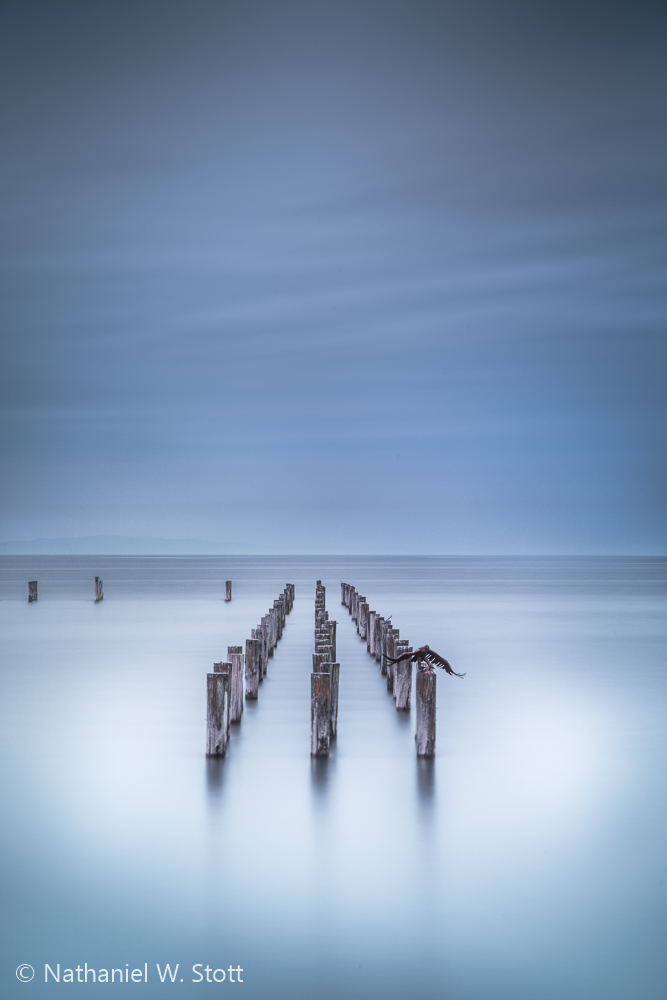
Anne and I recently had a chance to take a fine art long exposure photography workshop with Vancouver Photo Workshops. We’ve both been interested in long exposure photography for a while, and we’d already gotten some of the equipment (like 10-stop ND filters) to help us slow down the real world and blur our things like wave and waterfalls in broad daylight. As hoped, this workshop added to our bag of tricks.
The instructor was Marc Koegel. He has a great blog and since he’s been shooting long exposure photography for a while, he’s also full of great advice. He’s also been generous in sharing resources for the aspiring long exposure photographer.
Shooting Long Exposure
Marc had a lot of great guidance for us and took a ton of time to answer all sorts of questions. We spend half of both Saturday and Sunday talking about various aspects of long exposure photography. For me, the biggest take away was that long exposure photography is a means to the end of creating artistic images that inspire. Several people in the class mentioned that taking the workshop (including myself) was a way to help them produce more artistic photographs. Indeed, long exposure is a way of capturing a mood in movement that is imperceptible in our visual reality but that reaches us at a deep level. In this sense, it’s quite different than standard photography which aims to realistically and accurately the scene in front of us.
Serendipity
One of the really cool things about long exposure is the serendipity of it. Things happen when you’ve got the shutter open from thirty seconds to 30 minutes that you simply can’t account for. Marc showed us his image of the Brandenburg Gate where a limo pulled up while the shutter was open. The car helps make the image but could have never been staged. Clouds or water may not turn out how you think they will and that’s part of the magic.
GENERAL Tips
Of course there were lots of interesting tips that we took away. Marc has an excellent blog at http://bulbexposures.com that provides detailed tutorials. We referred several times to the Long Exposure Tutorial which provided some excellent advice on gear, selecting the proper amount of ND stopping power, and some guidelines for shooting.
1. Bracketing
In terms of shooting, perhaps the best tip was to really bracket the shot. Marc suggested not only doing a plus/minus HDR style bracket, but also a time based bracket of 1,2,4, and 8 minute exposures to ensure you’ve captured what you need. The HDR style bracket will allow you to fill in detail if you need it in post.
2. Clouds and cloud Coverage
Generally, you’re looking for days where the sky is between 60-80% cloudy. These days will provide you with a good amount of cloud variation to allow for a sense of motion. Too much cloud cover and everything is just bland. Too little and you can’t make an interesting sky.
3. F-Stops and Diffraction
Another good reminder was about using your aperture wisely. Too many times you’ll be tempted to use a high f-stop to further slow down the shutter speed. I’ve done this countless times to slow my exposure time. However, it’s important to remember that high f-stops (higher than about f/14 really) will cause diffraction in the lens and will cause image quality and sharpness to suffer. If you can, shoot at between f/7.1 and f/11 to ensure appropriate sharpness.
4. Long Exposure Noise
When shooting long exposure, especially when doing it back to back, remember that heat can build up on your sensor and lead to sensor noise. For example, if you’ve taken six 5-minute shots back to back then you’ve had the shutter open for about 30 minutes non-stop. That’s going to build up heat on the sensor and cause an increase in noise, especially on hot days. So take that into account and try and give your sensor a chance to cool off and reduce noise.
I’ve read a bunch of articles on long exposure noise reduction. Marc recommends touse long exposure noise reduction for any shot longer than 8 minutes that on a crop sensor camera. He also recommends to avoid it all together on full frame cameras to avoid the associated lengthy delays. I’ve read articles pontificating both approaches. At this point, I think I’m in the camp that says most cameras that are under a year old probably have noise levels that make noise reduction more of a hassle than a benefit. You mileage may vary.
5. Test Shots and Exposure Time
When shooting long exposure images, use a test shot to help you determine your exposure time. From the test shot, you can compute the long exposure time for your ND filter with a simple table (see Marc’s bulbexposure.com tutorial) or smartphone application (available for all smartphone platforms). For example, if a “normal” exposure at f/11 is 1/60th of a second, the equivalent exposure with a 16 stop ND filter would be 18 minutes and 12 seconds.
6. Light Leaks
It turns out that as good as cameras are today, most still have small areas where light can leak in and ruin your long exposure images. Marc uses black tape to tape over his viewfinder and other strategic areas of his camera. This is also problematic for users of “plate” style 100mm x 100mm filters like Lee, Cokin, or Hitech since light can bounce between the filters and lens. In general, I think screw on filters probably do a better job of controlling potential light leaks, but are harder to take on and off for focusing and metering.
I’ve taken to simply covering my camera with my hat, both to prevent sun from entering my Cokin filter holder system as well as to cover the entire camera/lens system. This prevents heat buildup and helps prevent any additional light from ruining my shots.
Summary
I had a blast on this workshop. We visited some cool places and learned some great new techniques to really help our photography. While the tips were specific to long exposure photography, I think some are also applicable to everyday shooting. If you have the chance, I’d certainly recommend taking a look at what Marc is doing and his workshops at Vancouver Photo Workshops.