May
22
2013
(photo by Anne Archambault)
Anne and I recently had a chance to take a fine art long exposure photography workshop with Vancouver Photo Workshops. We’ve both been interested in long exposure photography for a while, and we’d already gotten some of the equipment (like 10-stop ND filters) to help us slow down the real world and blur our things like wave and waterfalls in broad daylight. As hoped, this workshop added to our bag of tricks.
The instructor was Marc Koegel. He has a great blog and since he’s been shooting long exposure photography for a while, he’s also full of great advice. He’s also been generous in sharing resources for the aspiring long exposure photographer.
Shooting Long Exposure
Marc had a lot of great guidance for us and took a ton of time to answer all sorts of questions. We spend half of both Saturday and Sunday talking about various aspects of long exposure photography. For me, the biggest take away was that long exposure photography is a means to the end of creating artistic images that inspire. Several people in the class mentioned that taking the workshop (including myself) was a way to help them produce more artistic photographs. Indeed, long exposure is a way of capturing a mood in movement that is imperceptible in our visual reality but that reaches us at a deep level. In this sense, it’s quite different than standard photography which aims to realistically and accurately the scene in front of us.
Serendipity
One of the really cool things about long exposure is the serendipity of it. Things happen when you’ve got the shutter open from thirty seconds to 30 minutes that you simply can’t account for. Marc showed us his image of the Brandenburg Gate where a limo pulled up while the shutter was open. The car helps make the image but could have never been staged. Clouds or water may not turn out how you think they will and that’s part of the magic.
GENERAL Tips
Of course there were lots of interesting tips that we took away. Marc has an excellent blog at http://bulbexposures.com that provides detailed tutorials. We referred several times to the Long Exposure Tutorial which provided some excellent advice on gear, selecting the proper amount of ND stopping power, and some guidelines for shooting.
1. Bracketing
In terms of shooting, perhaps the best tip was to really bracket the shot. Marc suggested not only doing a plus/minus HDR style bracket, but also a time based bracket of 1,2,4, and 8 minute exposures to ensure you’ve captured what you need. The HDR style bracket will allow you to fill in detail if you need it in post.
2. Clouds and cloud Coverage
Generally, you’re looking for days where the sky is between 60-80% cloudy. These days will provide you with a good amount of cloud variation to allow for a sense of motion. Too much cloud cover and everything is just bland. Too little and you can’t make an interesting sky.
3. F-Stops and Diffraction
Another good reminder was about using your aperture wisely. Too many times you’ll be tempted to use a high f-stop to further slow down the shutter speed. I’ve done this countless times to slow my exposure time. However, it’s important to remember that high f-stops (higher than about f/14 really) will cause diffraction in the lens and will cause image quality and sharpness to suffer. If you can, shoot at between f/7.1 and f/11 to ensure appropriate sharpness.
4. Long Exposure Noise
When shooting long exposure, especially when doing it back to back, remember that heat can build up on your sensor and lead to sensor noise. For example, if you’ve taken six 5-minute shots back to back then you’ve had the shutter open for about 30 minutes non-stop. That’s going to build up heat on the sensor and cause an increase in noise, especially on hot days. So take that into account and try and give your sensor a chance to cool off and reduce noise.
I’ve read a bunch of articles on long exposure noise reduction. Marc recommends touse long exposure noise reduction for any shot longer than 8 minutes that on a crop sensor camera. He also recommends to avoid it all together on full frame cameras to avoid the associated lengthy delays. I’ve read articles pontificating both approaches. At this point, I think I’m in the camp that says most cameras that are under a year old probably have noise levels that make noise reduction more of a hassle than a benefit. You mileage may vary.
5. Test Shots and Exposure Time
When shooting long exposure images, use a test shot to help you determine your exposure time. From the test shot, you can compute the long exposure time for your ND filter with a simple table (see Marc’s bulbexposure.com tutorial) or smartphone application (available for all smartphone platforms). For example, if a “normal” exposure at f/11 is 1/60th of a second, the equivalent exposure with a 16 stop ND filter would be 18 minutes and 12 seconds.
6. Light Leaks
It turns out that as good as cameras are today, most still have small areas where light can leak in and ruin your long exposure images. Marc uses black tape to tape over his viewfinder and other strategic areas of his camera. This is also problematic for users of “plate” style 100mm x 100mm filters like Lee, Cokin, or Hitech since light can bounce between the filters and lens. In general, I think screw on filters probably do a better job of controlling potential light leaks, but are harder to take on and off for focusing and metering.
I’ve taken to simply covering my camera with my hat, both to prevent sun from entering my Cokin filter holder system as well as to cover the entire camera/lens system. This prevents heat buildup and helps prevent any additional light from ruining my shots.
Summary
I had a blast on this workshop. We visited some cool places and learned some great new techniques to really help our photography. While the tips were specific to long exposure photography, I think some are also applicable to everyday shooting. If you have the chance, I’d certainly recommend taking a look at what Marc is doing and his workshops at Vancouver Photo Workshops.
May
20
2013Anne and I concluded our trip to Iceland with a day trip to the Snaefellsnes Peninsula. Famously, the Snaefells Volcano is where Jules Verne set his classic “A Journey to the Center of the Earth”. Our adventures were somewhat less epic but I think no less fun (and probably easier on the blood pressure).
The peninsula is an easy (albeit long) day trip from Reykjavik and can be done via numerous tour agencies or through a private car rental. Anne and I opted for the car rental option and we made the trip with some friends from the photo tour. Despite the winter weather, we had no problems with the roads or the mountain passes (partially because rental cars in Iceland are equipped with studded tires during the winter).
We set out with several specific targets in mind:
- Kirkjufell
- Búðirkirkja
- Arnastapi
- Lóndrangar Lighthouse
Since we wanted to save Kirkjufell for sunset (and hopefully auroras), we started at Búðirkirkja and worked our way around towards the tip of the peninsula before backtracking and heading over route 54 to Grundarfjörður.
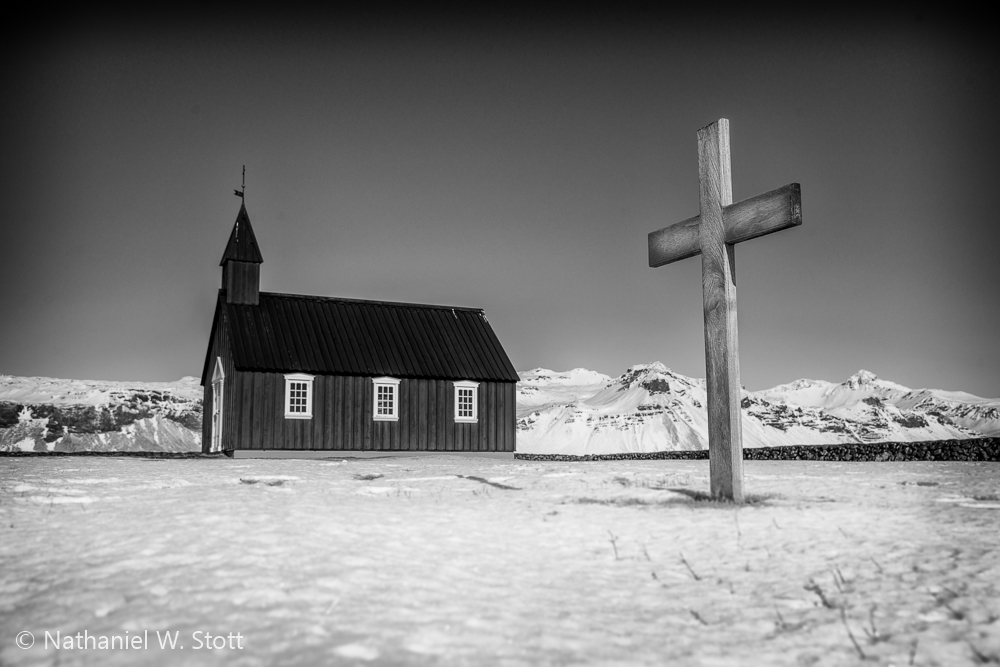
Búðirkirkja
Búðirkirkja is a small church that is notable because of its stark black color. It’s a simple structure that juxtaposes well against snow draped Snaefellsjokul.
On arrival, we were greeted by a small bus of Japanese tourists. Normally, running into any bus of tourists would not be a cherished event but in this case one of the tour participants had hand crafted a string of kites and was flying them over the church. They invited us to take turns flying the kites.
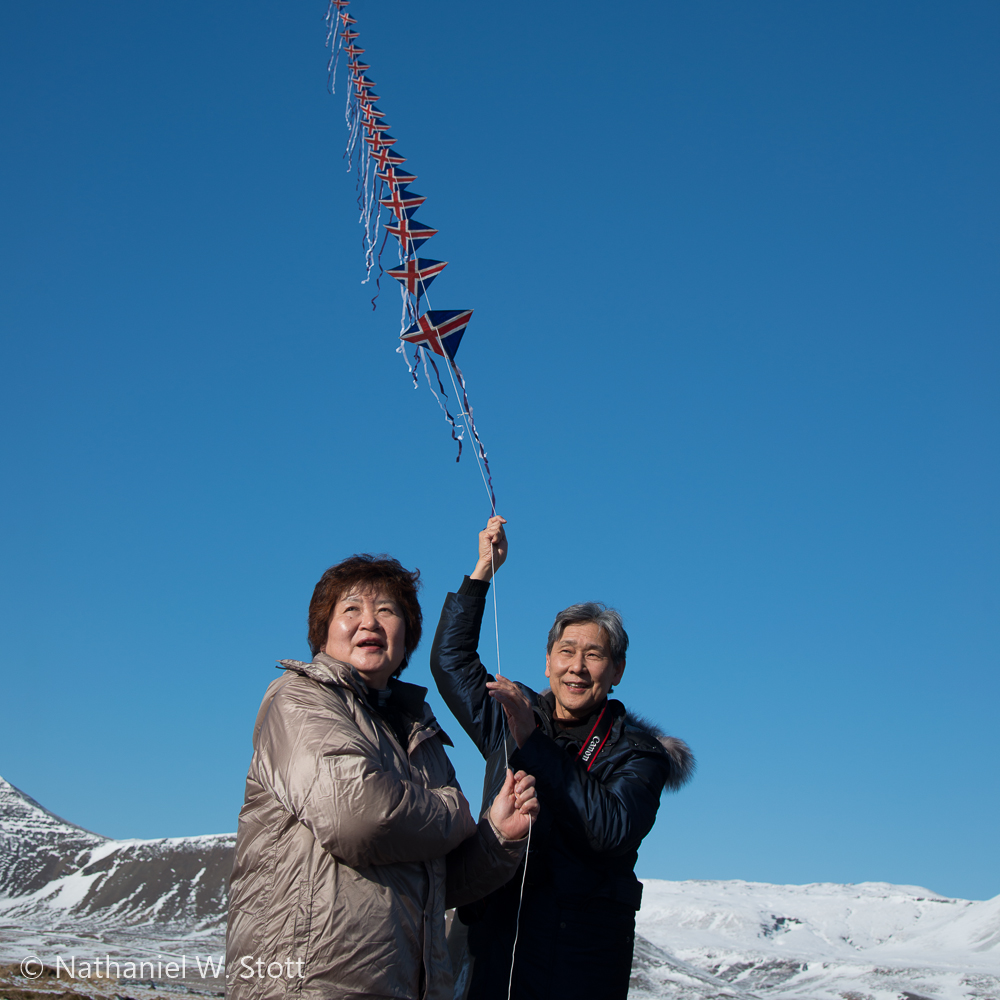
Pictures were taken all around of people flying the string of small kites, each kite with the colors and insignia of the Icelandic flag. It was a unique moment and an absolutely unique event.
Arnastapi
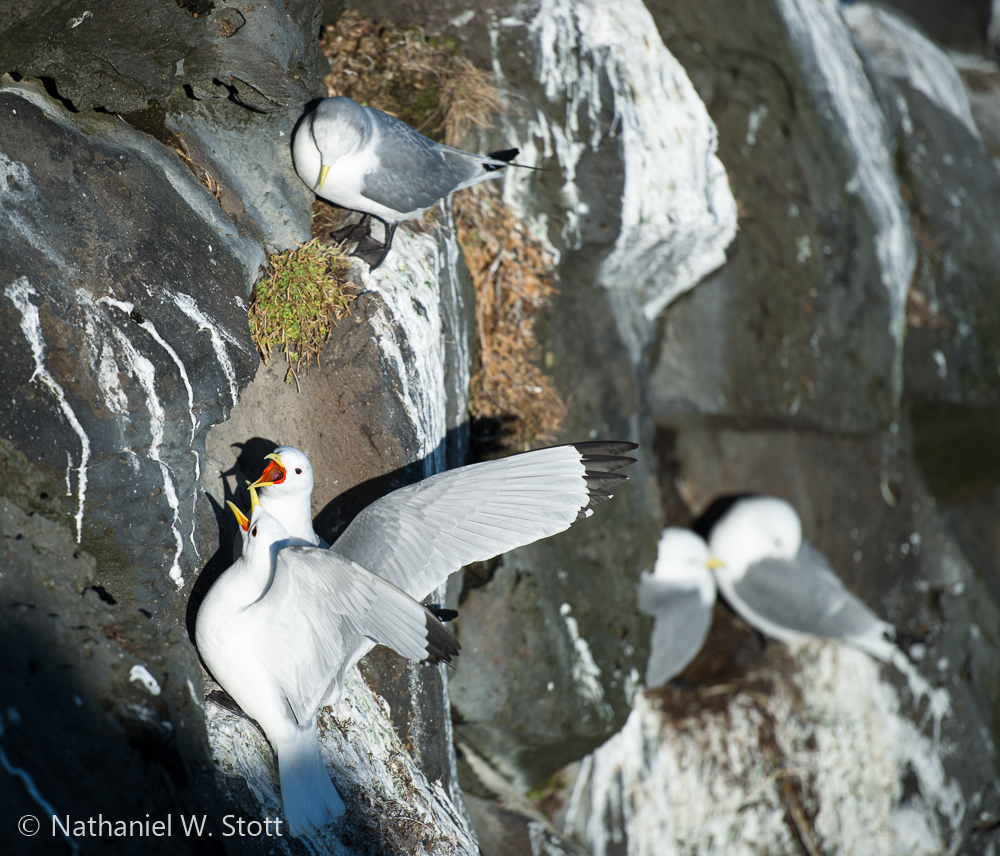
Arnastapi is a small fishing village that has a wonderfully secluded little harbor and a nice walking path around a series of coves. The coves serve as a rookery for nests that line the cliffs with an abundant array of bird life. We sat for a long time watching the mesmerizing aerial dance as fulmars flew about the coves against a backdrop of wonderfully clear blue north Atlantic water.
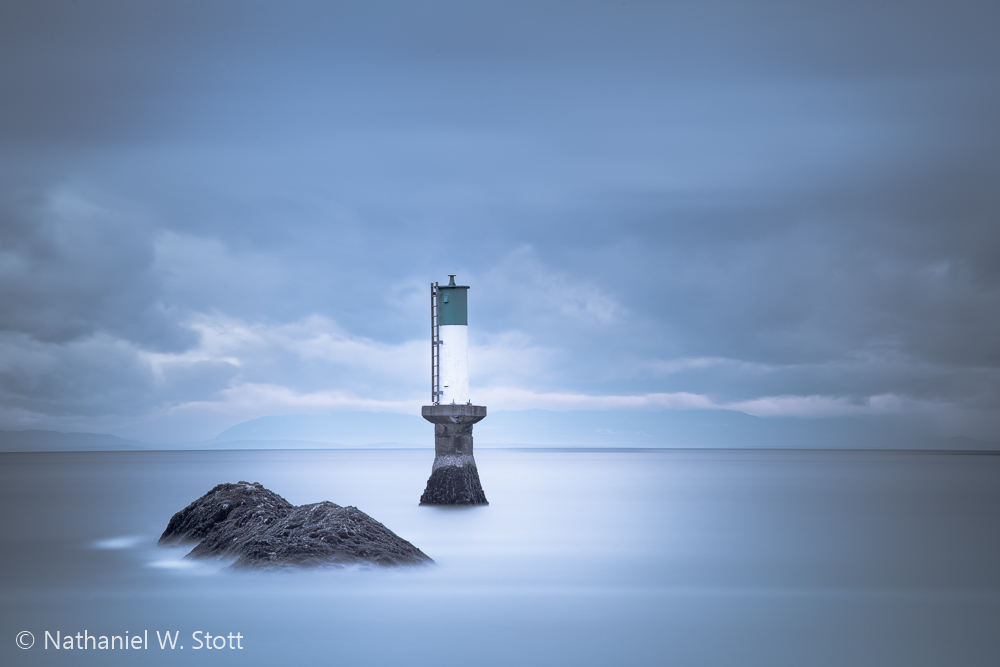
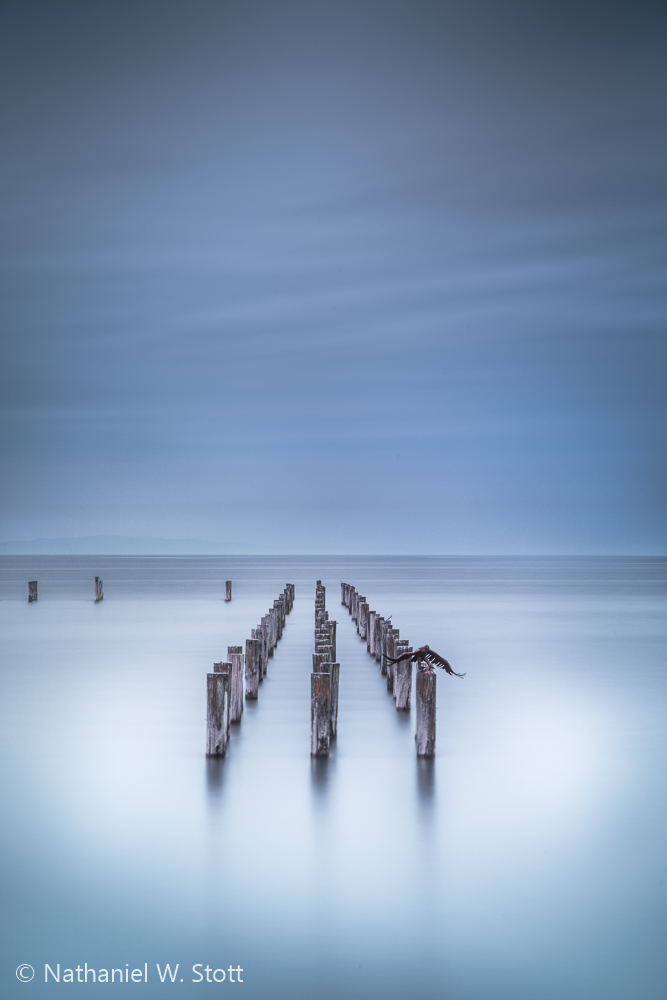
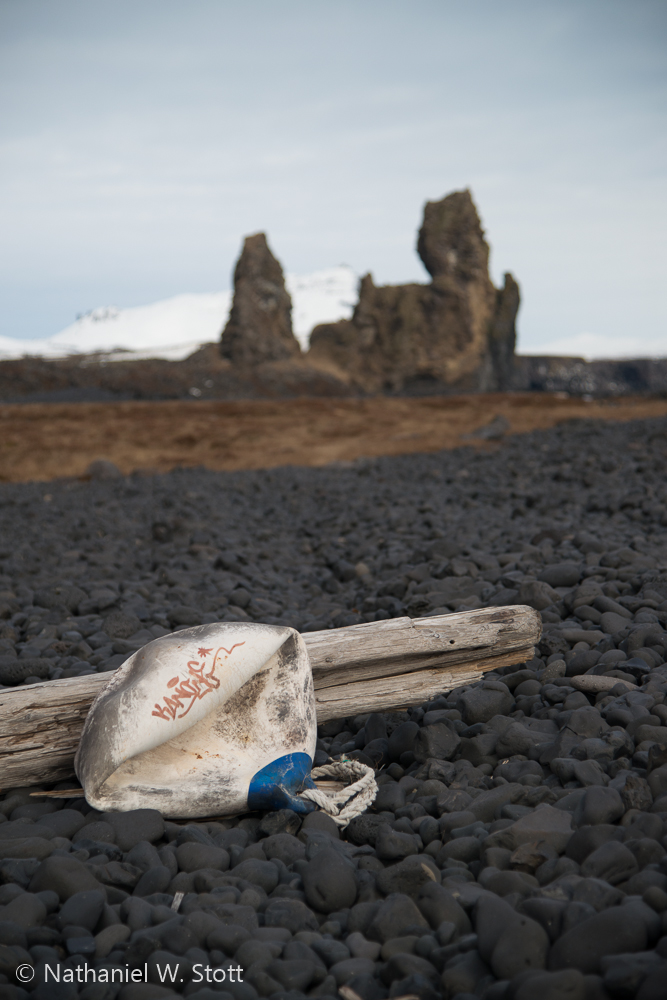
Lóndrangar
Lóndrangar is home to a pair of ancient volcanic basalt plugs that sit just on the coast. There are a couple access points but the “best” drives down to a lighthouse that overlooks an old fishing port. In addition to the sea stacks, the site has several small buildings that are photographically interesting along with beaches and various ocean debris that make for interesting foreground elements.
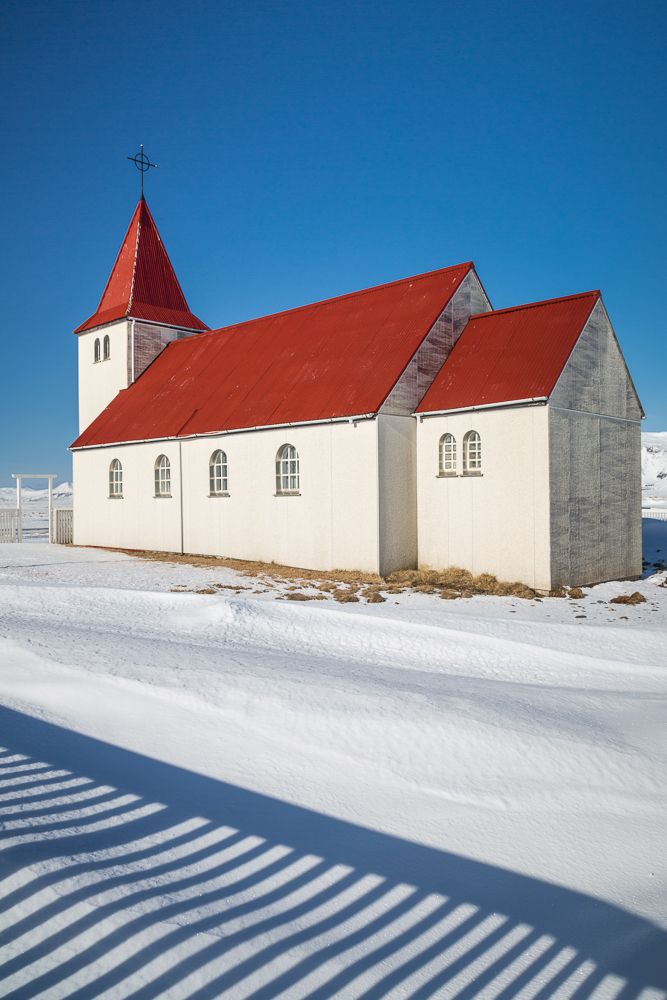
Churches
While not explicitly on our sight list, we also took the opportunity to photograph several additional churches along our route. The simple lines and iconic landscape make these churches hard to pass by without stopping.
(photo by Anne Archambault)
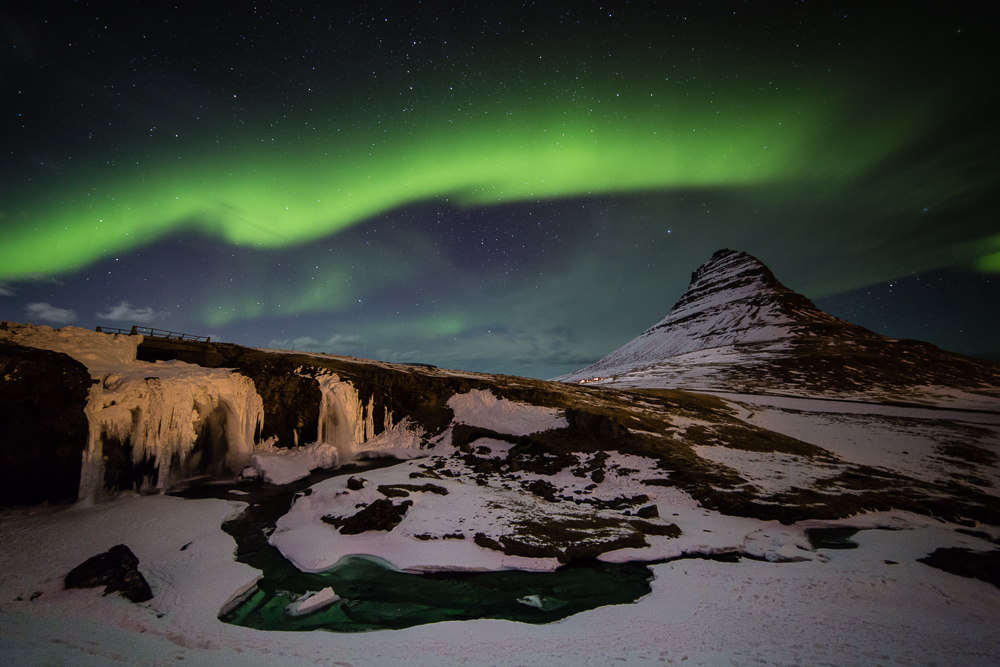
Kirkjufell
We concluded our tour of the peninsula with a stop at the iconic Kirkjufell Mountain and waterfalls. This vista has rapidly grown in popularity and is now common on photo sites like Flickr. Regardless, we hoped that we’d be able to harness sunset or an aurora and come away with some interesting images.
(photo by Anne Archambault)
While we weren’t rewarded with a magical sunset, we did manage to catch the aurora as overcast skies parted about an hour after sunset.
Summary
The Snaefellsnes Peninsula was a perfect ending to a great vacation in Iceland. It also allowed us to utilize a lot of what we’d learned during our week along the south coast and apply it to our photography. We were able to spend time with new found friends and see the aurora for one last time over an iconic Icelandic mountain. My only regret for the trip? We didn’t spend more time.
May
13
2013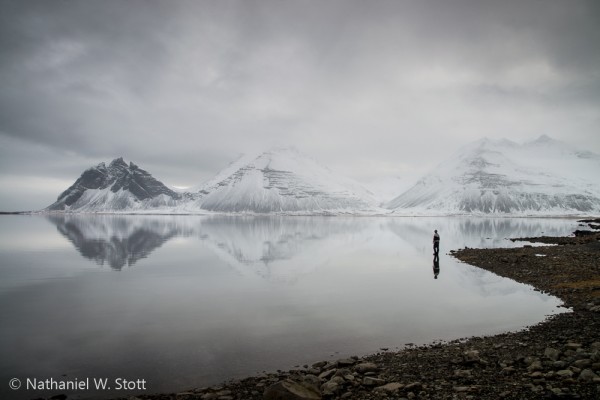
It’s hard to go anywhere in Iceland without feeling the power of water. Water shapes the landscape through rivers and waterfalls. It scours mountains through massive glaciers. Water is an epic force and it’s truly everywhere to behold in Iceland.
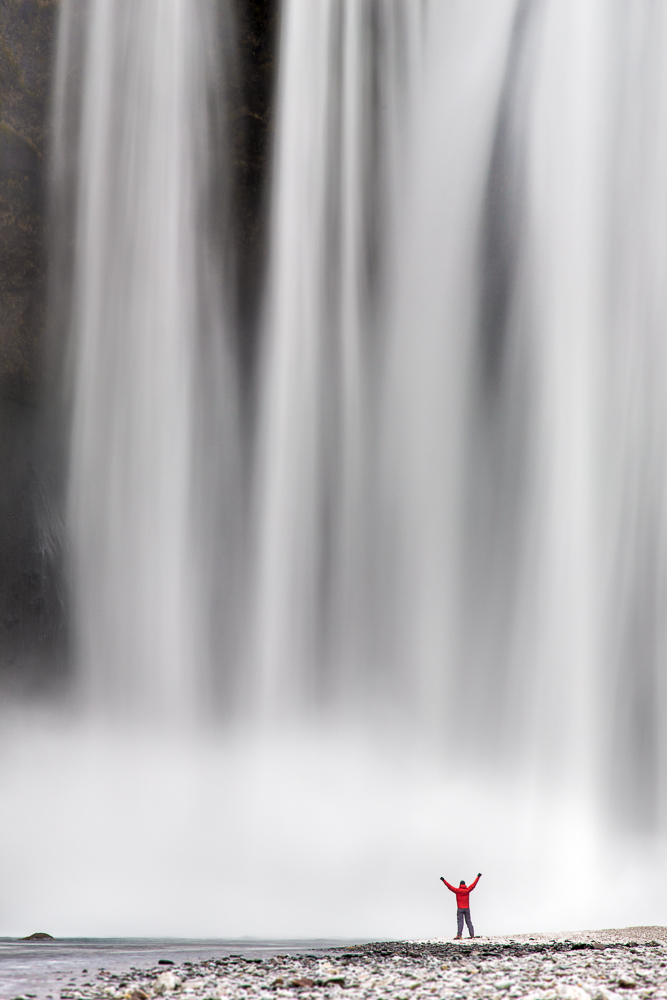
Waterfalls
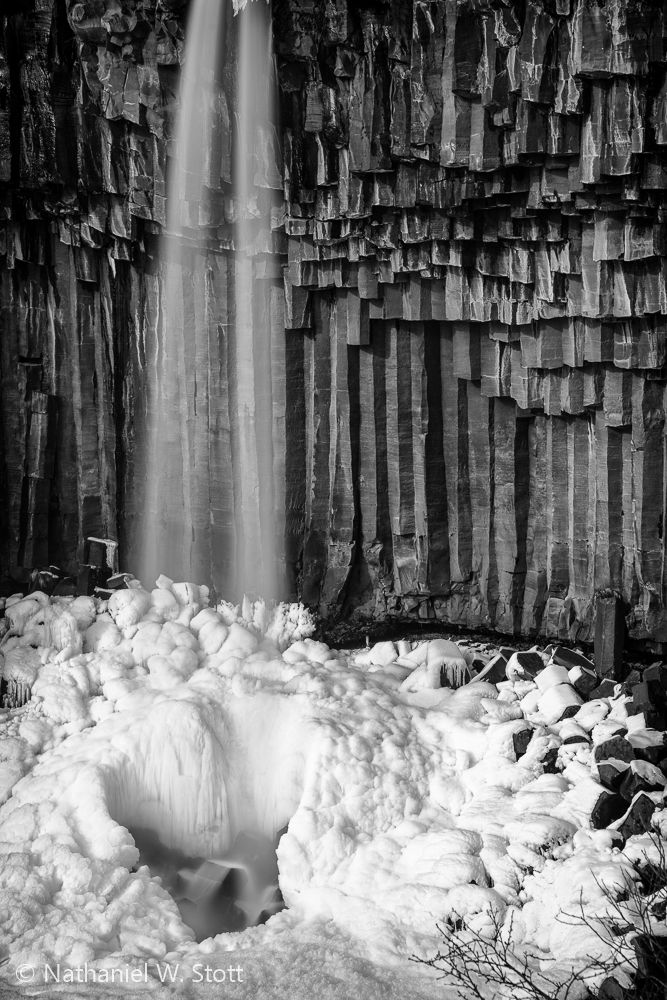
It’s literally impossible to drive and not see waterfalls rushing over cliffs near the road. On our trip to Iceland we visited some of the most well know waterfalls along the south coast: Selfoss, Gulfoss, Oxararfoss, Seljalandsfoss, and Svartifoss.
(photo by Anne Archambault)
Of those mentioned, Gulfoss and Selfoss are perhaps the most well-known but may be the most difficult to photograph well. Both tend to lose the sense of scale without an appropriately positioned person for scale. Of course if you do head there, be sure to take colorful rain gear which will not only provide needed protection from the spray but color for other photographers!

Of the waterfalls we visited, I think I most appreciated the time we spent photographing Oxararfoss in Þingvellir National Park. Combined with ice it provided myriad compositions for hours of enjoyment.
Similarly, the short hike to Svartifoss paid off with striking basalt columns and a generally wonderful scene. I found capturing the essence of the place to be difficult, but it was a magical place to be and I’m truly sorry I missed it on my first visit to Iceland
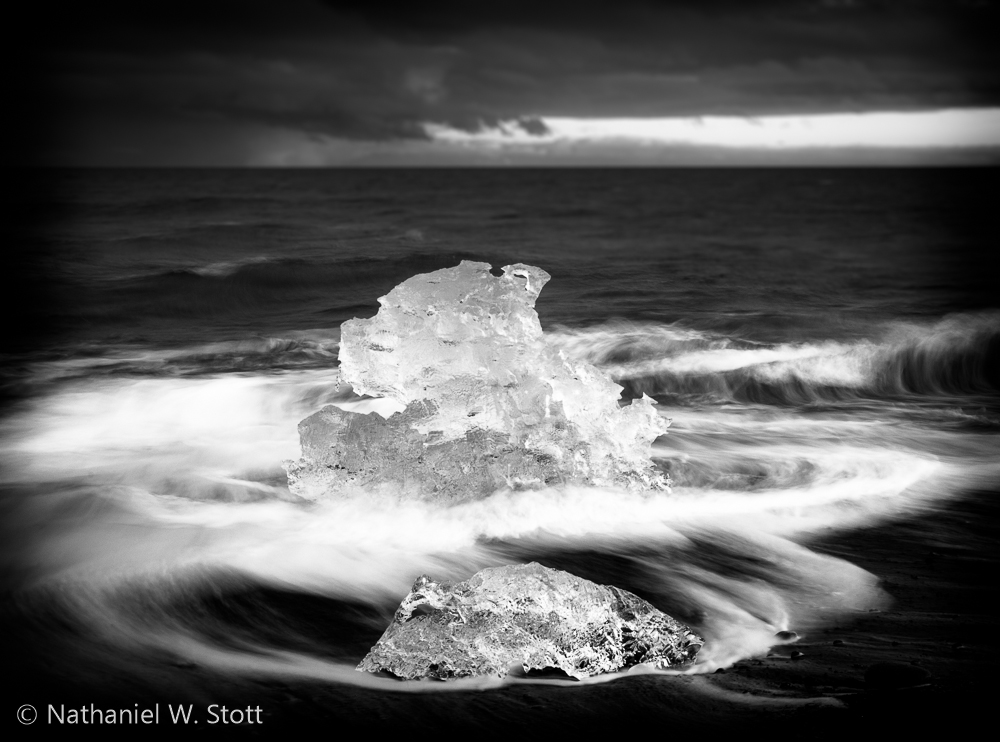
Icebergs
Of course no trip to Iceland is complete without a trip to the iceberg lagoons around Jökulsárlón. The lagoon is stunning and provides a double whammy, icebergs in the lake on the lagoon side and icebergs on the beach on the ocean side.
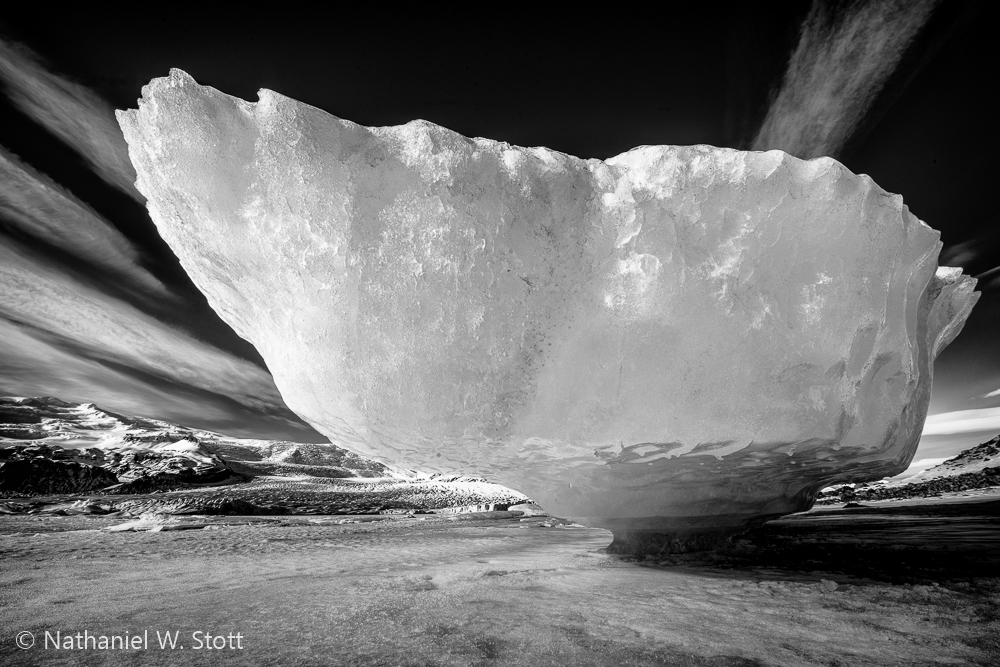
While we certainly spent time photographing the icebergs in the lagoon, it would be a mistake to ignore the beach. I found the beach to have wonderful compositions at both morning and evening and was a highlight of the trip.
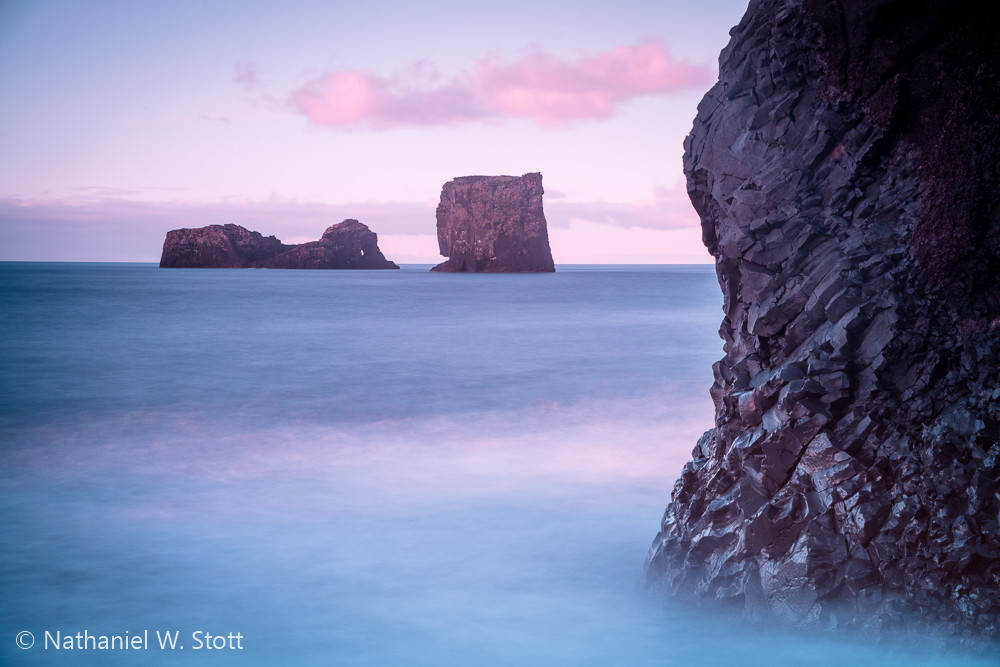
The Ocean
The ocean provides a ton of opportunities to play with wonderful shorelines and offshore sea stacks. Around Vik there are several sea stacks that provide dramatic scenes against black beaches. I found the promontory at Dyrhólaey to be my favorite location in the area. It afforded some outstanding views of sea stacks, the coast line, and the lighthouse.
Of course, these are only a handful of the wonderful “water based” locations along the south coast. These are indeed highlights, which was evidenced by the sheer number of tourists and photographers that we saw at these locations. If you’re going to visit, I’d recommend planning time to check them out in either early morning or late evening light. It will help you avoid the day tours from Reykjavik and also allow you to capture the incredible beauty these places have to offer.