Haute Route Day 3 – Champex Lac to Le Châble

The day from Champex Lac to Le Châble is probably the easiest day of the route with mostly elevation loss as you descend to the valley. The only elevation gain comes at the end of the day as you make your way gently up to Le Châble. That said, it’s still a sufficiently long and tiring day and hikers shouldn’t mentally underestimate the walk.

Our entire crew had made previous arrangements to meet up with Rich in the morning at the far end of the lake so we all set out together, grabbed cash from the ATM machine, and set off to meet Rich who was patiently waiting in the crisp morning air.

hauteroute - Champex Lac

We were surprised as we walked past the lake how the valley opened up to reveal a much better view than we had expected and showed just how high above the valley floor we actually were. We took in the awesome views and the warmth of the sun as we dropped down a grass covered two-track path leading towards Sembrancher at a healthy grade. This path opens at various places, providing nice views over bucolic farmland.

Haute Route - Pasture

Along the way we ran into various pastures where cows rested and ate grass. Unlike their North American counterparts, these cows didn’t seem shy in the least. In fact, they were more than happy to walk up and engage with people. They even loved being petted!

Haute Route - Cow

We’d expected to eat in Sembrancher but our short foray into town didn’t turn up much in the way of small cafes, eateries, or ATM machines so we continued our walk out of town and towards Le Châble with only a small snack. From Sembrancher the trail to Le Châble leads out of town into farmland before veering right and climbing rather steeply up the side of the valley. This path then drops back down to the river and follows it closely on a shaded road before coming to a major street where you can make out the chapel spire in the center of Le Châble.

Haute Route - Portrait

We’d called ahead the night before for accommodations, but our hotel had apparently over-booked so we were redirected to the Hotel Les Jietroz. We weren’t initially happy with the move, but our room turned out to be spacious, comfortable, quiet, and even had a four post bed!

Haute Route - Entering Le Chable

Having made good time that morning, we had the better part of the afternoon to wander around town, take pictures, and catch up on washing clothing before meeting our friends for dinner.

Haute Route - Anne and Nate

Dinner itself was a boisterous affair. We talked loudly over beers and Anne even managed to convince several of our travelling companions to try beef tartare! All in all, we had a blast.

Note: The ATM in Le Châble is the last ATM we were able to access until we got to Zinal. If you’re planning on paying cash at the huts or hotels, please plan accordingly. We also took the opportunity to stock up on provisions since the next two days would be at huts, we purchased three days’ worth of lunch supplies.

Total distance: 10.6 mi
Max elevation: 4892 ft
Min elevation: 2343 ft

Haute Route Day 2 – Col De La Forclaz to Champex Lac (via Fenêtre d’Arpette)

Since we knew we had a big day ahead of us we got an early start. The first part of the path follows an old bisse waterway, which means the path has an almost level grade. The bisse is still there and at various places runs through elevated wooden channels.

Haute Route - Sunrise at Forclaz

We reached the Château du Glacier hut in good time and were soon gaining elevation over the valley in a steep but pleasant climb that opened spectacular views over the Trient glacier. Because we’d left early the trail was still in the shade until we’d gained over half our elevation for the day — a welcome relief from the heat.

Anne over Trient Glacier

We took a quick snack break at an old shack where Kathy, Val, Rich, and Martijn caught up to us and provided lively banter. It’s pretty hard to understate the views looking back into the valley and over the glacier. I took a lot of pictures as well as some panoramas to try and capture just how awesome the place is.

The final pitch to the Fenêtre goes up a rather rocky and unstable scree slope. We’d had rocks come down the hill at us from unaware hikers above and the loose rock makes the last pitch dodgy. As we finally crested out at the col, we found that we were anything but alone with as many as 40 people lunching and resting. It was far from the wilderness experience Anne recalled from her previous visit here while walking around Mont Blanc ten years before.

The path down to Arpette and Champex Lac was generally pleasant. The initial descent from the Fenêtre was again steep and scree filled, and was most likely an even worse ascent than what we’d done earlier. Otherwise, it was a nice path along the valley side overlooking remnant lateral moraines.

Arpette

We stopped for beer at the small lodge in Arpette before continuing down to Champex Lac where we stayed for the night at the Pension en Plein Air. Kathy, Val, and Martijn stayed at the same hotel we did, and so we made plans with Rich (who was staying at the far end of the lake) to meet later for dinner. Anne and I cleaned up and then walked along the lake, taking in the last of the sunlight before it dipped behind the mountain, before heading back to a wonderful dinner with our new friends.

A couple notes here for would be travelers:

1) On the path from Arpette to Champex. According to the book “on coming to a bridge cross over, then go right on a footpath… Recross the stream and soon after bear left when the path forks.” The bridge is a road crossing with the footpath following the course of the river just on the opposite side. The left fork diverts down towards the steam, leaving what looks to be the more well-traveled path.

2) There is an ATM in Champex Lac.

Total distance: 10.58 mi
Max elevation: 8763 ft
Min elevation: 4957 ft

Haute Route Day 1 – Argentiere to Col De La Forclaz

It’s hard not to feel a little trepidation on the first day of a long, multi-day hike and the start of this day was no different. Anne had done part of this route previously as part of the TMB but I’d never been in this area of France before and had never visited Switzerland. We woke to a crisp but cloud free morning. The Gite served a filling breakfast and I helped myself to more than a single sitting knowing that there would be a lot of hiking ahead.

As we headed out of Argentière we grabbed some fresh bread and cheese for lunch. These shops open around 8am (some earlier) so it was perfect for us as we headed out of town. Our route for the day left from Argentière, crossed to the south side of the valley, and then made its way along a shady forested path up the valley to Le Tour, then climbed up and over the Col de Balme, and finally down into Trient. Along the way, we met many runners participating in the 300km La Petite Trotte à Léon. As each runner approached, we stepped aside and started clapping to help encourage them along their way.

Le Tour

Our path took us quickly to Le Tour, where we bypassed the gondola and started the long walk up to the Col de Balme. The path up to the Col de Balme isn’t a wilderness experience, you’re accompanied by either a gondola or lifts and flanked by mountain bike trails. But the scenery is impressive, lined on either sides by alpine valleys, mountain walls, and always the imposing massif of Mont Blanc behind.

Le Tour Gondola

Col de Balme sits on the border between France and Switzerland with a small hut that serves meals if you’re inclined. Anne and I had prepared cheese and bread for what would become a standard lunch and we made our own picnic on the side of the hut out of the wind.

Col De Balme

From Col de Balme there were a couple options for descending to Trient/Col de la Forclaz. The direct route heads down the valley towards Trient, starting with a gentle descent followed by more radical switchbacks in the woods. The other path follows the contour of the mountain and, based on the description in the book, provides a relatively stunning overlook to the Trient glacier. Anne and I decided that we didn’t want the extra distance or elevation the more scenic path might provide knowing that we had a tough day up the Fenêtre d’Arpette. The guide book described the more scenic path as the steeper of the two, but I’m not sure how it could have been any steeper than what we hiked! We used our poles liberally and were glad when the path mercifully met the valley floor.

Cold de Balme

(photo by Anne Archambault)

While our lodging that night had been planned ahead for Trient, we changed our plans as we made our way down the path so that we would instead stay at the Hotel De La Forclaz. This turned out to be a great trade-off since we had no problems getting a room that night (we’d asked hikers on the way up how full the hotel was the night before), we lessened our elevation gain for the next day, and we cut out time for the next day’s hike as well. For would be trekkers, this is certainly the way to go.

Trient

(photo by Anne Archambault)

Our decision was rewarded that night with a room, a comfortable bed, and generous helpings of food. As it turned out, the decision to stay at the Hotel de la Forclaz was also fortuitous in that it allowed us to meet the people who would the next day become our steadfast hiking companions for the rest of the trip: Rich, Val, Kathy, and Martijn. There we also met Neil and Fiona who had teamed up with Rich, Val, Kathy, and Martijn and who we would hike with the next two days until they jumped ahead a day at Le Châble.

Hotel de la Forclaz

Note: There aren’t good lunch options available at Col De La Forclaz. There is a small market across the street that sells some cheese (as of Sept 2013) and cured meats. We “borrowed” some food (banana, bread, nutella) from the hotel breakfast to round out our lunch. Hence, it may be worthwhile to pick up two days’ worth of lunch supplies in Argentière.

Total distance: 10.97 mi
Max elevation: 7270 ft
Min elevation: 4068 ft

Haute Route Day 0 – Arrival in Chamonix/Argentiere

Anne and I flew into Geneva and took the ChamExpress shuttle to Argentière where we had reserved a room at the Gite Le Belvedere. Since Anne had previously done the Tour Du Mont Blanc, she’d already walked the leg between Chamonix and Argentière so we decided that we’d skip that leg in favor of taking the day to further adjust to the time change, and generally just enjoy the sights.

Chamonix Parasailing

Chamonix is a beautiful area with the very impressive Mont Blanc massif rising steeply over town and dominating the skyline. Our trip overlapped with the tour Du Mont Blanc ultra-marathon, so town was bursting with people and activity.

Chamonix

We mulled around town and took in the sights. At lunch we bumped into another couple from Washington State who were doing a short section of the TMB.  It’s always a little humbling to be halfway around the world from home and bump into people from your home state or town.

To help us stay awake, we also grabbed an afternoon coffee and snack while watching some of the marathoners run the final few hundred meters of their 120km journey. For me, it was a little surreal to sit drinking coffee and eating macaroons while watching people who has just circumnavigated Mont Blanc in a day run by.

TMB Ultra Marathon

Anne and I did attempt to take a gondola trip up the Aiguille du midi but the gondola had stopped running for the day. I was a little bummed, knowing that I probably won’t get an opportunity to do that trip for a long time to come. But it may have worked out for the best because prices are steep and the late afternoon clouds were starting to roll in.

Aguille du Midi

We settled for just heading back to the hotel and resting, still trying to recover from our jetlag and preparing for the start of our trek the next morning. The Gite does provide passes to local transportation, including bus passes as well as rail so it was easy for us to move back and forth between Chamonix and Argentière. Our room was relatively humble, a double bed that didn’t come with bedding or towels for the shared bathroom and a sink that allowed us to fill water bottles and wash hands and faces.

Gite Belevedere

What the Gite didn’t provide in comfort it made up for in hospitality as the hosts were friendly and accommodating, helping us work out the bus schedule as well as ensuring that we had plenty of food at both dinner and breakfast the next morning.


The Haute Route – Walking from Chamonix to Zermatt

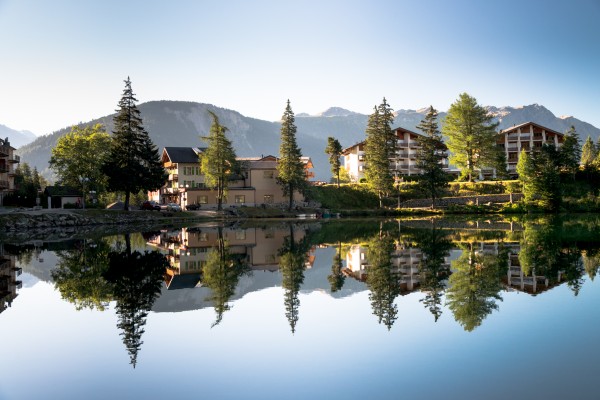
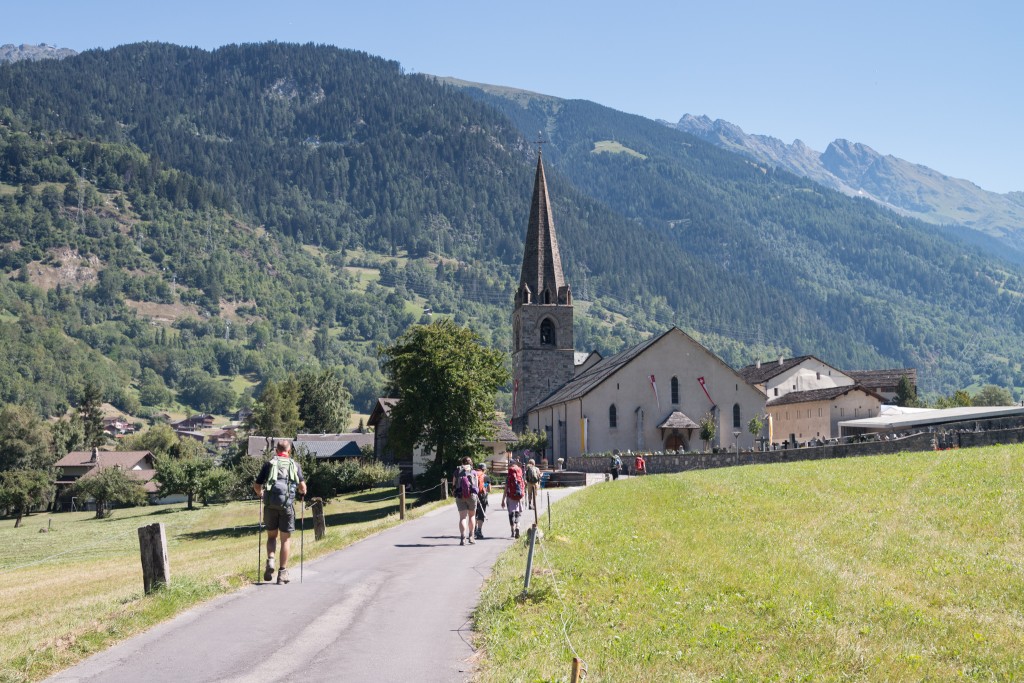
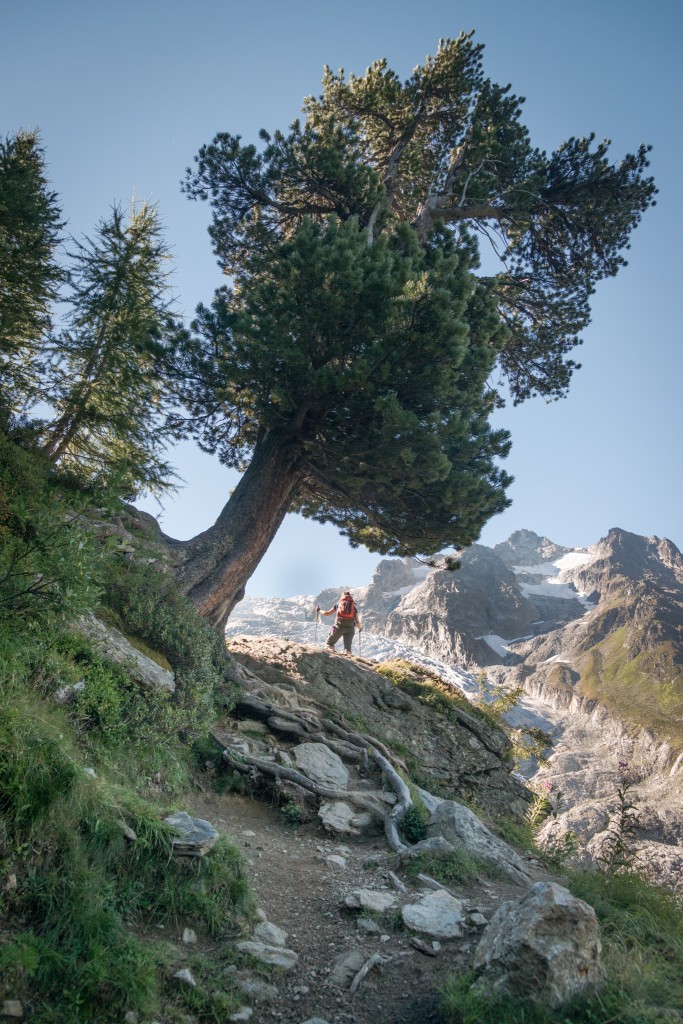
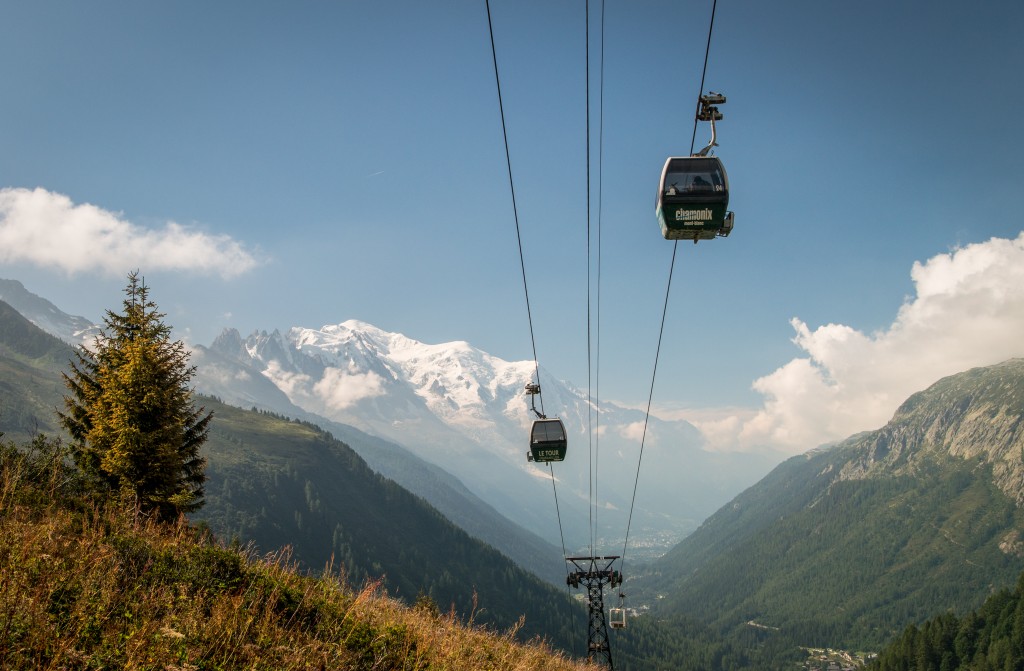
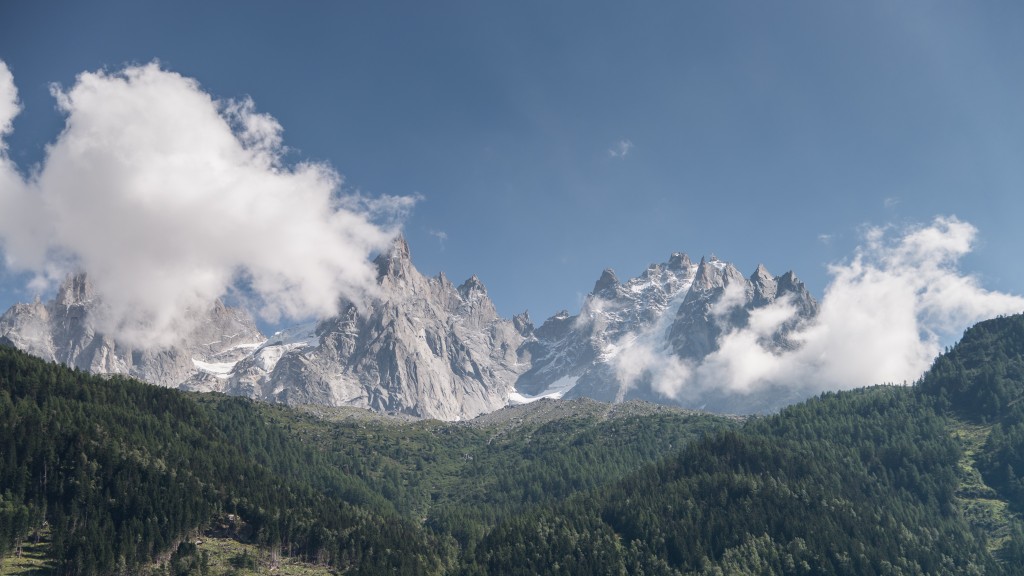
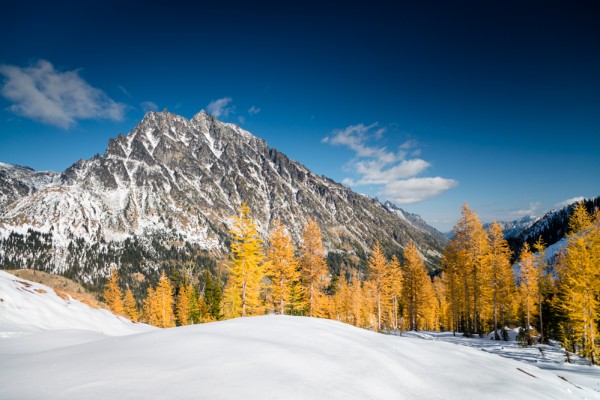
Anne and I recently completed the Walker’s Haute Route in the Swiss Alps. It was a fantastic hike and was filled with spectacular views, wonderful villages, awesome food, and some new friendships along the way. Unlike hiking in the Washington’s North Cascades, hiking in the Swiss Alps offers the ability to overnight from village to village. This allows you to travel light while still enjoying comfortable overnight accommodation and great food.

The Route – An Overview

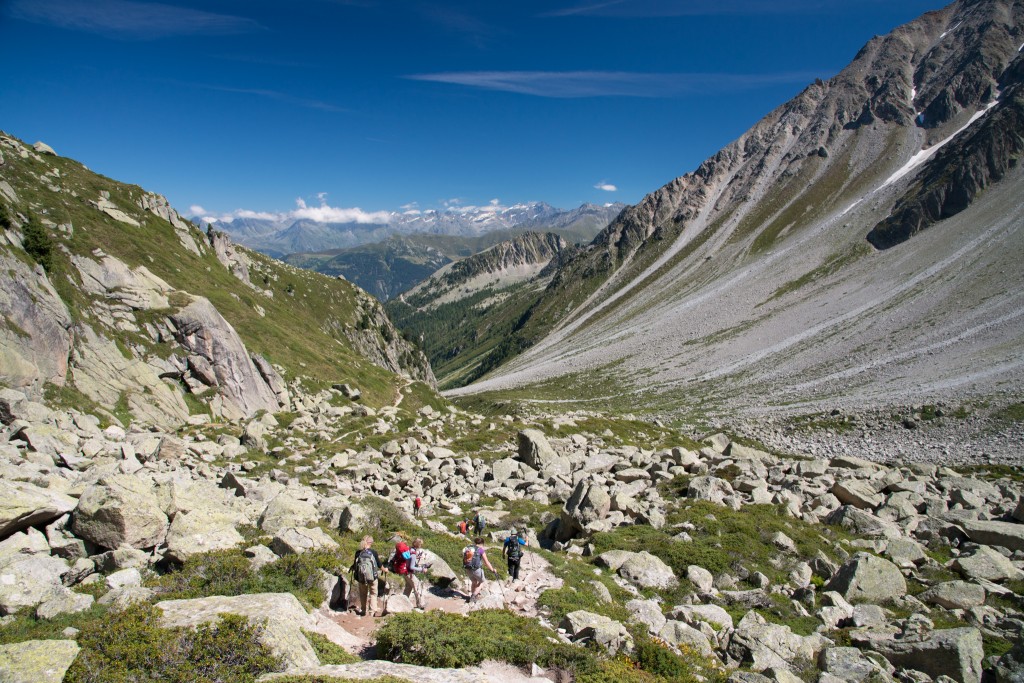
While the route is certainly challenging, it’s not overly hard and certainly those who are in good physical shape and have moderate hiking experience should have little difficulty if they take their time. There are also plenty of opportunities to take lifts or busses that allow you to significantly reduce the daily burden. We chose to walk the entire route starting in Argentière and avoided motorized transportation so that we’d feel the accomplishment of having completed the route using only human power.

There are at least a couple books that describe the route in detail. The book we relied on, as most others we hiked with, was the Chamonix to Zermatt Walker Haute Route (Cicerone Press) book by Kev Reynolds. The book details each stage and provides alternates for some of the stages. Note that 12 days is probably a minimum unless you want to rush. A couple more days would have allowed a rest day along the way and an overnight detour to the Hotel Weisshorn after Zinal.

Hikers should also be aware that while the route descriptions in the book are accurate, the distance and gain/loss measurements are not. Gain/loss measurements are taken at various waypoints and gain/loss is measured as a difference between those points rather than as an accurate reflection of terrain. Indeed, there are many accounts of this in various blog posts.

Our own GPS data shows that we traveled about 127 miles and gained around 42,000 feet of elevation. We lost almost as much, descending some 40,000 feet. All told, on average we did about 2.1 more miles each day than the book suggested and gained about 645 feet more elevation each day than suggested, with some days gain being off by as much as 1200 vertical feet!

For the data junkies, this all lays out as follows:

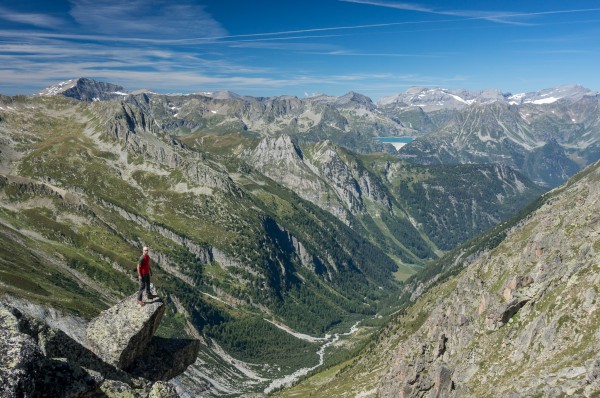
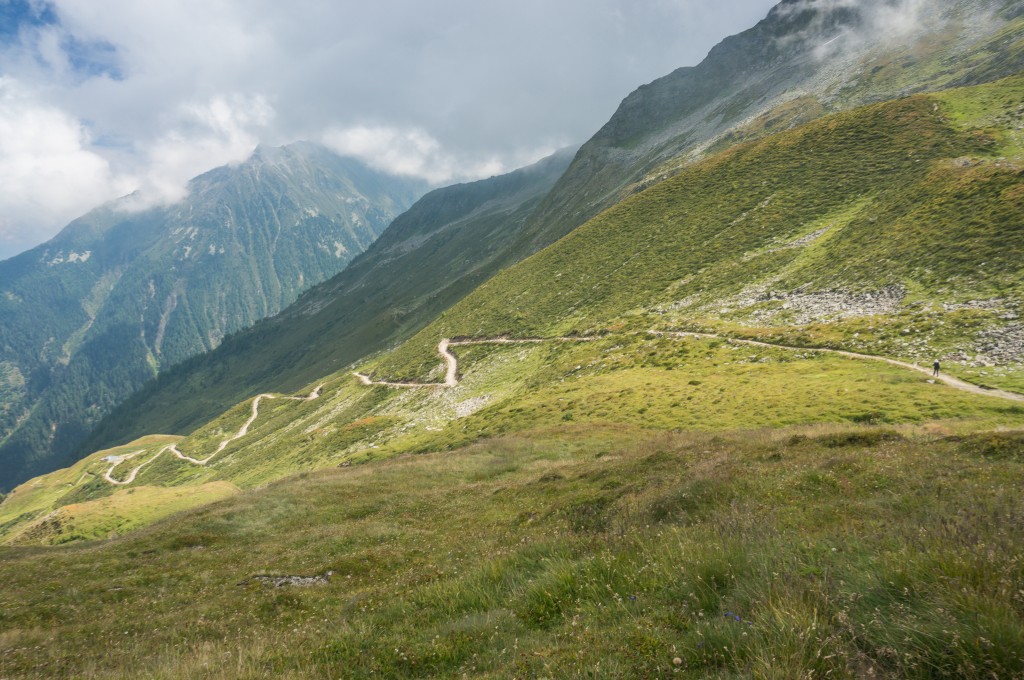
Also of interest is the route track and elevation profile, starting in Argentière and ending with the steady walk up the valley to Zermatt. With this view it’s easy to see the general nature of the hike, starting in villages each morning, climbing up to a pass, and then going back down to a village. The large elevation gain starting at mile 30 is the hike from Le Châble to Mont Fort:

Total distance: 122.76 mi
Max elevation: 9826 ft
Min elevation: 2349 ft

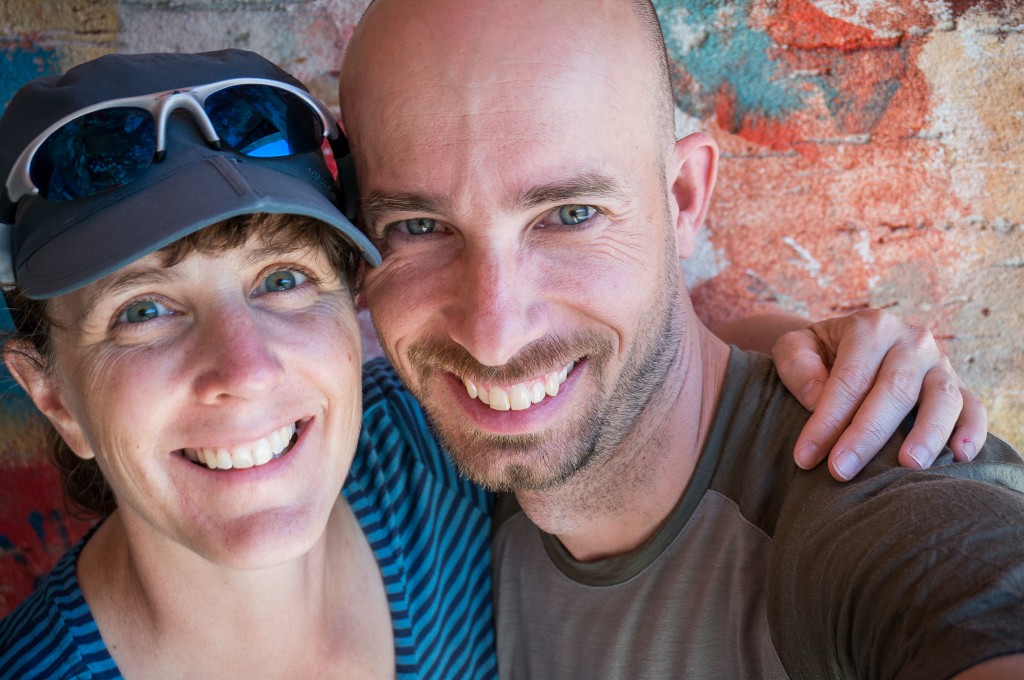
Good Friends and Travel Companions

Anne and I had planned the trip as an independent hike for the two of us. This is easy to do and the book provides all the information would be trekkers need to hike alone. But one of the unexpected joys of long distance hiking is the friendships that happen along the way. This happened for us, but to a much lesser extent, several years ago when we trekked to Everest Base camp. For the Haute Route, the friendships we developed along the way were even stronger because the route is relatively fixed and the pace is fairly constant. This gives people lots of time to form bonds along the trail. It also takes a certain type of person to hike a long distance trail, which provides an additional bond.

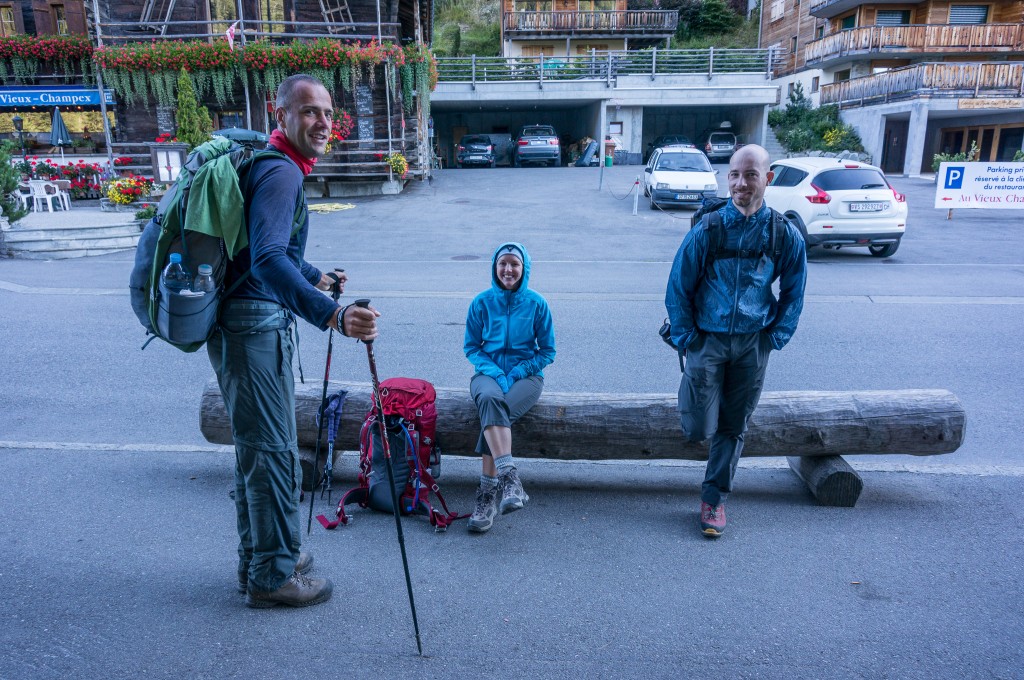
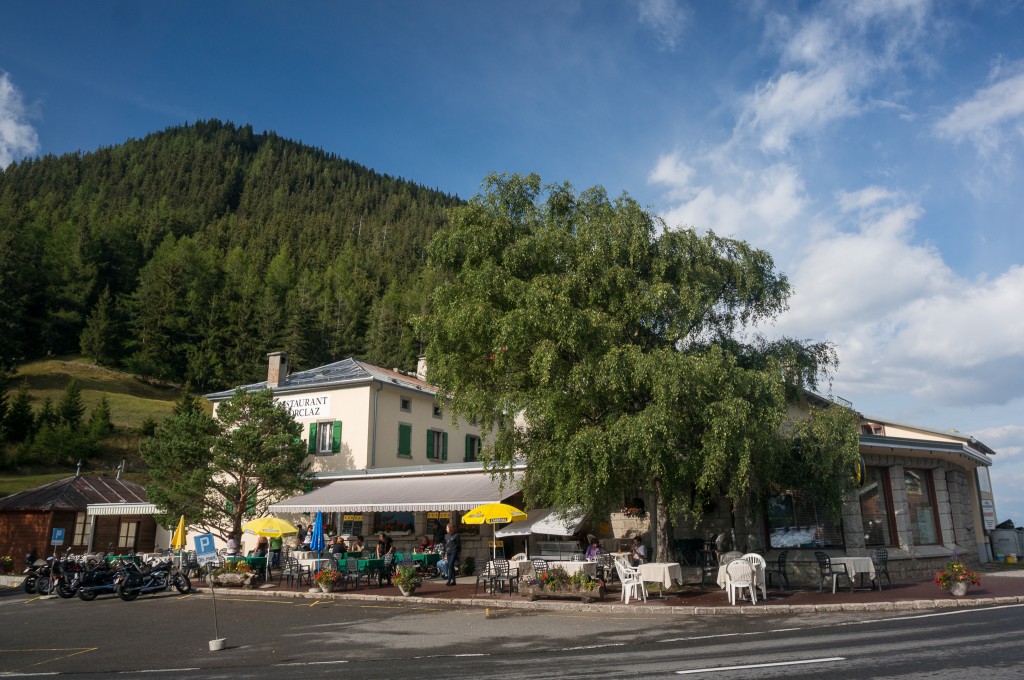
So while our trip started out as a trip for the two of us, it very quickly became a group affair. We met our travel companions our first night at Hotel de la Forclaz and overheard them as they talked about their hike. When we figured out that they were doing the same trek we were, we introduced ourselves. From there, we crossed paths several times on the trail and by the next night we were eating dinner together as a large group. I think this transformed the hike for me into an experience that was much richer than what it would have been if we’d done it alone.

Dinner Cabane de Moiry

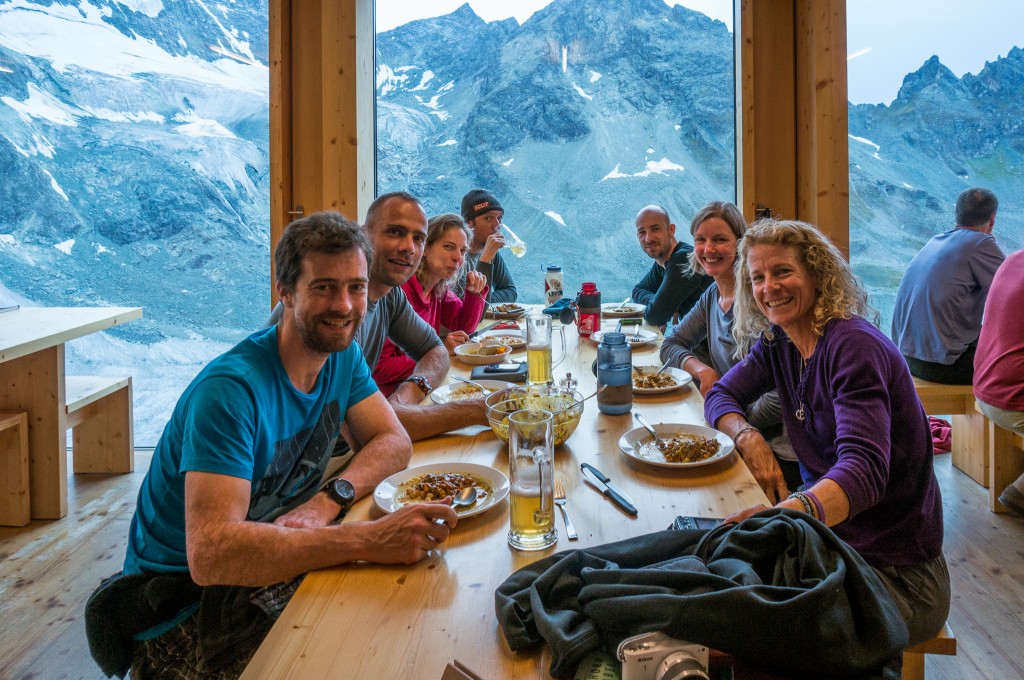
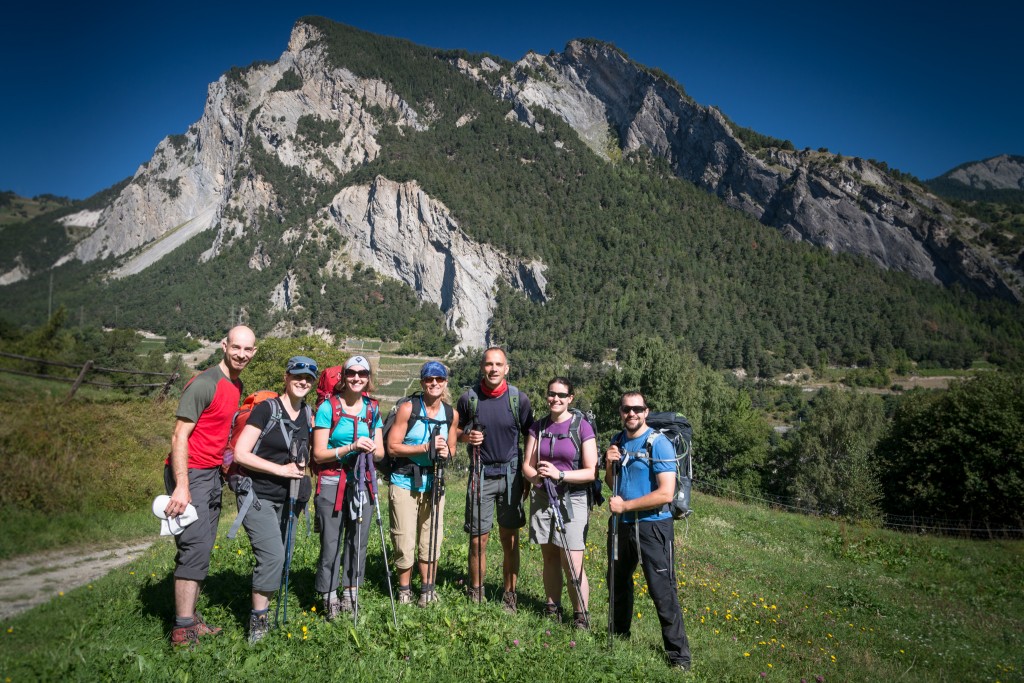
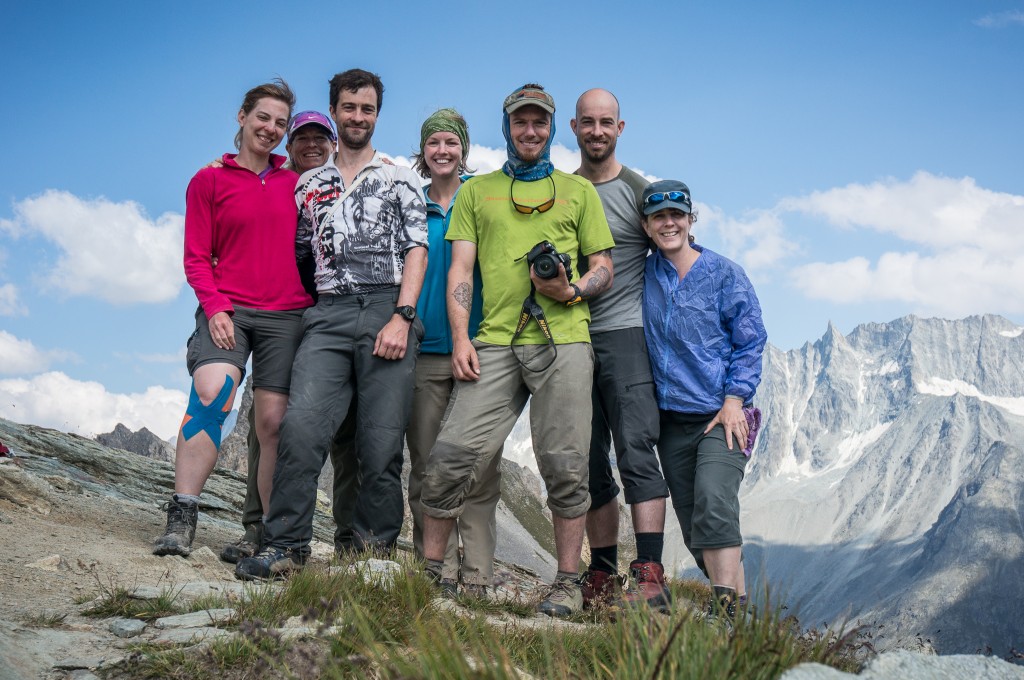
Our group was actually several groups that overlapped at various portions of the trip. Kathy, Val, Rich, Martijn, Anne, and myself formed what I’d consider to be the start to finish core of the group. Neil and Fiona were also with us during the first 3 days of the trek but soon skipped a day ahead. We met  Brian, Denise, Aliza, Paul, and Clare on the fourth day and Gareth on the fifth day. Paul and Clare fell behind a day after Arolla (they were carrying full loads with tents, sleeping bags, and cooking supplies). Aliza took a rest day and fell behind a day after Zinal. Anne and I parted with the rest of the group at St. Niklaus choosing to walk up the valley instead of continuing on the Europa Weg.

Haute Route - The Group

Our friends made the hike a much more rewarding experience. We shared the trials and tribulations of the day with them, we helped each other out and encouraged each other when we were feeling tired or sore. We ate, drank, and even partied together at a disco in Zermatt. When we parted for the last time, we were sad to leave people who felt like they’d become an integral part of our lives.

Equipment and Packing

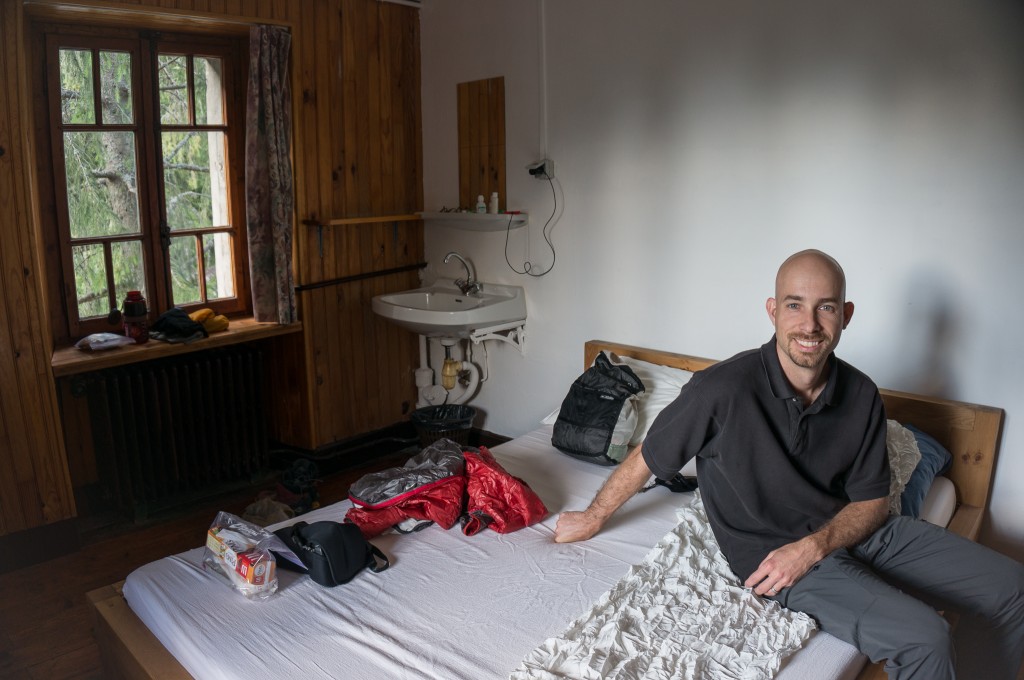
Anne and I each carried a backpack and no more. Some of our friends were able to send bags or equipment forward from Chamonix to Zermatt. If you do plan to do this, we heard that the train offers an excellent and cheap option in comparison to the post and is certainly something to be investigated.

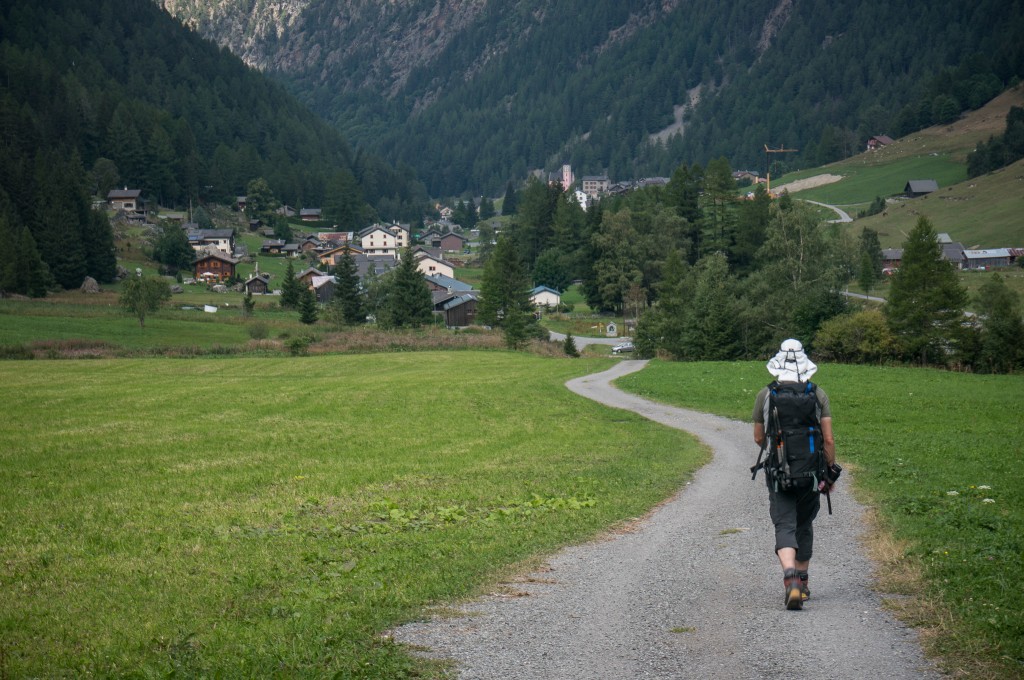
We both strived to carry as little as possible, though I opted to carry a DSLR, an extra lens, and tripod which added about 8-10 pounds. All told, my pack weight without water or extra food was 26.2 pounds.

To be on the safe side, we packed our poles, pocket knife, and first aid kit in a cardboard box and checked it with the airline to ensure we didn’t have any problems with security either here in the States or during our layover in Amsterdam. We carried the rest onboard as a carry on. I carried one of the ultralight REI Flash backpacks that we used as a backpack in Amsterdam and Zurich and converted it into a stuff sack during the rest of the trip.

Here’s a list of my packed equipment and a video running through it all:

Item Category Quantity
Sun hat clothes 1
Handkerchief clothes 1
hiking pants clothes 1
merino hiking shirts (short sleeve) clothes 2
merino hiking socks clothes 2
Injinji toe sock liner clothes 1
merino thermal bottoms clothes 1
merino hiking shirt (long sleeve) clothes 1
Merrill minimalist shoes clothes 1
camera + 24-120 lens camera 1
camera battery camera 1
camera charger + cord camera 1
tripod + ballhead camera 1
wide angle lens camera 1
polarizer camera 1
remote trigger release camera 1
ND Filters + holder camera 1
cell phone elec 1
cell phone charger elec 1
CF memory cards elec 8
headphones elec 1
outlet adapters elec 1
clif shots food 2
backpack gear 2
blister pads gear 6
Nalgene 1 liter bottle gear 1
first aid kit gear 1
warm hat gear 1
gloves gear 1
Down jacket gear 1
Wind jacket gear 1
headlamp gear 1
hiking boots gear 1
Hiking poles gear 1
hiking underwear gear 2
moleskin gear 1 sheet
Small pocket knife with can/bottle opener gear 1
Steripen + spare batteries gear 1
pack rain cover gear 1
pack towel gear 1
tent ground sheet gear 1
rain coat gear 1
rain pants gear 1
guide book gear 1
sleeping bag liner gear 1
sunscreen gear 1
One gallon Ziplock bags gear 4
passport misc 1
sunglasses misc 1
wallet misc 1
Advil, Tylenol toiletries 1
bar soap toiletries 1
chap stick toiletries 1
deodorant toiletries 1 stick
ear plugs toiletries 2 pair
Detergent Bar toiletries 1
toothbrush + toothpaste toiletries 1

Lodging and Costs

Because we also wanted to keep a relatively accurate accounting of our expenses, we also kept records of each place we stayed, the cost, and what was included. These prices are for 2 people.

It’s important to note that we only booked accommodations for our first night in Argentière and our second night in Trient in advance. All other lodging was booked along the way. When booking along the way, we generally tried to call ahead to book the next night and ensure we could find a room. This allowed us to keep our schedule flexible. It also allowed us the ability to coordinate with friends we made along the way so that we could stay at the same place.

Up Next

I’ll be posting for each day of the trip, including photos, route description, and GPS data. Stay tuned!

Ingalls Pass and Yellow Larches

It’s fall in the Pacific Northwest and we’d been hearing and reading trip reports that indicated the larches were in full color. It’s the first time Anne and I have been hiking since we’ve gotten back from the Haute Route and it felt good to pack up our gear and get a day hike to such a spectacular location.

Larches-4

Of course, the word was out and we met up with several hundred of our closest friends at the trailhead who were also making similar pilgrimages to the enchanted land of larches at Ingalls Pass. Fortunately, the trail was well graded and the day was pleasantly warm, which made the hike a good one and we made good time to the pass where we again joined the melee of people and caught our first sight of the color below us.

I had some goals in mind for the hike. I wanted to try and capture some images that were not just “taking in the sights” but tried to capture the spectacular color in new and interesting ways. I’ve been interested for a while in trying to make more “painterly” images and so I experiemented with capturing multiple images and combining them into single exposures in camera.

Wild Horse Wind & Solar Farm

(photo by Anne Archambault)

If you’ve driven through Washington on I90, you have probably seen the large wind farm that sits between the Columbia River and Ellensburg. Anne and I have often driven past and wanted to take pictures of the wind turbines but we’ve never stopped until this weekend.

Puget Sound Energy operates the facility, and as luck would have it they encourage people to visit! The Renewable Energy Center sits atop a ridge that has incredible views along with a windy disposition. The center itself has numerous educational displays to inform visitors about how the facility works and shows live data from the power output of the turbines and solar array.

A quick check-in allows you to get temporary use permits to travel around the facility and to walk just about wherever you please. There are of course some rules, the primary one being that you can’t get closer than about 100 yards to the turbines. However, the main access road crosses several lines of turbines, affording fantastic photographic opportunities right from your car.

While most locations favor a particular type of light (morning, evening), the direction of the turbines means that they could be facing in any direction at any time. Hence, locations that might make excellent morning compositions one day could change entirely when the turbines are angled differently. That said, we also found that the wide variety of terrain allowed for considerable freedom and we never felt like there weren’t opportunities.

Moon Rise over the Columbia

(photo by Anne Archambault)

As a happy coincidence, our trip corresponded with the “Super Moon,” allowing us to watch it rise above the Columbia and the turbines of the wind farm. Combined with the “Super Moon” we were also witness to an absolutely breathtaking sunset.

Since the facility allows visitors to stay up to two hours past dusk, we used the time to work on our night photography. The “Super Moon” provided us with enough light to experiment with different ways to photograph the turbines. In addition to headlamps and flashlights, we’d also brought along our camera flashes. We were able to use these to strobe the turbine blades and add detail. Anne was able to use this technique combined with some long exposure to capture a great image that she’s posted in her blog post Windy Night:

windfarm-aa3

Fine Art Long Exposure Photography Workshop

(photo by Anne Archambault)

Anne and I recently had a chance to take a fine art long exposure photography workshop with Vancouver Photo Workshops. We’ve both been interested in long exposure photography for a while, and we’d already gotten some of the equipment (like 10-stop ND filters) to help us slow down the real world and blur our things like wave and waterfalls in broad daylight. As hoped, this workshop added to our bag of tricks.

The instructor was Marc Koegel. He has a great blog and since he’s been shooting long exposure photography for a while, he’s also full of great advice. He’s also been generous in sharing resources for the aspiring long exposure photographer.

Shooting Long Exposure

Marc had a lot of great guidance for us and took a ton of time to answer all sorts of questions. We spend half of both Saturday and Sunday talking about various aspects of long exposure photography. For me, the biggest take away was that long exposure photography is a means to the end of creating artistic images that inspire. Several people in the class mentioned that taking the workshop (including myself) was a way to help them produce more artistic photographs. Indeed, long exposure is a way of capturing a mood in movement that is imperceptible in our visual reality but that reaches us at a deep level. In this sense, it’s quite different than standard photography which aims to realistically and accurately the scene in front of us.

Serendipity

One of the really cool things about long exposure is the serendipity of it. Things happen when you’ve got the shutter open from thirty seconds to 30 minutes that you simply can’t account for. Marc showed us his image of the Brandenburg Gate where a limo pulled up while the shutter was open. The car helps make the image but could have never been staged. Clouds or water may not turn out how you think they will and that’s part of the magic.

GENERAL Tips

Of course there were lots of interesting tips that we took away. Marc has an excellent blog at http://bulbexposures.com that provides detailed tutorials. We referred several times to the Long Exposure Tutorial which provided some excellent advice on gear, selecting the proper amount of ND stopping power, and some guidelines for shooting.

1. Bracketing

In terms of shooting, perhaps the best tip was to really bracket the shot. Marc suggested not only doing a plus/minus HDR style bracket, but also a time based bracket of 1,2,4, and 8 minute exposures to ensure you’ve captured what you need. The HDR style bracket will allow you to fill in detail if you need it in post.

2. Clouds and cloud Coverage

Generally, you’re looking for days where the sky is between 60-80% cloudy. These days will provide you with a good amount of cloud variation to allow for a sense of motion. Too much cloud cover and everything is just bland. Too little and you can’t make an interesting sky.

Long Exposure

3. F-Stops and Diffraction

Another good reminder was about using your aperture wisely. Too many times you’ll be tempted to use a high f-stop to further slow down the shutter speed. I’ve done this countless times to slow my exposure time. However, it’s important to remember that high f-stops (higher than about f/14 really) will cause diffraction in the lens and will cause image quality and sharpness to suffer. If you can, shoot at between f/7.1 and f/11 to ensure appropriate sharpness.

4. Long Exposure Noise

When shooting long exposure, especially when doing it back to back, remember that heat can build up on your sensor and lead to sensor noise. For example, if you’ve taken six 5-minute shots back to back then you’ve had the shutter open for about 30 minutes non-stop. That’s going to build up heat on the sensor and cause an increase in noise, especially on hot days. So take that into account and try and give your sensor a chance to cool off and reduce noise.

I’ve read a bunch of articles on long exposure noise reduction. Marc recommends touse  long exposure noise reduction for any shot longer than 8 minutes that on a crop sensor camera. He also recommends to avoid it all together on full frame cameras to avoid the associated lengthy delays. I’ve read articles pontificating both approaches. At this point, I think I’m in the camp that says most cameras that are under a year old probably have noise levels that make noise reduction more of a hassle than a benefit. You mileage may vary.

5. Test Shots and Exposure Time

When shooting long exposure images, use a test shot to help you determine your exposure time. From the test shot, you can compute the long exposure time for your ND filter with a simple table (see Marc’s bulbexposure.com tutorial) or smartphone application (available for all smartphone platforms). For example, if a “normal” exposure at f/11 is 1/60th of a second, the equivalent exposure with a 16 stop ND filter would be 18 minutes and 12 seconds.

Long Exposure

6. Light Leaks

It turns out that as good as cameras are today, most still have small areas where light can leak in and ruin your long exposure images. Marc uses black tape to tape over his viewfinder and other strategic areas of his camera. This is also problematic for users of “plate” style 100mm x 100mm filters like Lee, Cokin, or Hitech since light can bounce between the filters and lens. In general, I think screw on filters probably do a better job of controlling potential light leaks, but are harder to take on and off for focusing and metering.

I’ve taken to simply covering my camera with my hat, both to prevent sun from entering my Cokin filter holder system as well as to cover the entire camera/lens system. This prevents heat buildup and helps prevent any additional light from ruining my shots.

Summary

I had a blast on this workshop. We visited some cool places and learned some great new techniques to really help our photography. While the tips were specific to long exposure photography, I think some are also applicable to everyday shooting. If you have the chance, I’d certainly recommend taking a look at what Marc is doing and his workshops at Vancouver Photo Workshops.

A Journey to the Center of the Earth

Anne and I concluded our trip to Iceland with a day trip to the Snaefellsnes Peninsula. Famously, the Snaefells Volcano is where Jules Verne set his classic “A Journey to the Center of the Earth”. Our adventures were somewhat less epic but I think no less fun (and probably easier on the blood pressure).

The peninsula is an easy (albeit long) day trip from Reykjavik and can be done via numerous tour agencies or through a private car rental. Anne and I opted for the car rental option and we made the trip with some friends from the photo tour. Despite the winter weather, we had no problems with the roads or the mountain passes (partially because rental cars in Iceland are equipped with studded tires during the winter).

We set out with several specific targets in mind:

  1. Kirkjufell
  2.  Búðirkirkja
  3. Arnastapi
  4. Lóndrangar Lighthouse

Since we wanted to save Kirkjufell for sunset (and hopefully auroras), we started at Búðirkirkja and worked our way around towards the tip of the peninsula before backtracking and heading over route 54 to Grundarfjörður.

Búðirkirkja

Búðirkirkja is a small church that is notable because of its stark black color. It’s a simple structure that juxtaposes well against snow draped Snaefellsjokul.

Búðirkirkja

On arrival, we were greeted by a small bus of Japanese tourists. Normally, running into any bus of tourists would not be a cherished event but in this case one of the tour participants had hand crafted a string of kites and was flying them over the church. They invited us to take turns flying the kites.

Kites

Pictures were taken all around of people flying the string of small kites, each kite with the colors and insignia of the Icelandic flag. It was a unique moment and an absolutely unique event.

Arnastapi

Arnastapi is a small fishing village that has a wonderfully secluded little harbor and a nice walking path around a series of coves. The coves serve as a rookery for nests that line the cliffs with an abundant array of bird life. We sat for a long time watching the mesmerizing aerial dance as fulmars flew about the coves against a backdrop of wonderfully clear blue north Atlantic water.

Arnastapi


Lóndrangar

Lóndrangar is home to a pair of ancient volcanic basalt plugs that sit just on the coast. There are a couple access points but the “best” drives down to a lighthouse that overlooks an old fishing port. In addition to the sea stacks, the site has several small buildings that are photographically interesting along with beaches and various ocean debris that make for interesting foreground elements.

Lóndrangar

Churches

While not explicitly on our sight list, we also took the opportunity to photograph several additional churches along our route. The simple lines and iconic landscape make these churches hard to pass by without stopping.

church

(photo by Anne Archambault)

Kirkjufell

We concluded our tour of the peninsula with a stop at the iconic Kirkjufell Mountain and waterfalls. This vista has rapidly grown in popularity and is now common on photo sites like Flickr. Regardless, we hoped that we’d be able to harness sunset or an aurora and come away with some interesting images.

Kirkjufell_Aurora

(photo by Anne Archambault)

While we weren’t rewarded with a magical sunset, we did manage to catch the aurora as overcast skies parted about an hour after sunset.

Summary

The Snaefellsnes Peninsula was a perfect ending to a great vacation in Iceland. It also allowed us to utilize a lot of what we’d learned during our week along the south coast and apply it to our photography. We were able to spend time with new found friends and see the aurora for one last time over an iconic Icelandic mountain. My only regret for the trip? We didn’t spend more time.

A Land of Water

It’s hard to go anywhere in Iceland without feeling the power of water. Water shapes the landscape through rivers and waterfalls. It scours mountains through massive glaciers. Water is an epic force and it’s truly everywhere to behold in Iceland.

Waterfalls

It’s literally impossible to drive and not see waterfalls rushing over cliffs near the road. On our trip to Iceland we visited some of the most well know waterfalls along the south coast: Selfoss, Gulfoss, Oxararfoss, Seljalandsfoss, and Svartifoss.

nate-falls

(photo by Anne Archambault)

Of those mentioned, Gulfoss and Selfoss are perhaps the most well-known but may be the most difficult to photograph well. Both tend to lose the sense of scale without an appropriately positioned person for scale. Of course if you do head there, be sure to take colorful rain gear which will not only provide needed protection from the spray but color for other photographers!

Land of Water (1 of 10)

Of the waterfalls we visited, I think I most appreciated the time we spent photographing Oxararfoss in Þingvellir National Park. Combined with ice it provided myriad compositions for hours of enjoyment.

Similarly, the short hike to Svartifoss paid off with striking basalt columns and a generally wonderful scene. I found capturing the essence of the place to be difficult, but it was a magical place to be and I’m truly sorry I missed it on my first visit to Iceland

Land of Water (8 of 10)

Icebergs

Of course no trip to Iceland is complete without a trip to the iceberg lagoons around Jökulsárlón. The lagoon is stunning and provides a double whammy, icebergs in the lake on the lagoon side and icebergs on the beach on the ocean side.

Land of Water (2 of 10)

While we certainly spent time photographing the icebergs in the lagoon, it would be a mistake to ignore the beach. I found the beach to have wonderful compositions at both morning and evening and was a highlight of the trip.


Land of Water (4 of 10)

The Ocean

The ocean provides a ton of opportunities to play with wonderful shorelines and offshore sea stacks. Around Vik there are several sea stacks that provide dramatic scenes against black beaches. I found the promontory at Dyrhólaey to be my favorite location in the area. It afforded some outstanding views of sea stacks, the coast line, and the lighthouse.

Land of Water (9 of 10)

Of course, these are only a handful of the wonderful “water based” locations along the south coast. These are indeed highlights, which was evidenced by the sheer number of tourists and photographers that we saw at these locations. If you’re going to visit, I’d recommend planning time to check them out in either early morning or late evening light. It will help you avoid the day tours from Reykjavik and also allow you to capture the incredible beauty these places have to offer.